My favorite part about a card is usually the background! There are so many fun techniques and I often like to make the background the focus of my card. That's what I did today! Check out that fun, glittery, basketweave stenciled background!
I started by cutting a piece of white cardstock to 4" square and lined up the first stencil from the Basketweave 6x6 Layering Stencils and taped it in place. I used La La Lavender and a Blender Brush to apply ink and then lined up the second stencil. I used some lavender glitter gel through the stencil and set the panel aside to dry.
While the panel was drying, I stamped and colored my image from the Cosmos 4x6 Stamps. I wanted the background to be the stand-out portion, so I kept the coloring light and simple. I followed the shading lines on the stamp with light lavender, light gray, and light green markers and cut it out with the Cosmos Coordinating Dies.
I created a 4.25" square card base and added by background with foam tape, as well as the floral image and the sentiment. That's it! I hope this inspires you to let your backgrounds shine! See you soon!
I LOVE stencils! They are an inexpensive tool that never gets 'used up' and there are so many ways to make them look fancy! I am showing two ways to use the Gardenia Layering Stencils from LDRS Creative and step them up to take them to the next level!
Layering stencils are SUPER fun to play with! I love the dimension they bring to my projects. As gorgeous as the Gardenia Layering Stencils when used with inks to create a one layer card, I wanted to show you a couple of ways that you can use these stencils and bring a bit of extra WOW to your projects!
My first way to step up layering stencils is to use glitter pastes! I started by stenciling the first layer of the flowers from the Gardenia Layering Stencils with Marina Madness Hybrid Ink (stencil 1A). Instead of adding the second layer on top of the flowers with a second color of ink I went right to the first layer of the leaves and blended Prickly Pear Perfection through the stencil to create the base layer of the leaves (stencil 2A). I used an aqua glitter gel for the second layer of the flowers (stencil 1B) and a green glitter gel for the second layer of the leaves (stencil 2B). I added the aqua glitter gel, set the panel aside for about 10 minutes and then added the green glitter gel. It's still a one layer panel, but just LOOK at the glitter!!
I didn't want to distract from my background, so I trimmed the stenciled panel down to 4" x 5.25" and popped it up onto a black A2 card base. I cut a sentiment from the Everyday Word Dies and backed it in white and popped it up in the center of my panel. That's it for card one! Imagine how pretty this card would be if you added a transfer gel and foiled the various parts of the Gardenia Layering Stencils!
The second way to step up layered stencils is a bit less obvious, but still really pretty! I worked on two panels so that I could cut out the flowers and pop them up for some dimension. The gardenias are SO easy to fussy cut and it hardly took any extra time, but the results are gorgeous!
I blended the flowers from the Gardenia Layering Stencils on one panel with Banana Cream Pie and Peachy Keen Hybrid Inks and then cut them out with my scissors leaving a white border. I blended the leaves for the flowers on a second panel using Olive Branch and Evergreen Hybrid Inks. I cut down the base panel (with the leaves) to 4" x 5.25" and added some black ink spatters. Then I added the flowers to the card front with foam tape.
I cut out a sentiment using the All Occasions Word Dies and added it to the card with foam tape. I wanted to bring a bit of sparkle to my card, so I used my clear shimmer pen and added glitter to the flowers and to the sentiment.
I hope these two techniques inspire you to grab your Gardenia Layering Stencils and add a bit of WOW to your projects! I'll see you soon!
I'm gearing up for the Holidays and my mass production ideas are in full swing! I love to make simple cards and add a touch of something special, so I used the LDRS Creative Gingham Check Stencils to make a glittery set of Holiday cards!
I sprayed the back of the second layer of the Gingham Check Stencils with a temporary adhesive and added it on top of one of my ink blended panels. I used a spatula and spread gold glitter gel over the top, removed the stencil, and added the glitter gel onto the two remaining panels.
I trimmed down the ink blended panels to 4" x 5.25" and added them to A2 top-folding card bases and popped up the sentiments near the top center of each card.
That's it! This card design can be easily replicated and is great for mass production for the Holidays! Thanks so much for stopping by!
It's tiiiimmmeeeee!!! The new collection from LDRS Creative is available now! I have an easy to mass produce Christmas card on my YouTube Channel using a couple of the new items!
I cut a piece of blue cardstock to 4"x5.25" and temporarily adhered the Damask Stencil over the top and added some chunky iridescent glitter gel. I set the piece aside to dry.
I cut the Christmas Wishes Word Dies from the same color blue cardstock and the shadow from white cardstock. I glued the pieces together and added some clear glitter to the blue sentiment. I used foam to pop up the sentiment onto the background and added it to a white card base.
That's it! You could easily switch up the sentiment or the color to fit your style and mass produce this design this Holiday season! I'll see you tomorrow with another card using products from the LDRS Creative Halloween & Christmas 2022 Collection!
I added everything onto my card with foam tape and that's it! The new Halloween & Christmas 2022 Collection will be available TOMORROW, September 9th at 8am ET! All links will be live with the new product release. Come back tomorrow - I have another video to share with you!
I just love layering stencils! There are so many ways to step them up. I used the Pink & Main Birthday Candles Stencils and did some ink blending and added some Glitz Glitter Gel for a touch of something special!
I don't know about you, but rainbow is my favorite color! It's very easy to mask off the Birthday Candles Layering Stencils and add multiple colors. I positioned the first stencil over an A2 card and used a bit of masking tape so that I would only ink one row of candles at a time. I used an Ergonomic Blending Brush and blended on ink, moved my masking tape and blended the next color, and repeated until all of my candles were colored. I used a slightly darker shade of ink over the 2nd layer for the details on the candles.
I used a yellow ink for the large candle flames and a bit of neon orange Glitz Glitter Gel for the centers. It adds just a touch of something special and rounds out the rainbow! I stamped a sentiment from the Party Animals Stamp Set and trimmed it out with my scissors leaving a small white border. It wasn't standing out from my card, so I adhered it to a black piece of cardstock and created a shadow.
I popped up the layered sentiment in the center of my card with foam tape and that's it! Thanks for joining me!
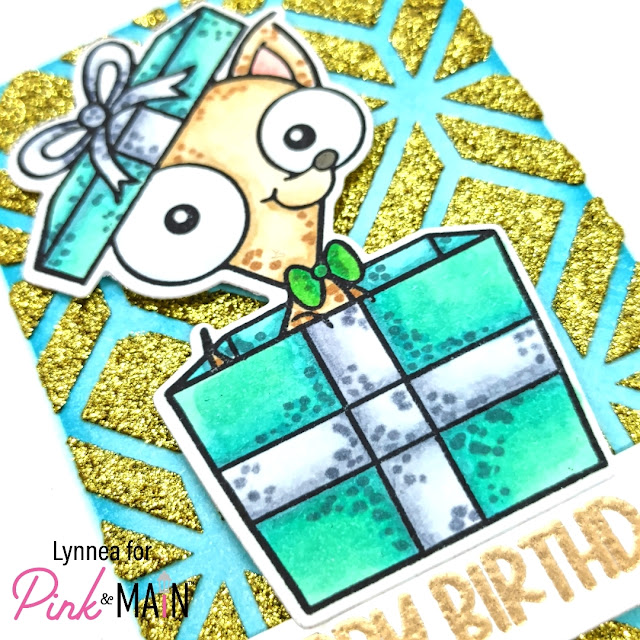
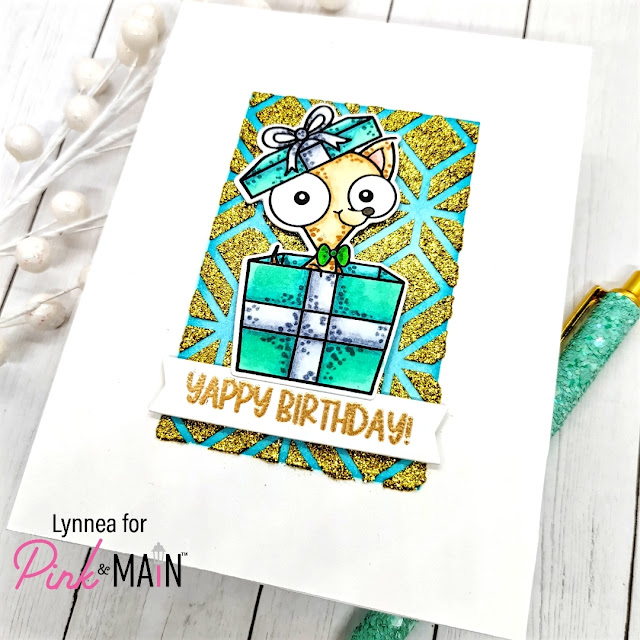
Yappy, yappy birthday to you! The Pink & Main March Stamp and Die of the Month is the CUTEST! I did some easy Copic coloring, masking, inking, and stenciling with Glitz Glitter Gel for this fun birthday card!
I centered the Mask It Rectangle Stencil onto my card and used an Ergonomic Blender Brush to ink the background with an aqua colored ink. I removed the stencil and added the Garden Gate Stencil over my background and then replaced the Mask It Rectangle Stencil on top. I used Gold Glitz Glitter Gel to add a bit of sparkle. Because of the double masking technique I have ink and glitter just in the center of my card creating the perfect backdrop for my images.
I stamped a sentiment from the Yappy Birthday Stamp Set and gold heat embossed it and then die cut it using a Large Sentiment Strip Die. I added the image and the sentiment to my card with foam tape to finish the card. Thanks for joining me!
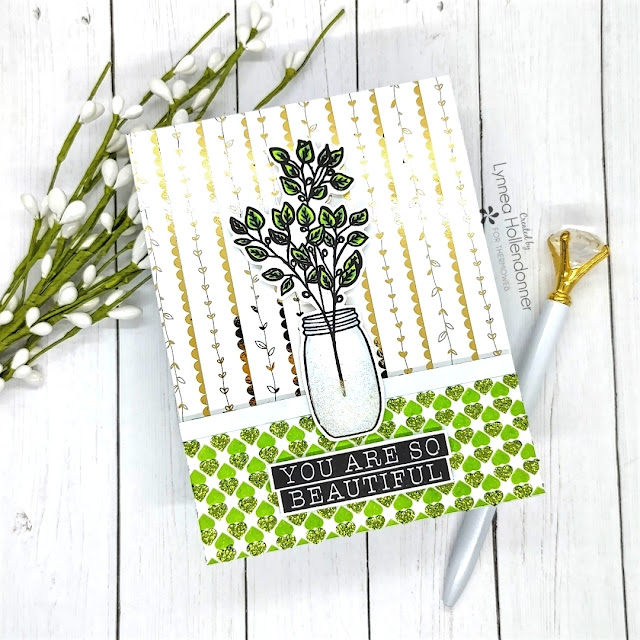
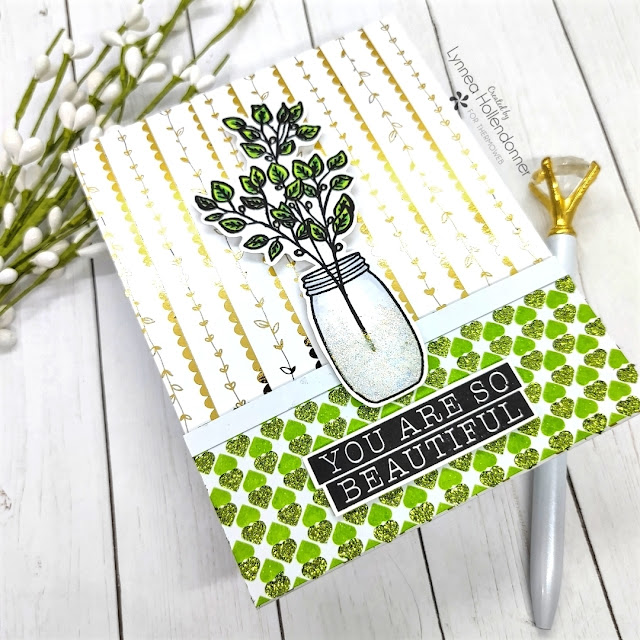
It sure looks like there's a lot that went into this card, but it was so easy to make! I started by blending Simon Hurley create. Overzealous Dye Ink over the Tiny Hearts Stencil onto a strip of white cardstock. I flipped the stencil 180 degrees and lined it up again and used my Stencil Pal and some Grass Green Glitz Glitter Gel to add some sparkle to my design. You could make a fabulous background this way, but I just wanted to have an accent piece at the bottom of my card, so I used a smaller piece of cardstock.
I added my stenciled panel to the bottom of my card with iCraft 1/16" White Foam Tape and used my iCraft Ultra Bond Liquid Adhesive Pen to add a small strip of white cardstock to the top to form a border. I popped up my image and a sentiment and that finishes the card!
It's time for an Instagram hop to celebrate the ThermOWeb and Simon Hurley create. collaboration week! After you watch my video be sure to check out Instagram for a hop full of inspiration and giveaways!
It's time for the Trinity Stamps Sweet Shop release! I'm joining in the video hop as a guest designer, so head over to YouTube for a fun hop and some prizes!
I am in love with the new Sunsational Stamp Set! It's so happy! I colored it with Copic Markers and then used my scissors to trim out the image.
I popped up my image with foam tape onto the front of my card and that's it! Remember to head to YouTube for all the video hop information and you can shop the NEW release from Trinity Stamps NOW!
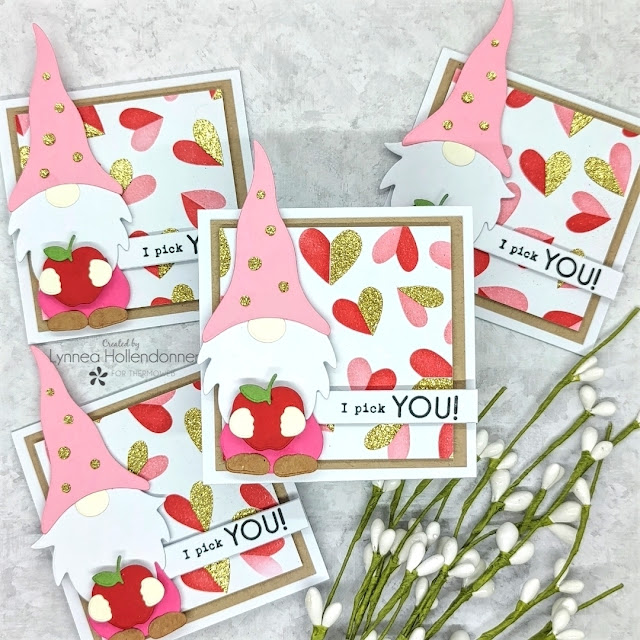
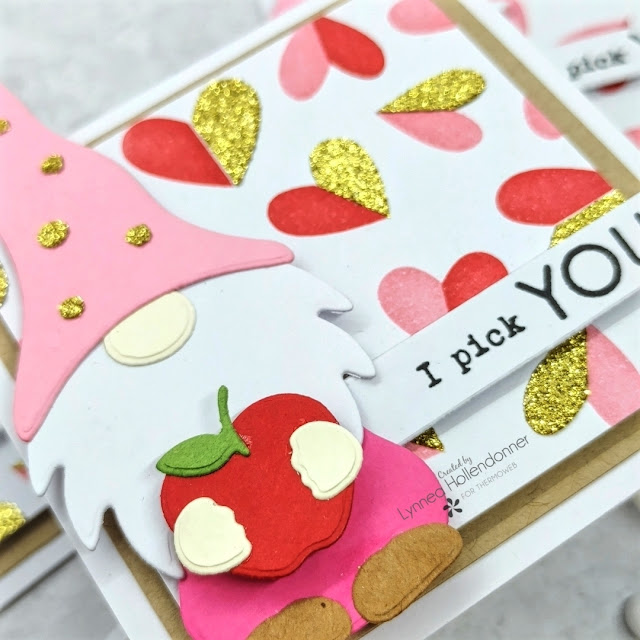
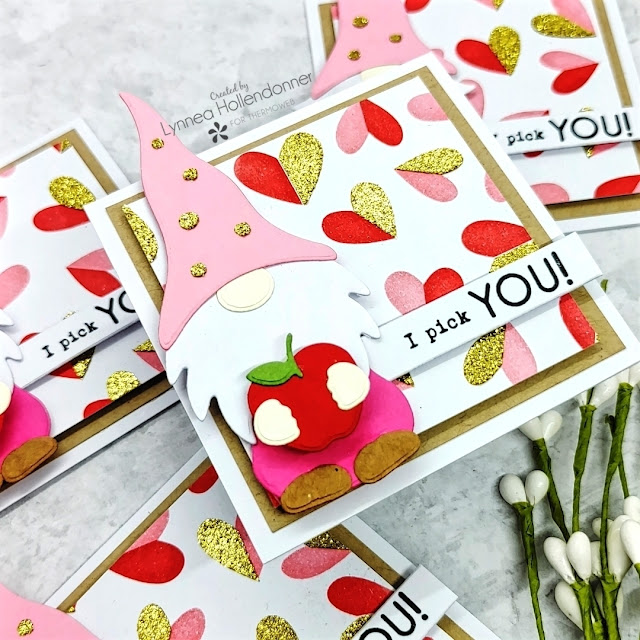
My son has a decent sized class - 27 kids! - so I need to keep ideas for cards for the class simple and easy to mass produce. I started by creating a background that I could easily cut into four pieces to get four mini lunch notes out of one background. I sprayed the back of each of the Taylored Expressions Half a Heart Layering Stencils with Pixie Spray and added pink and red ink over the top of the first two stencils. I wanted to add something special for the third layer, so I used a Stencil Pal and added a layer of Gold Glitz Glitter Gel to complete my background. Then I set that aside to dry for about 30-45 minutes.
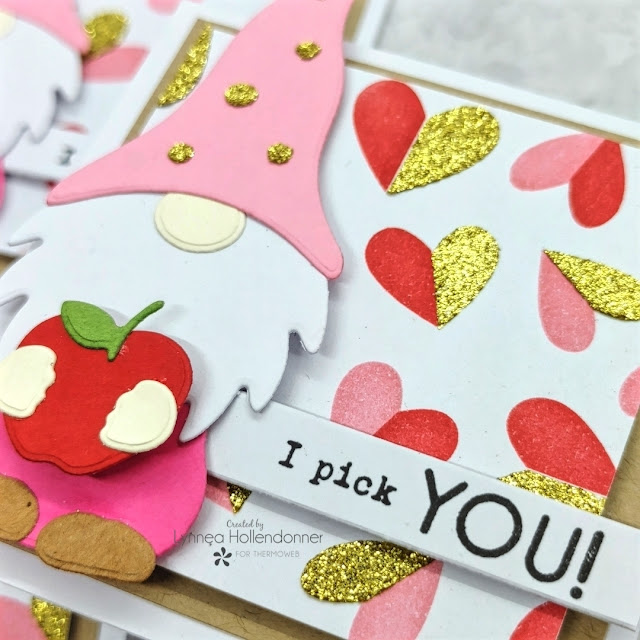
I started working on my adorable gnomes while my background was drying. I cut my pieces with colored cardstock, but you could use patterned paper or Flock for more fun! I used the dies from the Gina K Designs Gnome for the Holidays Craft Kit to cut the feet, body, beards, and noses for my gnomes and the Gina K Designs Festive Fall Add On Craft Kit for the hats, apples, stems, and the adorable little hands. I added a bit of extra sparkle to the hats using the Festive Fall Add On Stencil and some Gold Glitz Glitter Gel and then used my iCraft Ultra Bond Liquid Adhesive Pen to adhere the gnomes together.
I needed a sentiment to coordinate with the little apples my gnomes were holding, so I stamped "I pick you" from the Taylored Expressions I Pick You Stamp Set and trimmed the sentiments into strips. Once my background was dry I cut the one background down into four squares sized 2.5" and cut a kraft mat to 2.75". I adhered the pieces onto a 3" white mini card base using a mixture of iCraft Ultra Bond Liquid Adhesive and iCraft 1/16" White Jumbo Foam Tape.
Thanks so much for joining me in creating these adorable mini Valentine lunch notes! I'll see you soon!
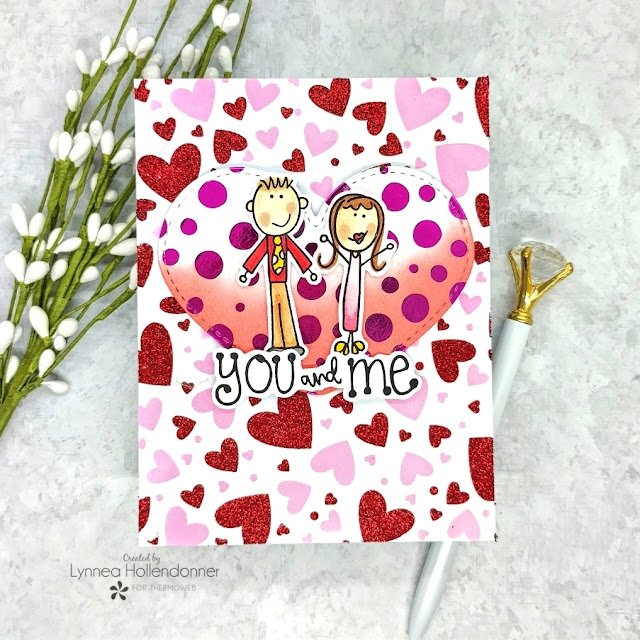
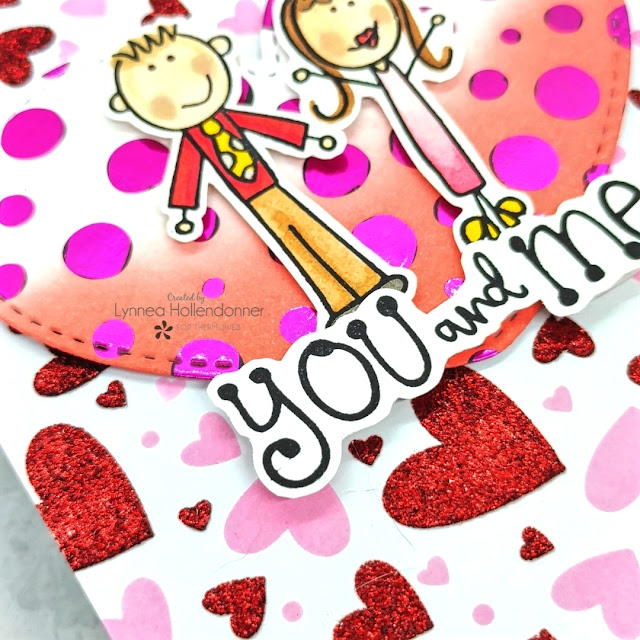
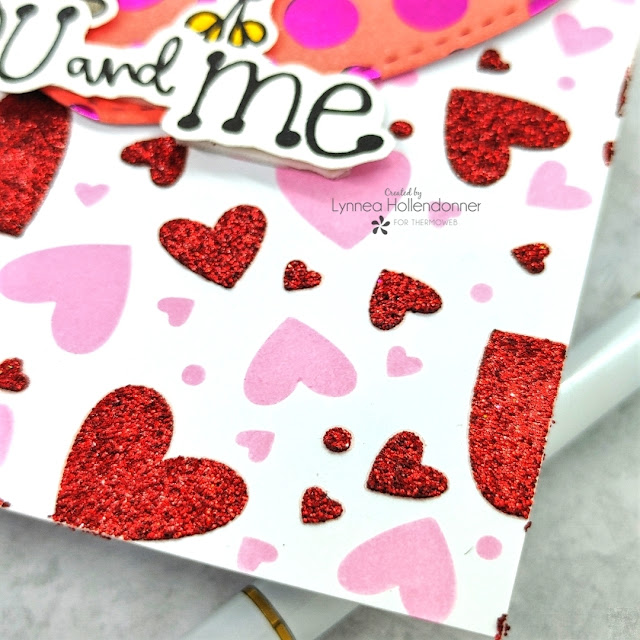
I have used the Laura Kelly Me & My Peeps Stamp Set for customized birthday cards, new home cards, Christmas cards...and now a Valentine's Day card! I love that the people can be colored however you like to represent whomever you want! I created a background using layering stencils with ink and Red Velvet Glitz Glitter Gel to be the backdrop for my cute little people.
I love finding ways to add a bit of glam to ThermOWeb Toner Sheets, so I decided to add some Glitz Glitter Gel to create a plaid pattern! Find out all the details live on the ThermOWeb YouTube channel Wednesday, December 1st at 11am CT/ 12pm ET!
Want to learn all the tips, tricks, in and outs of this card? Join me live on the ThermOWeb YouTube channel Wednesday the 1st at 11am CT/ 12pm ET! I'll see you there!