Showing posts with label Collage. Show all posts

Wednesday, June 3, 2026

LDRS Creative | Naturally Sweet Collage Stamps

Summer crafting is about to get a whole lot sweeter! For today's sneak peek card, I reached for the new Naturally Sweet Collage 4x6 Stamps - available the LDRS Creative store on Thursday, June 4th.


Products used - 


When building a freeform collage layout, I always like to work from large to small. I started with the largest "sweet" sentiment and then added smaller greetings like "I pick you" and "you're the one" throughout the design. Once the sentiments were in place, I filled the remaining spaces with the fruit images. This approach makes it easy to balance the layout while filling every corner with fun fruity images!


To finish the card, I die-cut the stamped panel using the Mixed Postage Rectangle Dies and layered it onto one of the cheerful rainbow stripe patterns from the Favorite Things 6x6 Paper Pack. The colorful background perfectly complements all of the fruity images! This card is so bright, happy, and full of summertime energy!

Monday, May 25, 2026

LDRS Creative | 5 Minute Anniversary Card Idea

Tomorrow is my 14th wedding anniversary, so I wanted to create a special handmade card for my partner - something heartfelt, modern, and quick to make. I reached for the LDRS Creative About LOVE Collage 4x6 Stamps and paired them with the Stepped Edge Die to create this easy freeform collage-style design.


Products used - 


Instead of using the Stepped Edge Die along the edge of a card like usual, I die cut it down the right side of a white panel to create an unexpected layered detail. From there, I started building my collage design on the left side of the panel using several sentiments from the About LOVE Collage 4x6 Stamps.

One of my favorite tips when creating collage-style cards is to keep your color palette simple. Limiting your colors helps all of the stamped elements work together. You can easily swap these shades to match your own style or occasion. I went with light purple, aqua, and raspberry ink colors. I began with the large “LOVE” sentiment and layered in smaller phrases like “XOXO” and “you’re my person.” I also added a few tiny black hearts for contrast and finished the collage with the sentiment, “I’d fall for you again and again and again and again…” which perfectly echoes the stair-step pattern created by the die.


To finish the card, I added foam tape behind the stamped panel and adhered it to a aqua/mint card base. I love the shadows and dimension from the foam tape. And that's it! An easy 5 minute anniversary card!

Thursday, March 12, 2026

LDRS Creative | Easy Ink Swiping Background + Collage Stamping Card

Let's create a colorful collage-style card using the LDRS Creative About LOVE Collage Stamps and the Never-Ending Wildflower Stamps!


Products used - 


I started by swiping four new ink colors directly onto my cardstock to create a quick and vibrant background. This technique is super simple and gives you a beautifully blended base in seconds! Once the background was finished, I built a freeform collage design using gray and black inks. I also stamped the Never-Ending Wildflowers lightly in the background to add texture without competing with the collage elements.


I'll be back tomorrow with another card and video tutorial using products from the new LDRS Creative release! See you then! 

Monday, February 2, 2026

LDRS Creative | Sugar Rush Collage Stamps Card Tutorial

Let’s make a sweet and colorful collage card using the Sugar Rush Collage Stamps from LDRS Creative! In this tutorial, I’ll show you how I built this freeform collage design with a bold pink, blue, and lime green color combo and pops of black for extra contrast. This is an easy, playful card that’s perfect for birthdays or any cake-worthy occasion - and it’s so fun to customize!


I love to freeform collage, but if you like a more structured look, you could use a grid-style outline with one of the LDRS ledger stamps. In my video, I show and talk about a few tips and tricks that I find helpful for collage stamping, so be sure to watch! I kept to a bright and happy color palette, but you could easily customize the colors to anything you wish! 


I finished the card with a bold background using the Floral Reverse Background Stamp. Then I layered the stamped panels onto an A2 card and that's it! 

Tuesday, October 15, 2024

LDRS Creative | Freeform Christmas Puzzle Card

Get ready for the holidays and create a charming and easy Christmas card using a freeform puzzle collage stamping technique! This classic design allows you to mix and match various festive stamps in a playful yet elegant arrangement. See how easy it is in today's video tutorial! 


Products used - 


The Puzzle Frames 6x8 Stamps are definitely one of my favorite products! I love creating puzzle scenes big and small! Today I went small and created a classic Christmas card. I cut a small rectangle using the Mixed Scallop Rectangle Frames Dies and stamped my pattern in the center of the rectangle. I chose some little scenes from the Christmas Puzzle Scenes 6x8 Stamps and filled in each area of the puzzle. You could leave them uncolored, but I added quick color with alcohol markers.


Once my coloring was complete, I cut a few more rectangle panels using the Mixed Scallop Rectangle Frames Dies and layered up my card with red and gold. That's it! Thanks so much for joining me!

Monday, September 2, 2024

LDRS Creative | Spooky, Scary Halloween Collage Card

The weather is changing, there's a chill in the air, and Halloween is ALMOST HERE!  Get ready for the spookiest time of the year with the Haunted Collage Stamps and create spooky, scary projects in no time! 


This card is so easy to make and would be perfect for mass production for kids, teachers, or anyone who loves a good spook! I cut a white piece of cardstock using the Mixed Scallop Rectangle Dies and stamped a "base" for my card with the Ledger 3x4 Stamp. I stamped the rest of my design using the Haunted Collage 4x6 Stamps and a few colors of ink. I like to stick to just a handful of colors, but you could push the envelope and use a bunch of colors if you wanted!


I layered another die-cut panel from the Mixed Scallop Rectangle Dies onto an orange card base and popped the stamp panel up with foam to complete the card. That's it! Thanks for joining me! 

Monday, August 19, 2024

LDRS Creative | Down the Chimney Collage Stamps

It's time to start sneaking some peeks of the upcoming Good Cheer Collection! This collection has everything you need for the fall and winter holidays and MORE and will be live on Thursday, August 22nd. Let's get started with this adorable Christmas stack and collage card! 


Products used -


*links to new products will be live on August 22nd


I love holiday card designs that can be easily replicated and duplicated! This one requires just a few die-cuts and some easy stamping! I chose to stick to a traditional red, green, and brown color scheme, but you could switch this up and use pink and teal for a different look if you wanted! 


I hope you enjoyed this quick peek into the Good Cheer Collection! We'll have more coming soon! 

Monday, August 12, 2024

Stack and Collage Adventure Card

Let's go on an adventure! The mix of sentiments, icons, and adorable Pocket Pals on this card will make anyone smile, whether you're 9 or 99! 


Products Used -


I stamped a ledger-style background using elements from the Tracks & Treads II 4x4 Stamps and Alloy Hybrid Ink. I used the Adventure Awaits Collage 4x6 Stamps to add sentiments and icons to my design. I started with the largest words "explore" and "wild" and filled in from there. Don't be afraid to overlap your stamping! It adds depth to the design.


I stamped a few images from the Swiss Family Robinson Pocket Pals 4x6 Stamps, colored them with Copic Markers, and cut them out with the Swiss Family Robinson Pocket Pals Coordinating Dies. I trimmed my background panel to 4" x 5.25", added it to an orange A2 card base, and added the colored images with foam tape. That's it! This card is going into my son's lunch box on the first day of school, but you could use it for many different occasions! 

Monday, June 10, 2024

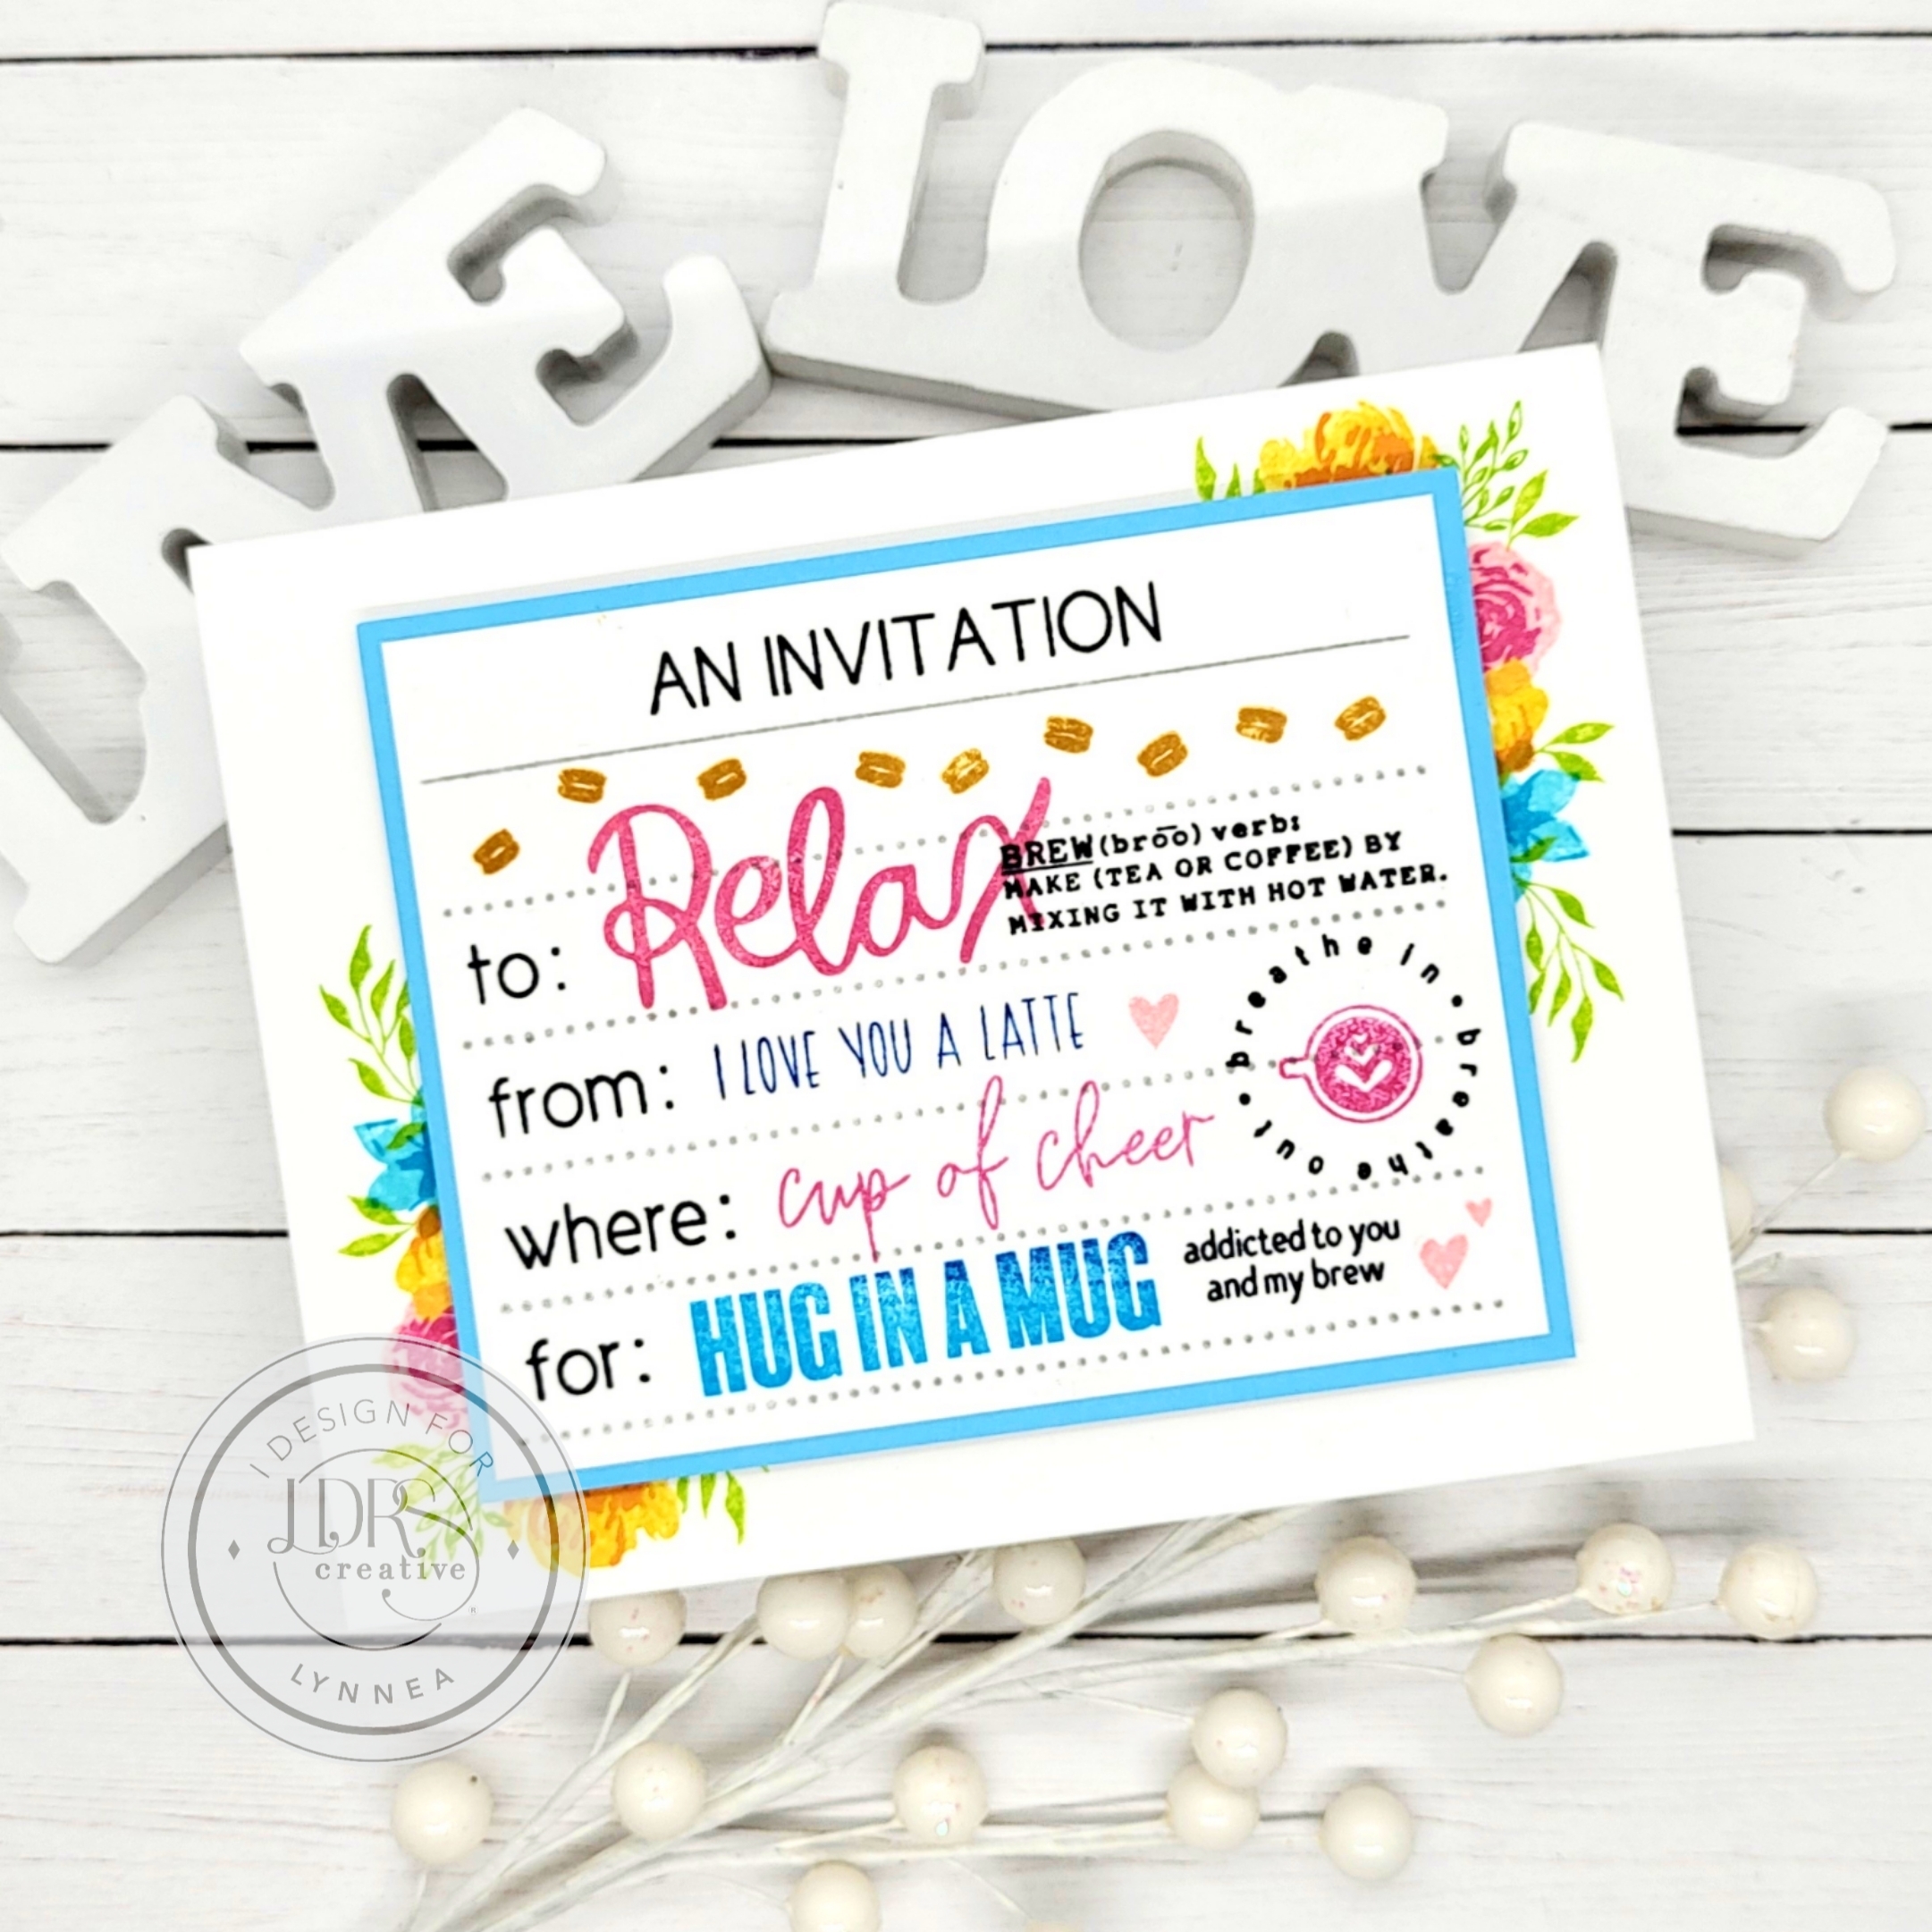
Coffee Themed Stack & Collage Invitation

You're invited for a coffee date! Send a cup of cheer with this Stack & Collage invitation card. Watch the video tutorial to see how easily everything came together!


Products Used - 


I stamped the Invitation 3x4 Stamp with Alloy Hybrid Ink Pad onto a piece of white cardstock and chose a few sentiments from the You're Invited Collage 4x4 Stamps to stamp with Raven Hybrid Ink Pad to build the base of the invitation. I kept a simple color palette for the rest of the coffee themed invitation and stamped sentiments and icons using Tickled Pink Hybrid Ink and Bali Blue Hybrid Ink. Once I was done stamping the invitation portion of my card, I trimmed the panel and added it to a light blue mat and set it aside while I worked on the rest of the card.


I used the Wildflower Layered Botanicals 4x6 Stamps and a few of the flowers onto a white card base to accent the invitation piece. The layered flowers are the perfect frame and help bring some extra color to the card. That's it! Thanks so much for joining me!

Tuesday, May 28, 2024

SNEAK PEEK!! | LDRS Creative Adventure Awaits Collage Stamps

We're one day closer to the release of the Summer Collection from LDRS Creative! Creating a masculine adventure-themed card is quick and easy. Just grab some inks and new Stack & Collage stamps and start stamping! 


*Links to products included in the Summer Collection will be live on Thursday, May 30th at 12:01am ET*


I trimmed a piece of white cardstock to 4" x 5.25" and created an "L grid" using stamps from the Tracks & Treads II 4x4 Stamps. Stamping the grid first gives me a base for stamping and helps to shape my collage card. I used a mix of sentiments and icons from the Adventure Awaits Collage 4x6 Stamps and filled in my card. I kept the color scheme more masculine, but you could switch it up and do pinks and teals, too! 


I cut a gray A2 card base and used foam tape to pop up my collage panel in the center of the card. That's all! I'll see you tomorrow with one more Summer Colleciton sneak peek! See you then!

Wednesday, May 1, 2024

Ink Blended Letterpress Arch Card with Collage Stamping

Mixing techniques is one of my favorite ways to create! I mixed ink blending, letterpress, and stack and collage stamping to make this easy card.


I used my BetterPress Letterpress Platform and pressed the "sending hugs" sentiment as well as one of the arches from the Arches Hello Impress-ion Press + Foil Plates into an A2 Cotton Watercolor Panel with Raven Hybrid Ink. I used the smallest Arch Die to cut out the arch and added the sentiment on top with foam tape. 


I cut a piece of white cardstock to 4" x 5.25" and used an Arch Spotlight Stencil to blend Soft Kisses Ink into the center of the panel. I kept the concentration of ink darker towards the bottom and lighter towards the top. I used Alloy and Soft Kisses Hybrid Inks to stamp various images from the Texturize It Collage 4x6 Stamps in a diagonal pattern from the bottom left towards the top right of the panel.

I used foam tape to adhere the arch die-cut piece to the center of the stamped panel and added everything to a black card base. That's it! I'll see you again soon!

Wednesday, February 21, 2024

SNEAK PEEK! || Timeless Wildflowers 4x8 Stamps

It's time for another sneak peek into the LDRS Creative Spring Collection! There's so much to love ... just look at these gorgeous wildflowers! 


I love the monochromatic color scheme and simplicity of this card. I used the Timeless Wildflowers 4x8 Stamps as the focal point of my card. Don't forget that you can easily switch up the floral image and create a set to give as a gift or make a set for yourself so you have cards ready to send on hand! I did some quick coloring and then added a simple sentiment and some stamped elements to the background from the Texturize It Collage 4x6 Stamps


That's it! Super easy peasy! Make sure to check the LDRS Creative website TONIGHT at midnight for the full Spring Collection release

Tuesday, February 20, 2024

SNEAK PEEK! || Hops & Waddles Collage Stamps

It's sneak peek time for the LDRS Creative Spring 2024 Collection! Check out these adorable collage stamps and Easter egg dies! They're too adorable for words! 


I started my design with the Ledger 3x4 Stamp and then used the NEW (and coming soon!!) Hops & Waddles Collage 4x6 Stamps to fill in the rest of the background with sentiments and icons in traditional Spring colors. 


Collage projects don't have to be strictly stamping! I grabbed the Easter's On Its Way Dies (coming SOON!) and cut three eggs to pop up near the top of my design. I finished the card with some colored cardstock layers and that's it! You could easily mass produce this design to send some Easter happiness. I'll see you soon for more sneak peeks! 

Monday, December 4, 2023

Trailing Hummingbird Collage Card

I love monochromatic backgrounds with a pop of color! I kept the background of my collage card in shades of black and grey and used bright, happy colors on the flower and hummingbird. See the full tutorial on the LDRS Creative YouTube Channel!


I stamped the hummingbird, flower, and leaves from the Trailing Hummingbird 4x6 Stamps with Raven Hybrid Inks and used a bunch of colors of LDRS Creative Hybrid Inks along with the Trailing Hummingbird Layering Stencils to add color to the images. I cut them out with the coordinating dies and started working on my background. I used the Ledger 3x4 Stamp, Tracks and Treads 4x4 Stamps, and the Welcome Sunshine 4x6 Stamps to build a collage style background using Alloy Hybrid Ink


I added a sentiment from the My Wish for You 4x6 Stamps as well as my colored images to the panel and layered a piece of black cardstock onto an A2 card. That's it!

Monday, November 13, 2023

'Tis the Season Collage Card

I combined all of the most wonderful things about Christmas on this card! Trees, Santa, reindeer, and the sleigh, and super cute sentiments! See how this card came together on the LDRS Creative YouTube Channel!


Have you tried Stack and Collage stamping? It's so fun! Just grab your inks and stamps and start having fun! I used the 'Tis the Season Collage 4x6 Stamps and a few LDRS Creative Hybrid Inks to create a quick and easy collaged card. I like to start with the Ledger II 3x4 Stamp so that I have a guide to know where to to build my stamping, but you could go totally crazy and stamp wherever you like! 


I hope you love this wintery Christmas card and that it inspires you to start collage stamping! I'll see you soon!

Monday, October 23, 2023

Collaged Halloween Tag Card

Eeeek!! Halloween is in just over a week! It's time to kick those spooky projects into high gear! Join me on the LDRS Creative YouTube Channel for a stack and collage spooky Halloween tag that you can attach to a gift or add to a card.


I love stacking and collaging! It looks like a lot of time and effort went into creating a project, when really it's just casual stamping! I used the Any Size Tags Dies to create a basic tag shape and stamped the Ledger 3x4 Stamp in the center. I wanted to have a big and bold sentiment in the center, so I used the Kringle Numbers Jumbo 4x6 Stamps to stamp the "31" in black ink and then filled in around the numbers with icons and sentiments from the Wicked Collage 4x6 Stamps


I wanted to have something special in the background, but something that wouldn't distract too much from my focal point tag. I trimmed a piece of black cardstock and cut it with the Quilted Plaid A2 Coverplate Die and added it to a card base with a bit of gold for some shine. 

Monday, October 16, 2023

October 31 Stack and Collage Card

It's spooky season! I inked up some jack-o-lanterns, spiders, black cats, and all kinds of creepy crawly sentiments and created a collaged card perfect for Halloween! 


Stamping and collaging is such a fun technique! I grabbed a whole bunch of LDRS Creative Hybrid Inks, the Ledger II 3x4 Stamp, Wicked Collage 4x6 Stamps, and the Cooler Days 4x6 Stamps and started getting inky! I began by stamping the Ledger II 3x4 Stamp in the center of a piece of white cardstock to give me a starting point. I wanted a big and bold sentiment in the center, so I used the Kringle Alphas Jumbo Lower 6x8 Stamps and wrote out "oct". I mixed in sentiments and icons from the Wicked Collage 4x6 Stamps as well as a couple of images from the Cooler Days 4x6 Stamps to fill in my design. 


I trimmed down my white panel to 5"x3.75" and added it to an orange mat and then popped that up onto a black card base. That's it! Quick, easy, and so spooky cute! 

Tuesday, September 26, 2023

Creating a Pirouette with the Cooler Days Collage Stamps

Autumn is finally here! I thought I would celebrate the season by showing you a different way to use your stack and collage stamps. Many of the stamps in these sets are small images - making them perfect to use with the Pirouette Pattern Templates


I know a lot of you have been wanting new Pirouette stamps, but I wanted to show you how you can use ANY small stamp in your stash to make a pirouette design! Be sure to watch my video above to see how easy it is to create a spiral pirouette on an A2 card.


I used a variety of LDRS Creative Hybrid Inks to stamp my design using the Cooler Days Collage 4x6 Stamps with the Pirouette Pattern Templates and then used one of the A2 Stitched Layered Card Toppers to cut. down my panel. I mounted that onto a kraft layer cut from the Delicate Stitches Scalloped Rectangle Dies


There are many sentiments included in the Cooler Days Collage 4x6 Stamps, but I decided to press a sentiment into a strip of kraft cardstock using the Thoughts of You Impress-ion Letterpress Sentiment Dies. I added that across the center of my pirouette pattern and that's it!

Sunday, September 10, 2023

Intro to Snowflake Ornaments Impress-ion Letterpress Dies and Bundle Up Collage 4x6 Stamps

I have a final sneak peek of the Fall, Winter, and Holiday 2023 Collection from LDRS Creative to share with you before the release tomorrow morning! I made a delicate, snowy, wintery card with the Snowflake Ornaments Impress-ion Letterpress Dies and the Bundle Up Collage 4x6 Stamps. Head over to YouTube to see the tutorial!

*Links to products in the Fall, Winter, and Holiday 2023 Collection will be live Monday, September 11th at 8am ET*


I used my Betterpress platform to press the small, medium, and large snowflakes from the Snowflake Ornaments Impress-ion Letterpress Dies into a piece of LDRS Creative Watercolor Cardstock with Soft Kisses Hybrid Ink. I love pink snowflakes! I think they're unexpected, but still classic and delicate. 

** Watch my video for a step-by-step tutorial on how to use the Impress-ion Letterpress dies. Remember - you DO need to use the Impress-ion Letterpress Dies with a letterpress platform. Using them with your regular die-cutting platform and cutting plates will damage your cutting machine. **


Just take a look at all of that dimension! The inked areas are pressed down into the cardstock, leaving the white areas with a raised appearance. It's amazing! I used the Bundle Up Collage 4x6 Stamps and stamped some sentiments near the bottom right corner of my card with Soft Kisses and Alloy Hybrid Inks. I wanted to really fill the card with snowflakes, so I used all the sizes of snowflakes from the Bundle Up Collage 4x6 Stamps and randomly stamped them with Soft Kisses, Pistachios-a-Plenty, Mrs. Periwinkle, and Alloy Hybrid Inks.


I finished the card by matting it onto a dark gray card base and adding some silver baubles to accent the sentiments. That's it! Make sure you stop by the LDRS Creative Store tomorrow, September 11th, at 8am ET for the reveal of the whole Fall, Winter, and Holiday 2023 Collection!