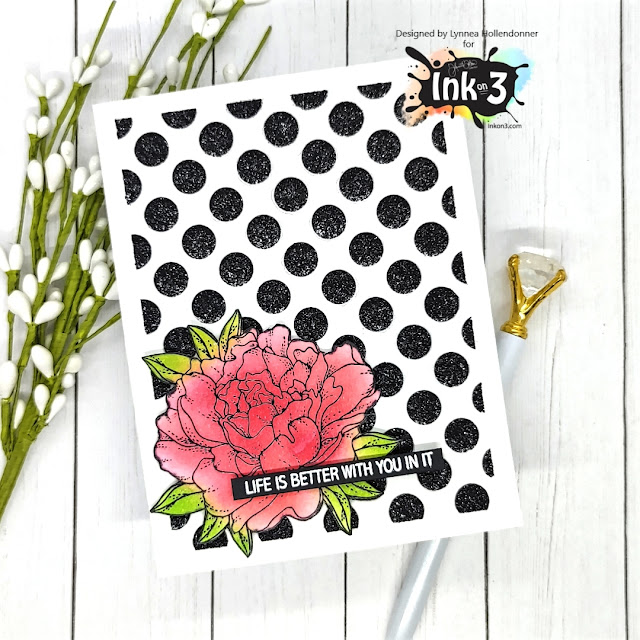
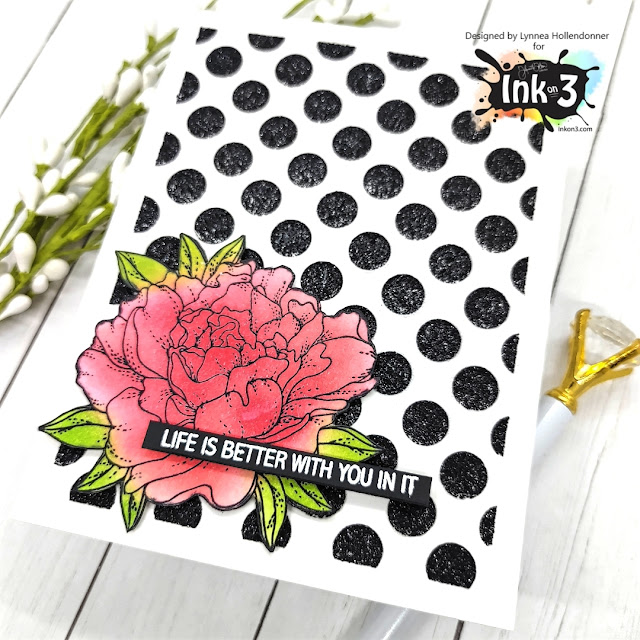
I love when small stamp sets go a long way! The Here for You Stamp Set is a mini set with the most gorgeous floral image and small sentiments. I stamped the image with Blackout Hybrid Detail Ink and heat embossed it with Crystal Clear Fine Detail Embossing Powder. I used Marilyn Red Atelier Ink and Goddess Green Atelier Inks to blend color onto the image and cut it out with my scissors. I masked off the edges of a card and added a bit of Black Glitz Glitter Gel over a polka dot stencil and popped up my flower on top.
Showing posts with label InkOn3. Show all posts
Saturday, February 12, 2022
InkOn3 | Coloring with Ink Blending
Ink blending with Atelier Inks is such a quick way to add color to images!
I stamped a sentiment from the Here for You Stamp Set with Juicy Watermark Embossing Ink and heat embossed it with Arctic White Fine Detail Embossing Powder. I trimmed the sentiment out into a strip and added it to the card with foam tape. That's it! Thanks for joining me!
Labels:
Atelier Ink,
Card,
Card Maker,
Card Making,
Glitz Glitter Gel,
Heat Embossing,
Ink Blending,
InkOn3,
ThermOWeb,
Video
Saturday, January 29, 2022
InkOn3 | Easy Atelier Ink Watercolor Background
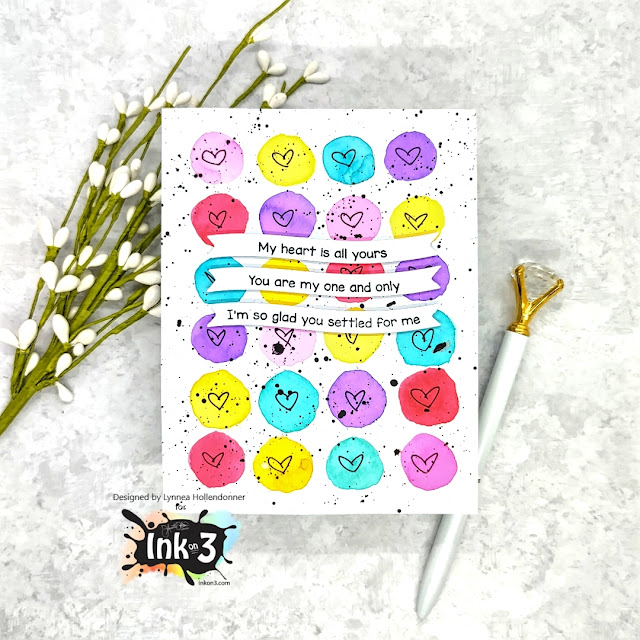
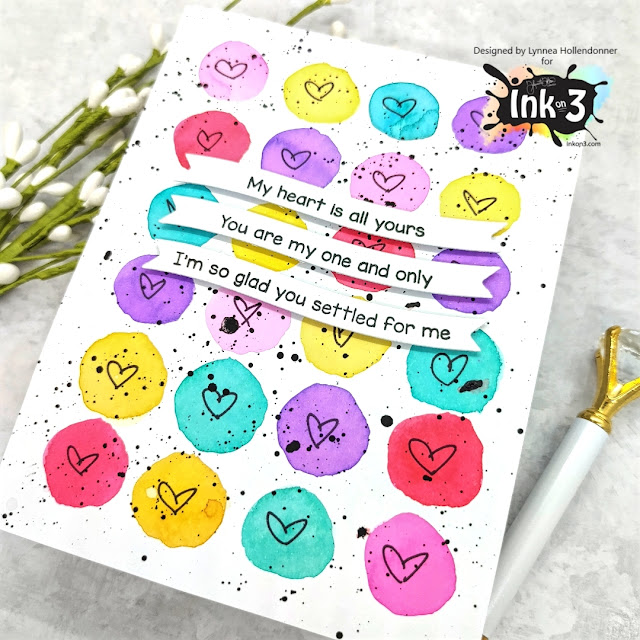
Easy peasy, lemon squeezy! Here's a simple Atelier Ink watercolored background for you!
I used a fine tip Sharpie and drew small hearts into each circle and then spattered the background with black watercolor.
I finished the card by adding a few sentiment strips from the LDRS Creative Love Wave Stack with Blackout Hybrid Detail Ink!
I started by smooshing a few different colors of Atelier Ink onto my glass work surface and then watercolored small hearts all over my background. I kept the circles loose and easy without any real shading. Just a simple and colorful background!
Labels:
Atelier Ink,
Card,
Card Maker,
Card Making,
Clean and Simple,
InkOn3,
Valentine's Day,
Watercolor
Saturday, January 8, 2022
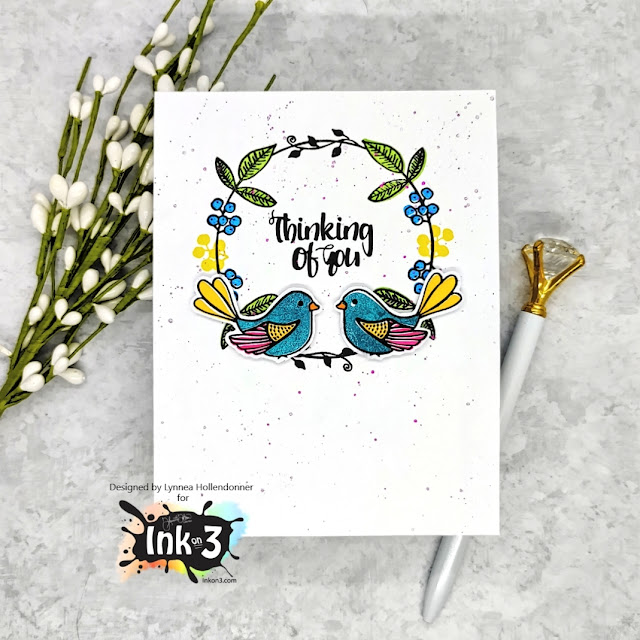
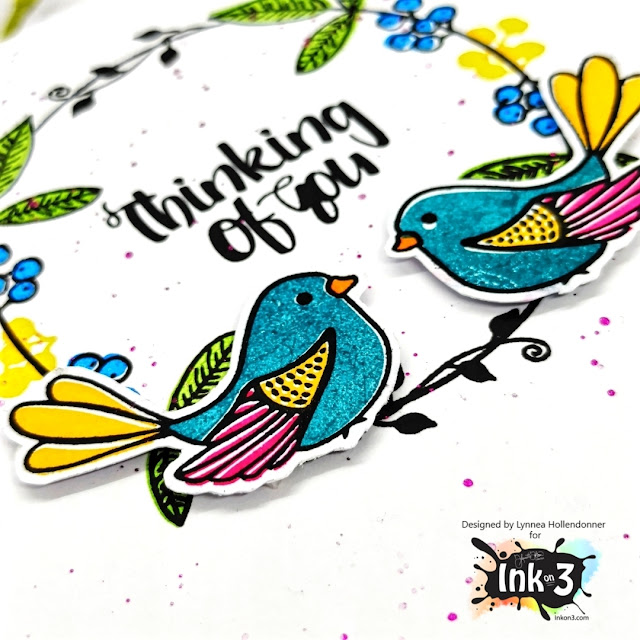
InkOn3 | Holiday Wreath Bird Card
I love versatile stamps! The Holiday Wreath Stamp Set from InkOn3 is great for all kinds of cards and occasions!
I wanted to keep that springy feel with the Love Birds Stamp Set, so I stamped the outlines with Blackout Hybrid Detail Ink and used the layering images with Trinity Teal, Bee Sting Yellow, and Sweet Petunia Pink Atelier Inks. I love how quick it is to add color to these birds! I added the sentiment to the center of my wreath and spattered some pink shimmer watercolor all over my background for texture.
This card is so simple, but I love the colors and how it turned out! I stamped the wreath from the Holiday Wreath with Blackout Hybrid Detail Ink and used the layering stamps to fill in the leaves and berries of the wreath. I used Goddess Green Atelier Ink, Bee Sting Yellow Atelier Ink, and Peacock Blue Atelier Inks to create a spring/summertime wreath.
Labels:
Atelier Ink,
Card,
Card Maker,
Card Making,
InkOn3,
Shimmer Watercolor,
Spring,
Stamp Layering,
Video
Saturday, December 11, 2021
InkOn3 | Shimmery Christmas Card
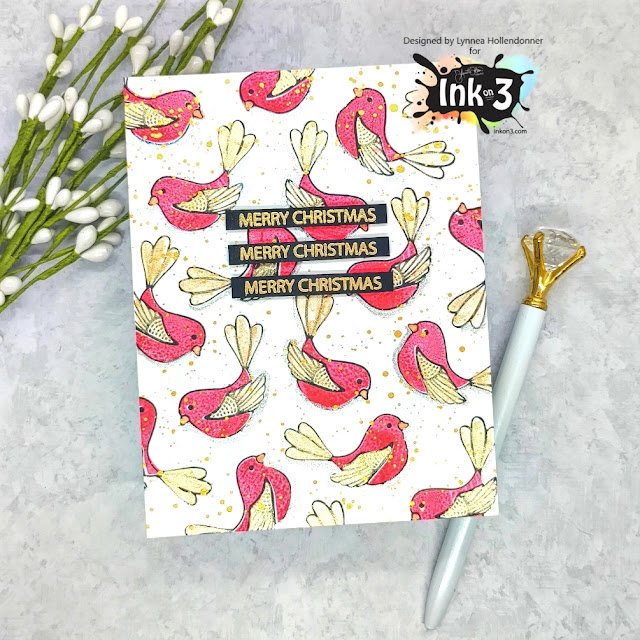
A little stamp layering with InkOn3 stamps and Atelier Inks and shimmer watercolors make a quick and easy Christmas card!
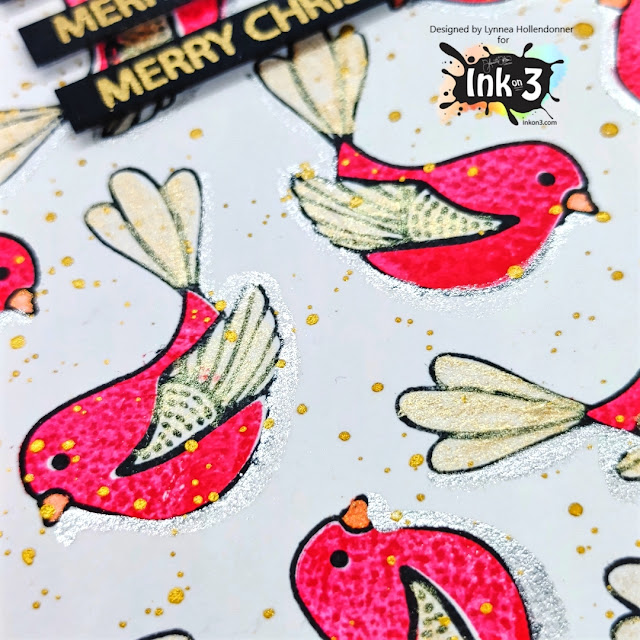
I stamped a greeting from the Holiday Wreath Stamp Set three times with Juicy Watermark Embossing Ink and heat embossed with Gold Rush Fine Detail Embossing Powder. I trimmed each of the sentiments into small strips and popped them up near the top center of my card.
I stamped the outlines of the birds from the Love Birds Stamp Set with Blackout Hybrid Detail Ink repeatedly on my background until my cardstock was full of little birdies. I used the layering images for the birds and stamped them with Marilyn Red Atelier Ink to mimic the look of cardinals. There are layering stamps to fill in the tails and wings as well, but I decided to use some shimmer watercolor for a bit of sparkle. I added some gold watercolor spatters to finish off the background.
Labels:
Atelier Ink,
Card,
Card Maker,
Card Making,
Christmas,
Heat Embossing,
InkOn3,
Shimmer Watercolor,
Stamp Layering,
Video
Friday, December 10, 2021
Miss Ink Stamps and InkOn3 Collaboration Instagram Hop
Hi! Miss Ink Stamps and InkOn3 are having a collaborative hop over on Instagram and I made a quick video tutorial showing how I made my card!
I started my card by stamping the cave image from the Miss Ink Stamps Bear Hugs Stamp Set at the bottom of a piece of white cardstock and used InkOn3 Atelier Inks to blend a night sky towards the top. I added the Miss Ink Stamps Sparkles Stencil over the top and blended Shark Tooth White Ink to create a starry sky. I added a few more images from the Miss Ink Stamps Bear Hugs Stamp Set to finish off the card.
Labels:
Atelier Ink,
Card,
Card Maker,
Card Making,
Copic,
InkOn3,
Miss Ink Stamps,
Scene Card,
Stencil,
Video,
Winter
Saturday, November 27, 2021
InkOn3 | Easy Masking with Dies
I love easy techniques and I have an easy masked background to share with you! I used Atelier Inks and some Reverse Confetti stamps and dies for this wintery card.
I stamped a bunch of snowflakes all over my card with Blackout Hybrid Detail Ink and then used the coordinating die set to cut masks for each image from masking paper.
I placed the masks over the stamped images and then pulled out some Atelier Inks to blend over my background. I started with My Jam Purple at the bottom, Trinity Teal in the middle, and Sweet Petunia Pink at the top. I added some spatters of shimmer watercolor and removed the masks. I love the look! The masks leave a sort of 'halo' around the stamped images that's so fun!
I planned to make this a one layer card, but I forgot to stamp a sentiment when I was stamping the snowflakes, so I stamped one onto white cardstock, trimmed it out, and popped it up onto my card.
Thanks so much for joining me! I'll see you soon!
Labels:
Atelier Ink,
Card,
Card Maker,
Card Making,
Christmas,
Die Cutting,
Ink Blending,
InkOn3,
Masking,
Winter
Friday, November 19, 2021
InkOn3 | New Release Instagram Hop
Today InkOn3 is celebrating THREE new stamp sets and THREE new mini ink cubes! I’m sharing inspiration using some of the newest items!
I used a 3D Embossing Folder to add texture to my background. I am not well practiced with embossing folders .... I embossed the wrong side of my cardstock, so the texture isn't as noticeable as I had hoped, but I like the effect!
I finished the card with some images and a sentiment from the new Thankful For You Stamp Set. Thanks for joining me!
I used some of the new Atelier Ink Cubes to do some ink blending onto my background panel. I have a secret! I started with yellow cardstock instead of white! This made things easier and slightly altered the color of the inks giving the appearance that I put in more effort than I actually did!
Labels:
Atelier Ink,
Autumn,
Card,
Card Maker,
Card Making,
Embossing Folder,
InkOn3,
Instagram Card Hop,
Stamp Layering,
Video
Saturday, November 13, 2021
InkOn3 NEW RELEASE! | Faux Watercolor with Atelier Ink Cubes
There's a new release from InkOn3 and I used one of the new stamp sets and some Atelier Ink Cubes to create an Autumn themed faux watercolored card.
I stamped the outlines with Blackout Hybrid Detail Ink but I offset them to add to the whimsy of the background. I added some flicks of gold watercolor to fill in any empty spaces.
I used Blackout Hybrid Detail Ink to stamp a sentiment from the Thankful For You Stamp Set, cut it into strips, and lined the bottom with red cardstock and popped up the strips with foam tape to finish the card. Thanks for joining me!
The new Thankful For You Stamp Set has solid and outline leaves that you can use together or separately. I lined up the solid images on my card using my Misti and inked them up with Marilyn Red, Marigold Orange, and Bee Sting Yellow Atelier Ink Cubes. I spritzed them with a bit of water and stamped them onto my card giving me a faux watercolor look.
Labels:
Atelier Ink,
Atelier Mini Ink Cubes,
Autumn,
Card,
Card Maker,
Card Making,
InkOn3,
Stamp Layering,
Video
Saturday, October 30, 2021
InkOn3 | Layered Ornaments Card Set with Atelier Inks
It may the end of October, but the Holidays will be here before you know it! I used a layering stencil set from Pretty Pink Posh along with my InkOn3 Atelier Inks and some ThermOWeb Glitz Glitter Gel and created a quick set of Holiday cards!
I used the Pretty Pink Posh Layered Ornaments Stencil Set along with my Atelier Inks and created four backgrounds. I used Marilyn Red, Goddess Green, Sweet Petunia Pink, and Trinity Teal Atelier Inks to create my baubles.
I moved on to the second layer of the stencil set and first blended Bee Sting Yellow Atelier Ink and then a bit of Twiggy Brown Atelier Ink over the yellow to create a golden yellow ornament topper. Perfect!
You could stop here and you would have some really cute inked cards, but the Layered Ornaments Stencil Set comes with a detail layer! I debated adding ink over the top for a quicker set of cards, but I really wanted some glitter! I broke out my Silver Glitz Glitter Gel and added glitter accents to each of the baubles. I'm really happy with how the silver looks with the bold ink colors!
I wanted simple but elegant sentiments for each of my cards, so I stamped the Pretty Pink Posh Holiday Scripts Stamp Set with Blackout Hybrid Detail Ink and used the coordinating dies to cut out the sentiments. I pieced together sentiments and added them to each of the cards with foam tape.
I hope you enjoyed this quick and easy card set! The bold Atelier Inks were perfect for these ornaments! See you soon!
This card set was really quick to pull together and I love that you can customize your backgrounds to make whatever colors you want!
Saturday, October 16, 2021
InkOn3 | Heat Embossed Poinsettia Card
I have a no coloring required card to share with you using the InkOn3 Poinsettia Stamp Set and coordinating dies!
I arranged the poinsettias and the leaves all over my card base and adhered them with liquid adhesive. Check out my video for some quick tips for adhering multiple small images at once!
I die cut a large sentiment from black cardstock and covered it with Liquid Pixie Dust for some super magical sparkle and added it to the card with foam tape. That's it! Have a great day!
I stamped the flowers and leaves from the Poinsettia Stamp Set onto red and green cardstock using Juicy Watermark Embossing Ink and embossed them with Arctic White Fine Detail Embossing Powder. I stamped and heat embossed a bunch so that I would have enough to cover a full background and have some extras left over. I wanted to add a little bit of dimension so I blended a bit of Twiggy Brown Atelier Ink to the centers of the flowers and Trinity Teal on to the bottom of the leaves. I added some gold watercolor ink spatters onto the flowers and leaves and used the Poinsettia Coordinating Die Set to cut out the images.
Labels:
Atelier Ink,
Card,
Card Maker,
Card Making,
Christmas,
Emboss Resist,
Heat Embossing,
InkOn3,
Video
Saturday, September 25, 2021
InkOn3 | Atelier Ink Set of Teacher Cards
My son started kindergarten a few weeks ago and I decided to spoil his teacher with a set of cards stamped with InkOn3 Atelier Inks!
I made one card to give to her and then a set of five cards to give as a gift. I used the Taylored Expressions I Pick You Cling & Clear Combo for all of the cards. This was the perfect set because it gave me an excuse to bust out my Atelier Inks and do some solid stamping!
Once all of my apples were stamped I used the I Pick You Stencil to add more detail to the backgrounds. This stencil perfectly masks off the apples in the background and creates some fun horizontal stripes. I used Peacock Blue, Paint It Black, and Twiggy Brown Atelier Inks to add ink blending to the backgrounds.
I hope this project inspires you! Thanks so much for watching!
Teachers work so hard and I wanted to show my son's teacher how much I appreciate her! I thought a long time about what style of card to make, but when I saw these apples I knew they were perfect!
I started by stamping the background - the apple outlines - with Blackout Hybrid Detail Ink and then used the coordinating stamp set to fill in the centers of the apples. I love that there are so many different styles of apple "fillings"! I used Marilyn Red, Marigold Orange, Bee Sting Yellow, and Goddess Green Atelier Inks to create my apples.
Even thought all the backgrounds are different I decided to keep things consistent by using the same sentiment on each card. I die cut using the My Favorite Things Sweet Hello Die Set and popped the sentiments up onto my card. I stamped a coordinating sentiment from the I Pick You Stamp Set with Blackout Hybrid Detail Ink to complete the look.
Saturday, September 11, 2021
InkOn3 | Masked Ink Blending
Even simple masking gives your stencils new life! I masked off the edges of the InkOn3 Wonky Lines Stencil for a more focused background.
I removed the stencil, but left the masking tape in place and spattered on some black watercolor for extra texture. Then I removed the tape and set the background aside to dry. I stamped out all three dragons and some flames from the Magical Dragons Stamp Set with Blackout Hybrid Detail Ink and colored them with Copic Markers. I used the coordinating Magical Dragons Die Set to cut them out.
I popped up the dragons and a sentiment onto my background with foam tape and then covered the dragons with Liquid Pixie Dust for some magical shimmer! Thanks so much for joining me!
Stencils are my favorite crafty tools and I love giving them new life. I'm a simple crafter, so I try to bring simplicity a bit of flare in my craft room! I used Purple Tape and masked off 3/4" on each side of an A2 piece of cardstock. I sprayed the back of the Wonky Lines Stencil with Pixie Spray so that the detailed lines wouldn't shift while I blended with Atelier Inks. Can you believe I only used two colors of ink on the background?! I started with a few blobs of Bee Sting Yellow and then finished off with Peacock Blue. I made sure that the inks overlapped to create varying shades of yellow, green, and blue.
Labels:
Atelier Ink,
Card,
Card Maker,
Card Making,
Copic,
Ink Blending,
InkOn3,
Masking,
Video
Thursday, September 9, 2021
InkOn3 | Atelier Ink Cube Instagram Hop + BONUS GIVEAWAY
There are new Atelier Mini Ink Cubes in town and we are celebrating with an Instagram hop! Read below for giveaway details and then head to my YouTube video for a BONUS GIVEAWAY!
I started by showing how easy it is to stamp with the new Atelier Mini Ink Cubes. These cubes are so juicy and vibrant! I stamped with the A Pocket Full of Happiness Mosaic Circle Builder Stamp Set and then ink blended Blackout Hybrid Detail Ink over the Taylored Expressions Triangle Toss Stencil for my background. The inks just POP against the black!
I love ink blending with the Atelier Mini Ink Cubes as much as I love stamping with them! I created two ink blended backgrounds. The first one features the Taylored Expressions Half a Heart Layering Stencils. Be sure to check out the video above for tips and tricks for layering stencils!
I saved the brightest and best ( I think! ) for last! Just look at how BRIGHT those Atelier Mini Ink Cubes are! I love all that color! I used the Taylored Expressions The Right Angle Layering Stencils for this one and it's definitely my favorite!
I finished off all three cards using the Concord & 9th Big on You Stamp and Die Set. I wanted the colorful Atelier Mini Ink Cubes to be the focus of each of the cards, so I kept it simple with a bold black sentiment. That's it! Remember to head over to Instagram for a fun hop with lots of colorful inspiration and check out my YouTube video for a BONUS GIVEAWAY! Good luck to everyone!
I used the new Atelier Mini Ink Cubes on each of my three cards - the first I did stamp layering and the second and third cards use the same cubes for ink blending and stencil layering.
Saturday, August 28, 2021
InkOn3 | Floral Atelier Ink Watercolor
This card was so easy to make and it's one of my favorites I've made in a long time! I watercolored these gorgeous florals with InkOn3 Atelier Inks and they're just gorgeous!
Atelier Inks are great for stamping and ink blending ... but I really LOVE the way they work as watercolors! They are so vibrant! I stamped the Concord & 9th Heartfelt Blossoms Stamp Set with Blackout Hybrid Detail Ink and heat embossed with Crystal Clear Fine Detail Embossing Powder. The embossing helps to keep the watercolor in the lines - which is something I definitely need! I used Goddess Green, Bee Sting Yellow, Sweet Petunia Pink, and Trinity Teal Atelier Inks to watercolor my background and then used the coordinating die to cut it out.
I created a peek through background by stamping the Altenew Pinstripe Stamp with Blackout Hybrid Detail Ink and popped up my watercolored image on top with foam tape. I wanted a sentiment that would perfectly match my background, so I blended Trinity Teal Atelier Ink onto white cardstock and then die cut the sentiment. The color of the sentiment perfectly matches my watercolored frame!
I finished off this pretty Atelier Ink watercolored card with some pastel pearls. Thanks for joining me!
Labels:
Atelier Ink,
Card,
Card Maker,
Card Making,
Concord & 9th,
Die Cutting,
Heat Embossing,
InkOn3,
Video,
Watercolor
Subscribe to:
Posts (Atom)