Showing posts with label Alcohol Inks. Show all posts

Tuesday, August 31, 2021

Sassy &. Crafty and T-Rex Alcohol Inks Instagram Hop

There's a fun hop happening on Instagram to celebrate the Sassy & Crafty and T-Rex Alcohol Inks collaboration! I made three cards by mixing together products from these fabulous companies! 


This is my first time using T-Rex Alcohol Inks and they are AMAZING! They blend beautifully and are so SO vibrant!


I couldn't play with the beautiful rainbow 12-Piece Starter Set and not create a rainbow background! I mixed together a bunch of different colors and then trimmed down my background to create a slimline card. 


I didn't use a lot of purple on my rainbow background, so I thought I would make a background with just purple! 


With all the vibrancy in the other two cards I thought I would switch it up and create a background using just the black ink. I LOVE IT! 


I finished off each of the cards using my FAVORITE Sassy & Crafty stamp set - Flutter By Butterfly. Remember to head over to Instagram for the hop and your chance to win prizes! 

Wednesday, May 26, 2021

ThermOWeb | Unity Toner Card Fronts and Alcohol Inks YouTube LIVE!

Hi, friends! I'm going to be live on the ThermOWeb YouTube Channel TODAY at 1pm CST / 2pm EST making a Father's Day Card with Unity Toner Card Fronts and Maker Forte Foil Transfer Sheets with Alcohol Inks


I like to use a variety of coloring mediums to add color to my Unity Toner Card Fronts and in today's YouTube Live I'll be showing how I use alcohol inks! I've never used them on the Unity Toner Card Fronts, but I decided to give it a go and it works! 


In addition to the Unity Toner Card Fronts I'll be showing off the new Maker Forte Foil Transfer Sheets! I'll use the Sunrise Lake Foil! It's gorgeous! I used Gold Deco Foil on my example, but the Sunrise Lake Maker Forte Foil adds another touch of texture to the background. I also ink blended on some Emerald Green Deco Foil Flock! Lots of techniques you won't want to miss! 


l hope you'll join me LIVE today at 1pm CST / 2pm EST on the ThermOWeb YouTube Channel where I'll walk you through all the steps in making this Father's Day card! See you there! 

Monday, March 1, 2021

i-crafter March Release | Slimline Borders and Edges

Get ready for the March Release from i-crafter! There are a bunch of new dies available in the shop RIGHT NOW and I used the new Slimline Edges and Borders Die Set for my mini slimline card design!


The GREATEST thing about the Slimline Edges and Borders Die Set is that you can use these dies to add elegant edges to a variety of card sizes - slimline, A2, A7, mini slimline and more! 


I created an alcohol inked panel on Yupo Paper with alcohol inks as well as some gold foiling and trimmed down a small portion and added it to the bottom of my mini slimline card. 


I used the scalloped border design from the Slimline Edges and Borders Die Set and cut a piece of white cardstock and popped it up on top of my alcohol inked panel and trimmed off any overhang. I used purple ink and my i-Blend Brushes to add a bit of purple ink to the edges of my white panel. 


I finished my mini slimline card with a butterfly cut from gold cardstock with the Butterfly Bursts Die Set and the hello sentiment from the Hello Flower Die Set. You can find all of the i-crafter products I used on my card in the i-crafter shop NOW! Happy shopping! 

Monday, May 4, 2020

i-crafter // Elegant Alcohol Inked Card

I'm a clean and simple cardmaker - that's just who I am! I love to use a few products on one card and really make them shine, so I mixed a stamp and die set from i-crafter on a pretty background!


Yellow and brown are my favorite colors - they were even my wedding colors! They remind me of sunshine and sunflowers! And mix in a little bit of gold you have an instantly elegant color combination!


The background was created with a few colors of alcohol inks. I love using alcohol inks for backgrounds! It's easy and fluid and all kinds of amazing! I used some gold foil cardstock from my stash and die cut a few leaves, the large flower, and some center embellishments from the Flower Bursts Die Set. I adhered them to my card and popped up the centers of the petals. I love this feature of the Flower Bursts Die Set!


I wanted to have a simple, elegant sentiment to finish my card. I used the "you amaze me" sentiment from the Amaze Me stamp set and heat embossed it with white powder. This stamp set is actually a maze themed stamp set, but I find myself reaching for this punny sentiment for a lot of my cards. Thanks for joining me today!

Monday, April 27, 2020

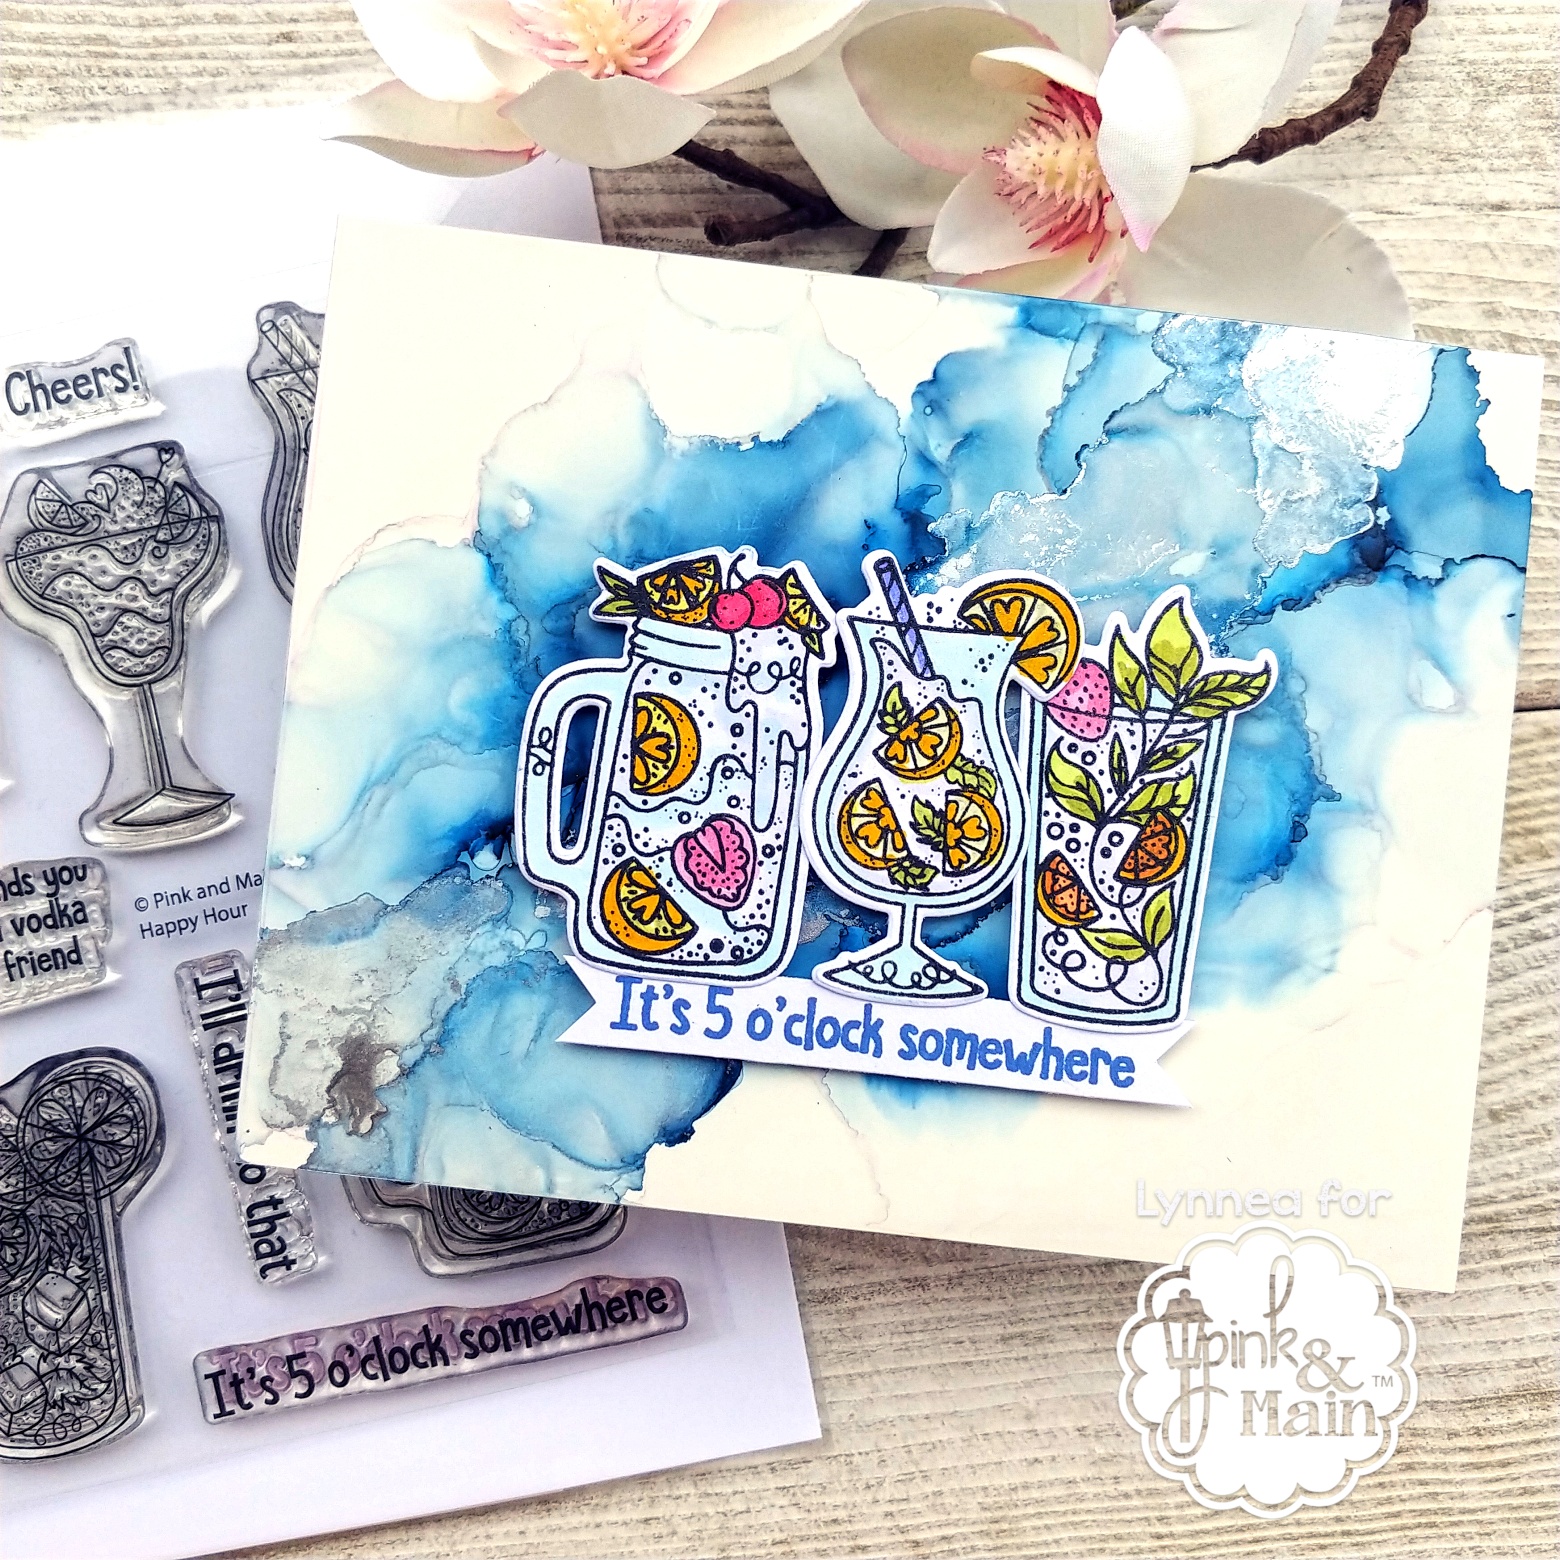
Pink & Main // Happy Hour Alcohol Inked Card

Could you use a drink these days? Yeah ... me too! Haha! The Happy Hour stamp set from Pink & Main is perfect for how I'm feeling these days!


I haven't played with alcohol inks in a long time. Not because I don't love them - I do! But because my backgrounds turn out blobby. I played around with some techniques and lots and lots of blending solution and finally found a background technique that I like!


I made this background with just one color of alcohol ink and some metallic shimmer. I added a pretty decent blob of blending solution across the middle of a piece of alcohol ink paper and a few drops of color to the center. I shifted my ink around and when I had color where I wanted it I let it dry a bit. Then I came back in with more blending solution and added it to the edges of the color and blew the color back towards the center. I love the effect! I added some metallic additives to finish the background. 


Such a classy background needed some classy images! I stamped some fancy drinks from the Happy Hour stamp set and colored them in. I left lots of white areas to make them really pop off the background! And some orange and pink to compliment the blue in the background. Then I die cut them with the Happy Hour die set and added them to the card with foam tape. I stamped a sentiment from the Happy Hour stamp set with a dusty blue ink, trimmed it into a banner, and placed it beneath my yummy drinks. 


Doesn't this just make you want to kick back on the beach and have a drink? Yeah ... me too! Haha! 

Sunday, April 12, 2020

i-crafter // Rainbow Doily Background

Hey, there! I just love the Doily Die from i-crafter! It's cute, it's elegant, it's amazing! 


This card is super easy to make. And you can change it up to add any sentiment that you want! Let's start with the background. I used alcohol inks to create a bright rainbow background. I die cut the Doily Die from heavy white cardstock and glued it onto my rainbow background. I used scissors to trim around the outline of the Doily Die leaving a little border. I added foam tape behind the die cut to give it dimension and adhered it onto some subtle tone on tone gray patterned paper. 


I didn't quite know what sentiment I wanted to add, but I'm ALWAYS sending "thank you" cards, so I used the Carly Alphabet Die Set to cut my sentiment. I cut out each letter that I would need for my sentiment five times and stacked them together. You could use foam tape instead, but I didn't want to cut out a bunch of tiny pieces of foam. I find it easier to stack die cuts on top of each other! When I went to add my letters onto the background I didn't think they were standing out enough. I arranged the Carly Alphabet sentiment onto a piece of vellum and trimmed around the sentiment (leaving a border) with scissors and added it to my Doily Die with liquid adhesive. 


I needed to add some glitz and shine, so I covered the die cut sentiment with glitter and a thick coat of Glossy Accents! That finishes this card! See you soon!

Saturday, June 22, 2019

Penguin Palace Butterflies with Love Die

Hey, everyone! I'm back with another stand alone die from Penguin Palace!


I love how this die cuts out the hearts on the left and leaves a stitched border, but the butterflies on the right don't cut out completely and can be popped up!


I created two alcohol inked backgrounds. Check out my video below to watch how! I used a simple technique - add blending solution to yupo paper, drop in some alcohol ink, and blow it around with a straw - or a nasal aspirator in my case! - until the background is covered. Then I die cut the alcohol inked background with the Butterflies with Love die. Steel dies will die cut yupo paper beautifully!


I decorated my first card with the little girl image and a sentiment from the Rabbit Cafe stamp set. I made sure my butterflies were popped up. I love how you can see the white card base peeking out from the sides!


For my second card I stamped and white heat embossed a sentiment from the Sending Kisses Your Way stamp set. I decided I wanted my butterflies to completely be cut out like the hearts, so I used my scissors and just snipped them out! Check out my video below for the whole process!


Thanks for stopping by! 


Monday, March 25, 2019

Alcohol Inked Narwhal Card

Hey, everyone! I hope you've been loving the new release from Pink & Main! This month Pink & Main are celebrating their 5th birthday so all the products in this release are celebration themed! How perfect!


I had an idea for a magical, dreamy underwater scene - so I grabbed my alcohol inks and started playing around! I only used a pink and a light blue, but I used lots of blending solution and let them mix to create the purple! I LOVE how it turned out! It's just what I had in mind! I used the Narwhals stamp set from a while back and stamped the images and colored them with my watercolor markers. I love how the gray plays off the colors in the background!


I've mentioned it before - but I'm really trying to build up my stash of birthday cards - so this release is amazing! I used the Celebrate die set and cut the sentiment from white cardstock and the shadow from vellum. Then I stamped a coordinating sentiment from the Celebrate stamp set and embossed it with white powder. The white against the background is so ethereal! I'm in love!


The new Celebrate stamps and dies are a staple in my craft room! And I know they will be in yours too! See you soon!


Monday, February 18, 2019

Pink & Main February Release Sneak Breakfast Fun


Hello! Are you ready to get a sneak peek at one of the CUTEST stamp sets I've EVER seen!? The Breakfast Fun stamps and dies are from the Pink & Main February release and they'll be available Wednesday February 20th! I used alcohol inks to create a set of backgrounds and used a bunch of images from the Breakfast Fun stamps and their coordinating sentiments. I made four cards and didn't even use all of the images and sentiments! There's so much cuteness packed into this stamp set!


I picked out the images and sentiments I wanted to use from the Breakfast Fun stamp set and stamped them on watercolor cardstock with Versafine Onyx Black ink and heat embossed them with clear powder. I used my Staedtler felt tipped markers and a waterbrush to color them and then die cut them with the coordinating dies.


I've been obsessed with alcohol inks lately! I grabbed some Yupo paper and my inks and just started making backgrounds! I used two or three colors on each background and tried to keep the inks in a diagonal pattern going left to right.


I have a tendency to get a little heavy handed with my alcohol inks, but that's no problem! After I let my inked background sit for about 10 minutes I use DecoFoil and press it on top of my ink. The foil will stick anywhere the ink pools and is tacky and leaves behind some awesome shine!


I added my sentiment strips and die cuts from the Breakfast Fun stamp set with foam tape onto each background. I love how quickly this little set of cards came together! And the foodies are so super cute! Remember that the February release from Pink & Main will be available Wednesday the 20th! See you soon!


Tuesday, July 24, 2018

Big Hugs Alcohol Ink Backgrounds

Hello, friends! A while back I made the leap into alcohol inks and I don't know what made me wait so long! I probably knew I would spent a boat load of money! Haha! 


I used Yupo paper and Ranger alcohol inks as well as some metallic mixatives to create a bunch of backgrounds. I picked out 4 of my favorites and used them to create 8 simple notecard sized cards!


I can't even pick a favorite background out of the four! I love them all! The great thing with alcohol inks is that you can use the same colors and technique but you will always get a unique background!


I took each of the backgrounds that I made and used the Big Hugs die from Neat and Tangled to cut into the center of the Yupo paper. I did the same with white cardstock 4 times. I inlaid the white die cut into the alcohol inked backgrounds and glued the die cut sentiment onto a white notecard. I have 8 cards just like that!