The Stocking Stuffers Stamp Set was one of my favorite Holiday sets Pink & Main released last year. I LOVE how you can build a stocking with an elf, cat, dog, or some presents! So many fun possibilities! I stamped the stocking twice and the elf and dog and colored them with water brush pens then die cut them with the coordinating Stocking Stuffers Die Set.
Showing posts with label Karin Markers. Show all posts
Monday, July 12, 2021
Pink & Main | Christmas in July Gift Tags
I'm feeling in the Holiday sprit and wanted to use the new Pink & Main Fancy Tag Dies to create some easy Christmas tags!
The Fancy Tags Die Set has a bunch of dies that you can use to create simple or fancy tags! I decided to layer together a bunch of pieces to create fancy, but still easy, tags! I die cut the smaller stitched tag shape from two pieces of white cardstock and planned to layer it onto the scalloped tag, but I wanted to give it some extra interest. I used the Holly Layering Stencil and an Ergonomic Blending Brush to give the white tags a cute pattern. I cut the larger scallop tag from two pieces of black cardstock and then cut the tag topper from white. I used the small circle die to cut a hole through all three pieces of the tag and looped white ribbon through the top.
I stamped the sentiment from the Stocking Stuffers Stamp Set and trimmed it in half so that I could stack it to the left of the cute images. And that's it! Two easy tags to add to my Holiday stash! Thanks for stopping by!
Labels:
Christmas,
Christmas in July,
Die Cutting,
Karin Markers,
Pink & Main,
Tag,
Watercolor
Wednesday, May 19, 2021
Miss Ink Stamps | Swiss Dots and Climbing Roses
Watercoloring is my favorite method of coloring and it was so relaxing to color the Climbing Rose Stamp Set from Miss Ink Stamps with my Karin markers!
I stamped my images with a black pigment ink and clear heat embossed them making it easier to watercolor and added easy color with Karin Brushmarkers. I colored some extra leaves, but you don't really need them. The large vine is full enough on its own.
I added some light gray ink through the Swiss Dots Stencil around the image and created a sentiment strip with the Sunshine and Rainbows Stamp Set to finish my card. Thanks for stopping by!
This card came together quickly and I just love it! The Climbing Rose Stamp Set has a large vine image that takes the guesswork out arranging greenery. Perfect for crafters like me who overthink everything!
Labels:
Card,
Card Maker,
Card Making,
Heat Embossing,
Ink Blending,
Karin Markers,
Miss Ink Stamps,
Stencil,
Video,
Watercolor
Thursday, February 25, 2021
LDRS Creative February Features Day 1 | Watercolored Lily Card
Spring is coming to my craft room with the new LDRS Creative February release! I used my Karin Brushmarkers to color the gorgeous lily and make this card with my favorite color combo!
I cut the Mosaic A2 Cover Plate Die from white cardstock and added it onto an A2 card. I trimmed a piece of yellow hexagon patterned paper from the Pastel Patterns 6x6 Paper Pack to go along the bottom edge. I stamped the striped border and the script sentiment from the Lily Stamp Set with Raven Hybrid Ink and cut them out.
I added my elements with foam tape and that's all! Come back tomorrow for another springy card with the LDRS Creative February release!
I LOVE the new floral stamp sets from LDRS Creative. There is a large floral image, coordinating greenery, a little insect, a border, and a script sentiment with coordinating print sentiments. And the best part is the coordinating dies cut out the script sentiment! YES! I stamped the images from the Lily Stamp Set with Raven Hybrid Ink and heat embossed them with Clear Embossing Powder then colored them with Karin Brushmarkers. I used LDRS Creative Watercolor Paper and this stuff is AMAZING for watercoloring with the Karin Markers!
Labels:
Card,
Card Maker,
Card Making,
Die Cutting,
Heat Embossing,
Karin Markers,
LDRS Creative,
Video,
Watercolor
Thursday, February 18, 2021
Pink & Main | Hey Bunny Spring Card
We are just two days away from the new Pink & Main release! I have a card packed with new goodies to show you today, so let's jump right in!
Let's start with the pretty background! I used patterned papers from the new Happy 6x6 Paper Pack. I picked out two of the gorgeous patterns and cut them down to 3.25" wide. I used the full 6" in length for the striped piece and the remaining 2.25" from the blue patterned piece. I cut a strip of white cardstock to be 1/2" wide to cover the seam where the patterns meet. I decided to frame up my background with the pretty reverse scalloped shape in the Blessings Slimline Die Set ( previously released ).
Don't you just love this adorable bunny?! He's from the new Love Ewe Stamp Set - and he's got some friends, too! I stamped the image with black ink and heat embossed it with clear powder. This is a trick I like to do when I color with watercolors - it helps to hold in the color. I colored the image with just two colors of Karin Markers and cut it with the coordinating Love Ewe Dies.
Labels:
Card,
Card Maker,
Card Making,
Die Cutting,
Easter,
Heat Embossing,
Karin Markers,
New Release,
Pink & Main,
Sneak Peek,
Spring,
Watercolor
Friday, September 18, 2020
Whimsy Stamps Friday Frenzy | Vintage Wallpaper Sympathy Cards
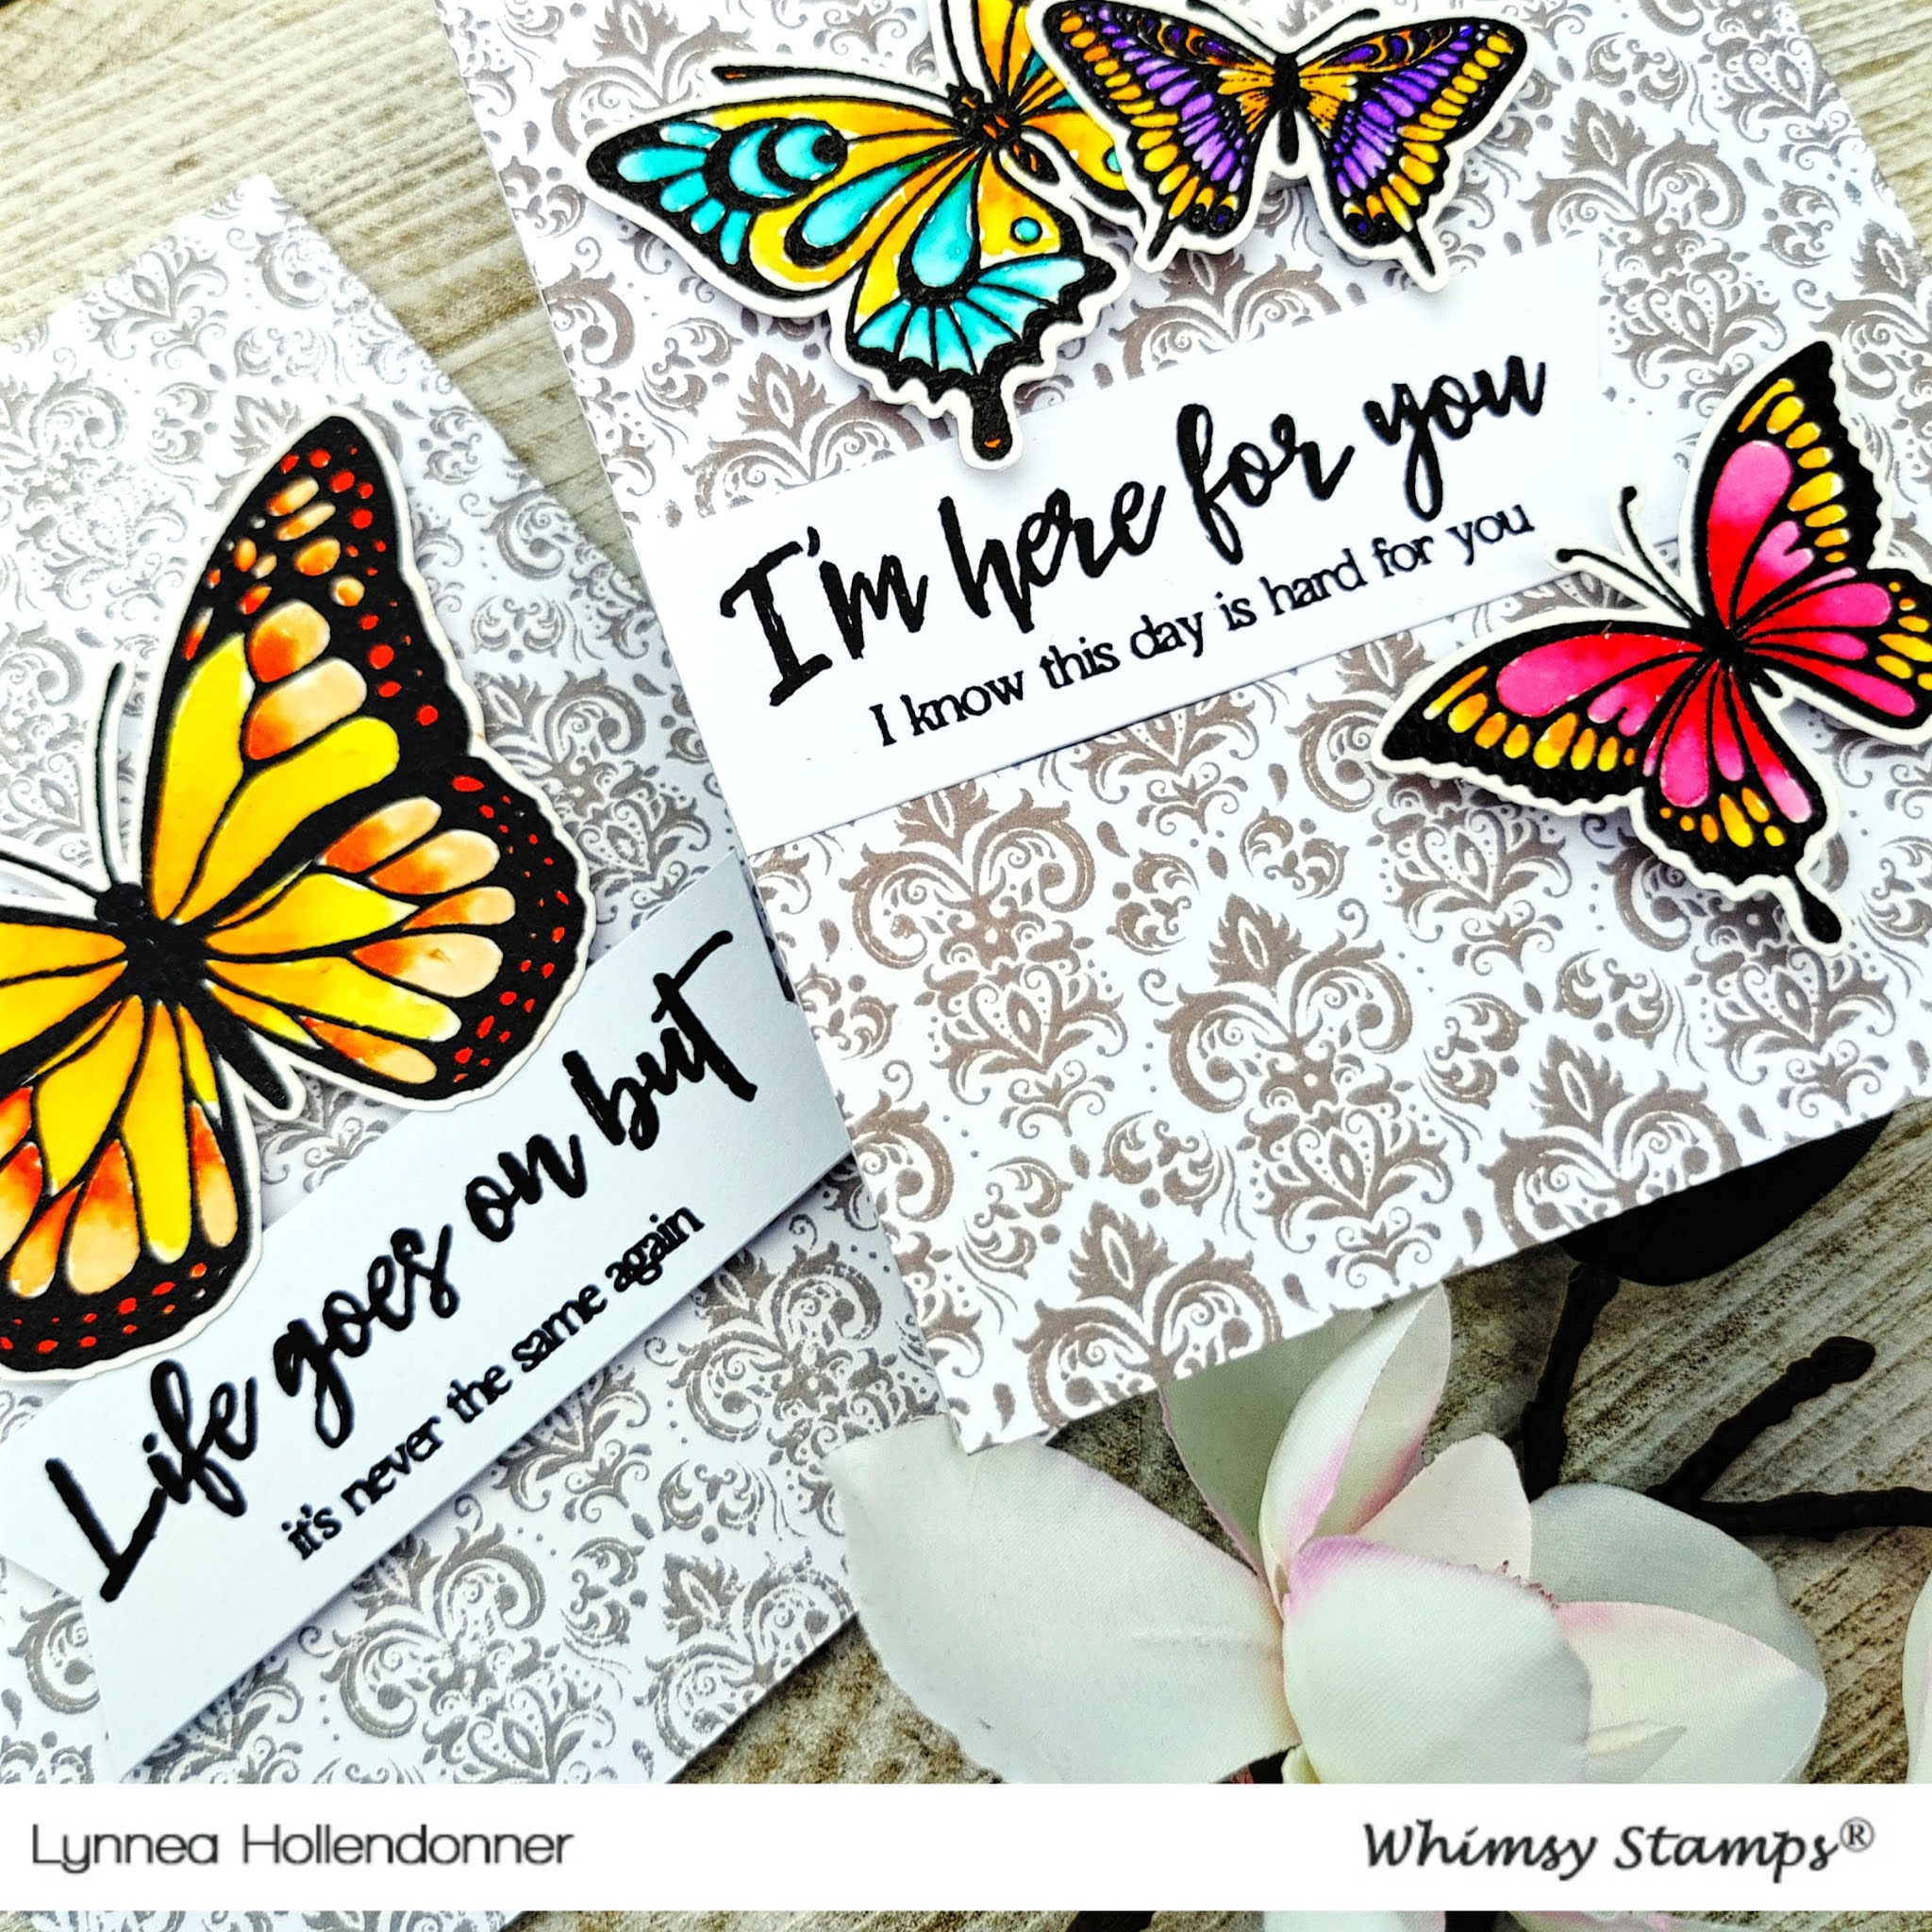
Unfortunately we live in a world where sympathy cards are necessary. I made two elegant butterfly sympathy cards with Karin Brushmarkers and other Whimsy Stamps goodies.
The Vintage Wallpaper Background Stamp could be used for a bunch of different card styles depending on which color ink it's stamped in. I decided to go with a light gray to keep the background subtle.
Labels:
Card,
Card Maker,
Card Making,
Friday Frenzy,
Karin Markers,
Sympathy,
Video,
Watercolor,
Whimsy Stamps
Monday, August 10, 2020
Pink & Main | Fabulous Pineapples
I often like to create my own backgrounds, so when I saw the cute little pineapples in the Let's Flamingle Stamp Set from Pink & Main I knew I had to make them the focus of a card!
I used my MISTI and lined up the big and the small pineapple from the Let's Flamingle Stamp Set next to each other so that I could easily shift my piece of watercolor paper up and down and left and right until I had lines of pineapples filling my background. I stamped with Versafine Onyx Black Ink and heat embossed with clear powder. This is a trick I do when I'm watercoloring. The embossing powder creates little "wells" resulting in pooling. This gives easy dimension!
You could use any number of coloring mediums to add color to the background, but I recently acquired some Karin Markers and I wanted to try them out! I chose a couple of colors and quickly scribbled color onto my background. I wanted to have a "messy watercolor" look, so I wasn't careful to make my scribbling pretty. Then I used a waterbrush and spread out the color. Quick and easy and messy! I decided I wanted my panel to have a stitched border, so I die cut the background with the largest die in the Stitched Rectangles 1 Die Set.
I wanted the focus of the card to be on the cute little pineapples in the background, so I chose a simple sentiment from the Let's Flamingle Stamp Set and white heat embossed it three times onto black cardstock. I trimmed them into strips. and added them to the top center of the card with foam tape then I added a bunch of clear liquid shimmer to the strips.
Only one thing left to do! Add a pop of color with some fun Pink & Main Enamel Shapes! It seems the ones I used on my card are out of stock, but the Preppy Brights Enamel Shapes would be an AMAZING substitute! That's all! Thanks for stopping by!
I used my MISTI and lined up the big and the small pineapple from the Let's Flamingle Stamp Set next to each other so that I could easily shift my piece of watercolor paper up and down and left and right until I had lines of pineapples filling my background. I stamped with Versafine Onyx Black Ink and heat embossed with clear powder. This is a trick I do when I'm watercoloring. The embossing powder creates little "wells" resulting in pooling. This gives easy dimension!
You could use any number of coloring mediums to add color to the background, but I recently acquired some Karin Markers and I wanted to try them out! I chose a couple of colors and quickly scribbled color onto my background. I wanted to have a "messy watercolor" look, so I wasn't careful to make my scribbling pretty. Then I used a waterbrush and spread out the color. Quick and easy and messy! I decided I wanted my panel to have a stitched border, so I die cut the background with the largest die in the Stitched Rectangles 1 Die Set.
I wanted the focus of the card to be on the cute little pineapples in the background, so I chose a simple sentiment from the Let's Flamingle Stamp Set and white heat embossed it three times onto black cardstock. I trimmed them into strips. and added them to the top center of the card with foam tape then I added a bunch of clear liquid shimmer to the strips.
Only one thing left to do! Add a pop of color with some fun Pink & Main Enamel Shapes! It seems the ones I used on my card are out of stock, but the Preppy Brights Enamel Shapes would be an AMAZING substitute! That's all! Thanks for stopping by!
Labels:
Card,
Card Maker,
Card Making,
Heat Embossing,
Karin Markers,
Pink & Main,
Watercolor
Subscribe to:
Posts (Atom)