Gatefold cards are a fast (and easy) way to bring a bit of fun to your projects. I have a quick step-by-step video on the LDRS Creative YouTube Channel showing how I made this card!
Now let's create the gatefold card base. I love gatefold cards because you don't need any fancy supplies or extra cardstock. Take a piece of standard 8 1/2" x 11" cardstock and cut it in half at 5 1/2" so that you have a piece of cardstock that measures 5 1/2" x 8 1/2". This is where you'd usually fold the cardstock in half to create a standard A2 card base, but we're going to mix it up! I scored at 2 1/8" from each end and folded the flaps toward the center to create a "kissing gatefold" card base.
I wanted to add a bit of texture and design to the background of my card, so I die-cut the Modern Geometric A2 Coverplate I Die from white cardstock and cut it in half at 2 1/8" and glued one piece to each of the gatefold flaps.
I adhered the floral cluster to the center of the card, being careful to only add my foam adhesive to the left side of the image (otherwise you'll glue the card closed!). Then I added a scattering of pearls around the card and to the centers of the flowers. That's it! Thanks so much for joining me!
I made 5 cards from the Best Friends Crafty Courtyard Kit and I still have SO MANY goodies left over! Most of my cardstocks and papers, a lot of embellishments, and of course the stamps, dies, and stencils! The possibilities with this kit are endless! And I only brought in a few additional elements - I had to add some adhesives and ink, and I chose to use the A2 Layered Rectangles Die Set to cut my cardstock and patterned papers ( but you could use a paper trimmer! ).
Be sure to watch my video above for a full step by step walkthrough for each of these cards! My first card uses the stamp set and patterned paper from the Best Friends Crafty Courtyard Card Kit. I decided to do a faux watercolor technique by stamping on the back of the heart stamp and spritzing it with water! I heat embossed the detail layer on top and added a chipboard sentiment strip.
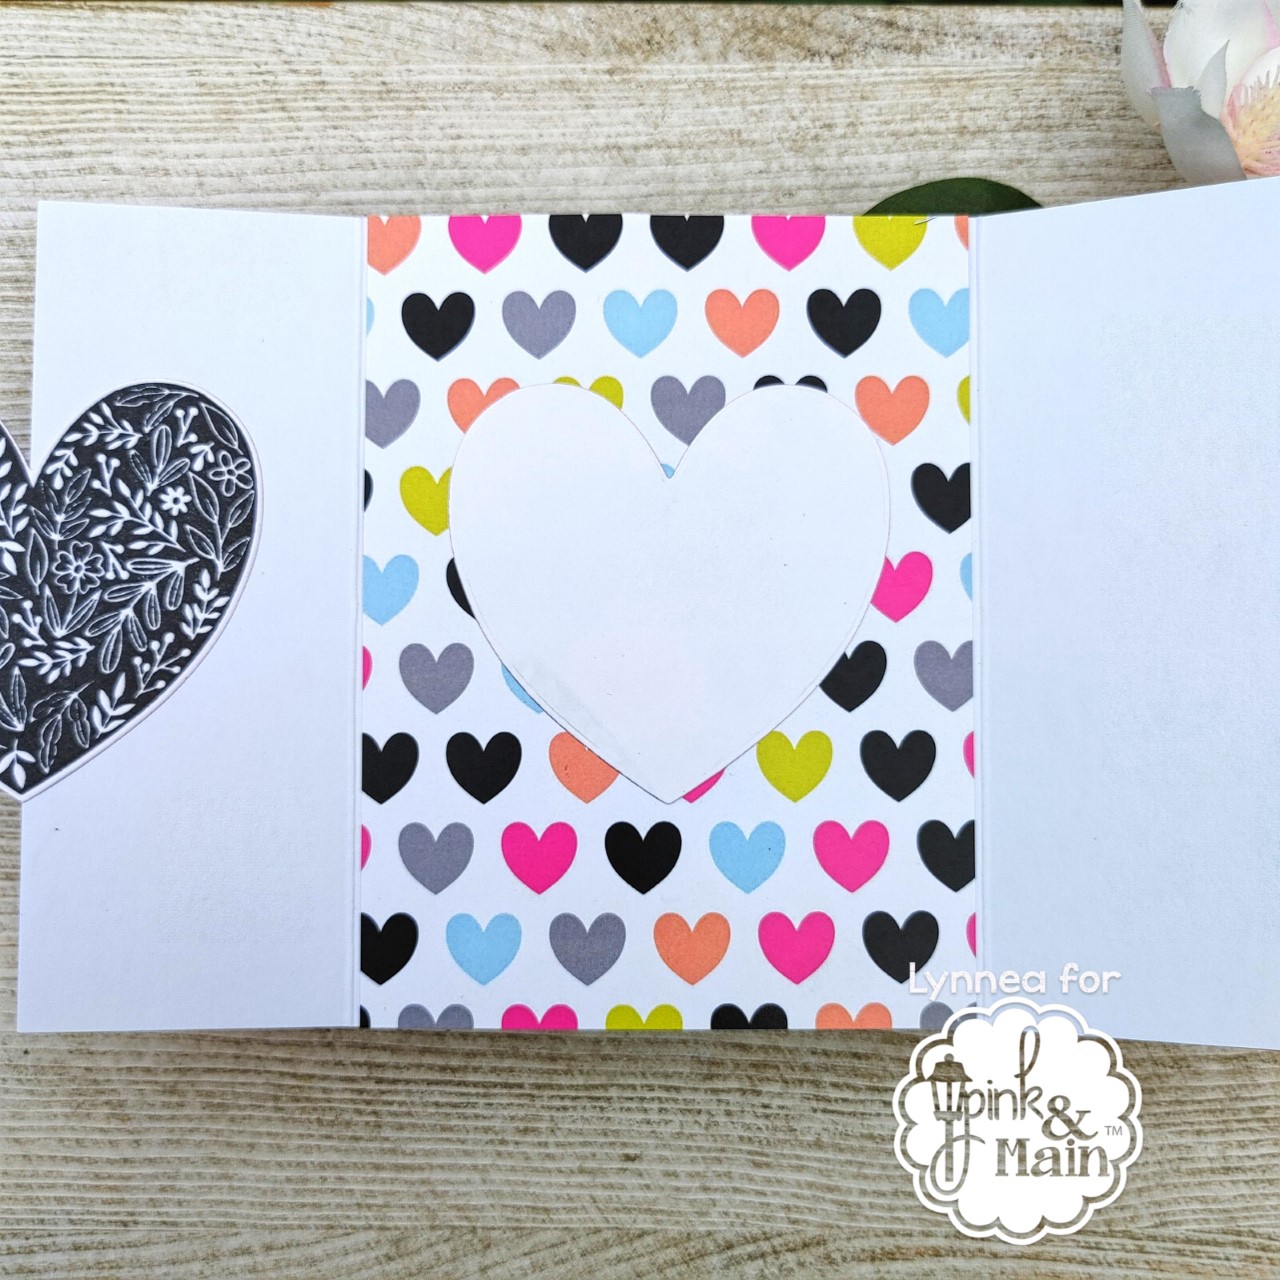
My second card is probably the most involved, but it's still super easy! I made a simple gate fold card and decorated the outside with cardstock, patterned paper, and a die cut stamp from the Best Friends Kit.
But I couldn't leave the inside empty! I used a matching stamped heart on the left flap and added some matching heart patterned paper!
It looks super fancy, but you'll see in the video just how easy it is to make!
My third card is one of my favorites! I had planned to stamp the hearts all over my background panel, but after stamping just two I realized how much I liked the simplicity! I used a yellow and pink ink to stamp the more solid heart image and black for the detail layered image. I added a stamped sentiment from the Best Friends Stamp Set and some glitter enamel shapes!
Here's another of my favorites! I used some gray ink and the Best Friends Stencil to create a background. Those cute little hearts and sentiment strip are from the chipboard stickers! No stamping on this card at all! Easy peasy!
My last card uses the Best Friends Stamp Set, patterned papers, and chipboard stickers. I stamped a sentiment and the leafy images from the stamp set and added the chipboard sticker flowers on top as well as just a couple of glitter enamel shapes. I trimmed down my panel slightly and added some pretty striped patterned papers!
I hope you guys aren't sick of gate fold cards because I'm surely not! Haha! I think they are such a fun way to bring some interest to a simple card! And they use the same amount of cardstock as a regular card base - just scored in a different way.
I started this card like I would any regular card - with a piece of 5.5" x 8.5" cardstock. Instead of scoring it in the middle I scored at 2 1/8" from each end and folded the flaps in to meet in the middle forming my gate fold card base. I taped the card onto my glass work surface and used 1/2" masking tape to mask off equally spaced 1/2" stripes on my card. I have a heavy hand when I blend inks, but I decided to push myself and try to do a center fade ink blending technique. I grabbed In Your Face Orange and Lantern Yellow hybrid inks from LDRS Creative and used ink blending tools to blend inks onto my card keeping the ink dark on the edges and using a light hand as I blended towards the center of the card. This gives me a cool highlight going down the center of my card! I kept the masking tape in place and added some black ink spatters with watercolor for texture.
The watercolor spatters bled through the front of the card base onto the inside of my card - but that's no problem! LDRS Creative has tons of amazing 6x6 paper pads with cute patterns! I used the orange striped pattern from the new Sweater Weather 6x6 paper pad and the black checked pattern from the Sweet Sensations 6x6 paper pad. The Sweet Sensations paper pad is definitely not for Halloween, but I really encourage you to look at your summer products in a different way and use them outside of their intended seasons! I thought it would be difficult to write a message on the inside of the card with the patterned paper, so I die cut a piece of white cardstock with a die from the Scalloped Rectangle Frames die set and centered it on the inside of the card.
The background turned out kind of like candy corn, don't you think? It's a happy accident! Originally I was going to blend the orange on the outside and into the yellow on the inside and something made me want to alternate the colors and I'm so in love with the results! I stamped out the vampire boy image and some coordinating cuties from the Halloween High Jinks stamp set and colored them with alcohol inks and cut them out with the coordinating Halloween High Jinks die set. I arranged everything onto a die cut scalloped circle from the Scalloped Circle Frames die set. I glued the scalloped circle onto the front of the card making sure to only add glue to the left side of the circle so that I didn't glue the card shut.
I added some clear glitter to my images and that finishes this cute card! I hope you love it!
I've been obsessed with gatefold cards lately! I love that they still fit into a regular envelope, but it's a special surprise fold for the recipient! And it's almost effortless to create a gatefold card versus a regular top folding card! I have a video showing you just how I made this card!
I started this card with a piece of cardstock just like I would for any other card - my starting cardstock piece is 5 1/5 x 8 1/5 inches and I scored at 2 1/8 inches from each side. That gives me a finished card size of 4 1/4 x 5 1/2 inches with the edges of the card folding in to the middle! I stamped out the whale and fish images from the Whale Wishes stamp set and colored him with alcohol markers and cut them out with scissors.
I wanted to use the Puddle Jumper 6x6 papers to brighten up my card and I love that they are double sided! I picked out a few patterns to decorate the front and inside panels of my card - keeping to yellow mostly yellow and blue patterns and used liquid glue to adhere them. I used the Practically Oval die set to cut two more patterns of paper - one with the largest oval and one with the smaller scalloped oval die. I wanted the ovals to layer, so I added the scalloped oval to the left side of the card and the larger oval to the right side of the gatefold card. When you open and close the card the ovals layer and peek out from behind! And this is where the double sided papers come in handy because you can see the reverse side of the patterns! Watch my process video for tips and tricks on adhering the layers together!
I finished the card by stamping sentiments from the Whale Wishes stamp set with Raven Hybrid Ink and hiding them behind each other. Usually I don't decorate the inside of my cards, but I decided to stamp some fish for a finishing touch! Thanks for stopping by today!
Hi! Are you ready for ThermOWeb and Joy Clair collaboration week!? Today I'm trying out a new to me technique - heat embossing on foil! The results are so fabulous! And I used the GORGEOUS Lion and Lamb stamp set from Joy Clair to create a fun gatefold card! And there's a short video tutorial at the end of this post!
I used iCraft Easy Cut Adhesive Sheets to easily transfer some Dazzling Orange Gina K Designs Fancy Foil onto some cardstock and then heat embossed the lion head images onto the foil. This was my first time heat embossing on foil and I'm so impressed with the results! I created a gate fold card by folding a piece of 8.5 x 5.5 inch cardstock at 2 1/8 inches from both sides and folded the flaps in to meet in the center. I used some iCraft White Foam Squares to adhere the heat embossed images onto my card! You can visit the ThermOWeb blog for a complete list of the products I used for this card!
Hey, everyone! I'm so excited that The Rabbit Hole Designs is a super sponsor for the Spring/Summer Coffee Lovers Blog Hop! To celebrate The Rabbit Hole Designs is offering free shipping on orders of $25 or more (before taxes and shipping - US orders only) for the duration of the hop! (no code necessary, exclusions apply) But there's even more exciting news! All orders placed during the hop of #35 or more (before shipping and taxes) will receive a new 2 x 3 inch stamp set - Handmade Brew! (**while supplies last**) Please note - a limited number of these stamp sets have been set aside for those wishing to purchase them.
Are you ready to see my card? I used the Caffeinated Dino stamp set along with the new Perfectly Blended stamp set to create a simple gatefold card! I have a video at the end of this post showing how easily I created this card!
It is super simple to create the base of a gatefold card - I cut a piece of cardstock in half so that I had a piece 8" long by 5.5" tall. Then I score at 2 1/8" inches from each end. Fold the side flaps in until they meet and boom! Simple base for a gatefold card!
I die cut the Basket Cover Die from kraft cardstock backed with double sided adhesive. I adhered it to one of the side flaps and cut off the excess. This leaves me with enough to perfectly adhere to the other flap! To decorate the front I colored the Caffeinated Dino image and stamped the sentiment from the Perfectly Blended stamp set. I added foam squares to the right side of each of them and adhered them to the right flap of my card. It doesn't matter which side you adhere your images to - but you want to make sure you only adhere them to one side or you won't be able to open your card.
I decided to stamp the Caffeinated Dino on the inside of my card using a light gray ink to add some interest to the inside. Check out my video below to see just how simple it is to create a gatefold card!
Thanks so much for joining me today! Remember to check out The Rabbit Hole Designs blog this week to see more inspiration! Tomorrow Martha will be sharing her project!