Boo! 👻 It’s Halloween, and I couldn’t resist sneaking in one more spooky project! I grabbed my LDRS Creative Halloween Postage Collage Stamps and Stencils, added in the Postage Collage Masks, and got to work creating a fun and colorful card packed with Halloween spirit.
I wanted to mix the Halloween Postage Collage 4x6 Stamps and Layering Stencils in a different way, so I did some creative masking, and and only stenciled the top right, middle left, and bottom right scenes. Then I grabbed the Postage Collage Mask Stencils and did some ink blending onto the top left, middle right, and bottom left portions. I used icons from the Halloween Postage Collage 4x6 Stamps to fill in the stenciled areas and make them look like spooky Halloween scenes.
I stamped some sentiments and icons from the Halloween Postage Collage 4x6 Stamps and cut them out with the Postage Collage Dies and also used the largest die to cut out my panel. I layered it onto some pink and orange cardstock, and this card is done! Wishing everyone a safe and happy Halloween!
The weather is changing, there's a chill in the air, and Halloween is ALMOST HERE! Get ready for the spookiest time of the year with the Haunted Collage Stamps and create spooky, scary projects in no time!
This card is so easy to make and would be perfect for mass production for kids, teachers, or anyone who loves a good spook! I cut a white piece of cardstock using the Mixed Scallop Rectangle Dies and stamped a "base" for my card with the Ledger 3x4 Stamp. I stamped the rest of my design using the Haunted Collage 4x6 Stamps and a few colors of ink. I like to stick to just a handful of colors, but you could push the envelope and use a bunch of colors if you wanted!
I layered another die-cut panel from the Mixed Scallop Rectangle Dies onto an orange card base and popped the stamp panel up with foam to complete the card. That's it! Thanks for joining me!
Eeeek!! Halloween is in just over a week! It's time to kick those spooky projects into high gear! Join me on the LDRS Creative YouTube Channel for a stack and collage spooky Halloween tag that you can attach to a gift or add to a card.
I love stacking and collaging! It looks like a lot of time and effort went into creating a project, when really it's just casual stamping! I used the Any Size Tags Dies to create a basic tag shape and stamped the Ledger 3x4 Stamp in the center. I wanted to have a big and bold sentiment in the center, so I used the Kringle Numbers Jumbo 4x6 Stamps to stamp the "31" in black ink and then filled in around the numbers with icons and sentiments from the Wicked Collage 4x6 Stamps.
I wanted to have something special in the background, but something that wouldn't distract too much from my focal point tag. I trimmed a piece of black cardstock and cut it with the Quilted Plaid A2 Coverplate Die and added it to a card base with a bit of gold for some shine.
It's spooky season! I inked up some jack-o-lanterns, spiders, black cats, and all kinds of creepy crawly sentiments and created a collaged card perfect for Halloween!
I trimmed down my white panel to 5"x3.75" and added it to an orange mat and then popped that up onto a black card base. That's it! Quick, easy, and so spooky cute!
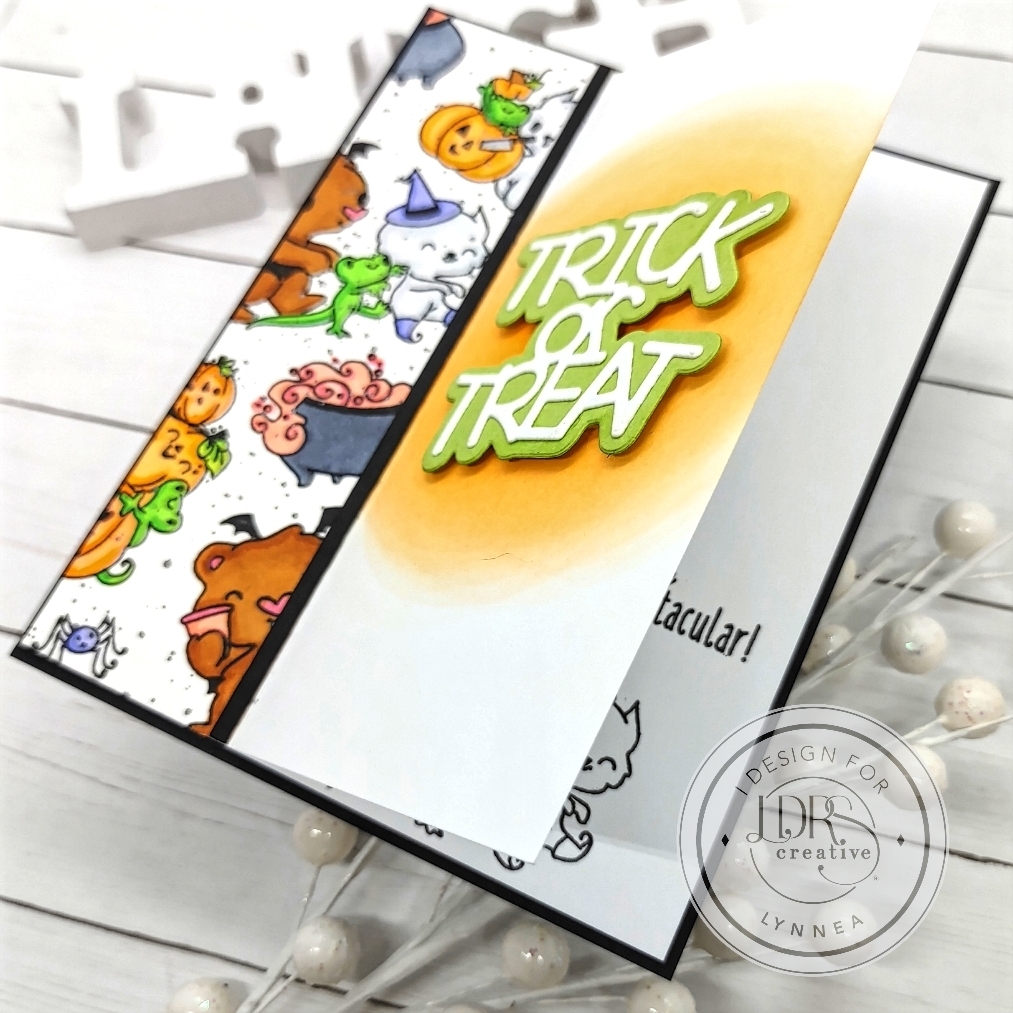
It's amazing what adding an extra fold to your card can do! I have a last minute Halloween card made with LDRS Creative goodies to share with you!
I started by stamping images from the Halloween Party 4x6 Stamps onto a strip of 1 3/4" x 5 1/2" white cardstock with Raven Hybrid Ink and colored them in with alcohol markers.
Now it's time to make the fun fold card. It's SUPER easy! I started with a piece of 5 1/2" x 8 1/2" piece of cardstock (half of an 8 1/2" x 11" sheet of cardstock) and scored it at 2 3/4" and 4 1/4". Fold it in half at 4 1/4" and you'll have a regular side fold card and then fold on the second score line and you'll have a sort of "Z" shaped card. I added a bit of ink blending with In Your Face Orange Hybrid Ink onto the right side of the card to be a halo behind my die-cut sentiment and started putting the card together.
I adhered the stamped and colored strip of cardstock onto the left side of the card and trimmed off the excess. I added the strip of black cardstock right along the edge of the score line to give it a finished edge and popped up my die-cut sentiment. Then I glued the folded portion of my card together so that the card only opens on the 2 3/4" score line. I wanted to add a black mat, so I cut a piece of cardstock slightly larger than my card (4 3/8" x 5 5/8") and adhered the card to the black piece.
I usually leave the inside of my cards blank, but I thought this fun fold card called for something special! I stamped some critters and a sentiment from the Halloween Party 4x6 Stamps on the inside of my card and that's it! I hope you enjoyed this fun card!
It's time to share some Fall-themed inspiration using the latest release from LDRS Creative! Visit my YouTube Channel to see how this cute and spooky card came together!
It's time to get spooookkyyyyy!!! You all know how I love to create my own patterned papers with small stamps and a bit of ink spattering! I used the LDRS Creative Graveyard Ghouls Pocket Pals for this fun card. Find the tutorial for this card on my YouTube Channel!
I love creating Pirouette backgrounds, but I'm always looking for ways to turn the products I have in my stash into something new. I have to confess - I'm not a super creative stamper, but I had an idea and I couldn't let it go! I wanted to create a "reverse" pirouette. I wanted the pattern to come in from the outside instead of starting at the center and branching out. After a while of sitting at my desk trying to think of a creative way to accomplish my idea I got frustrated and walked away. Then it hit me! I would create a traditional pirouette and then cut it up and piece together my background!
I started my card just like I would to create a traditional circular pirouette. I cut a piece of cardstock to 4.25" square and placed it onto my Pirouette Pattern Template and stamped multiple images from the Trick or Treat Pirouette Stamp Set using Raven, Plum Crazy, Tropical Sea, In Your Face Orange, Dan-D-Lion, and Alloy Hybrid Inks. The process of stamping and turning and stamping and turning is quite easy and builds beautiful backgrounds! You can watch the process in my video above. Once my background pattern was complete I cut my paper in half at 2 1/8" and then in half again so that I had four 2 1/8" squares. I placed them on my desk the way they were originally meant to line up and turned each of them twice so that the inside portion was now facing towards the corners. VOILA! It's perfect!
I stamped a spider web, some ghosts, and a sentiment from the Trick or Treat Pirouette Stamp Set and added them to my background with foam tape. I cut a piece of patterned paper from the Haunted Halloween 6x6 Paper Pack to 4 3/4" square and mounted all of my pieces onto a 5" square card. That's it! It's so easy and I LOVE the way it turned out!
I stamped the house and some critters from the Welcome Home Stamp Set and colored them with Copic Markers and fussy cut them leaving a slight white border.
I stamped the large "spooky" and a coordinating sentiment strip from the Halloween Sentiments Stamp Set and added them near the bottom of my card. I added all my critters with foam tape and covered them with shimmer. That's it! Thanks for joining me!
I used a stamp that's intended to be cut out and used as a focal point piece for my background. And I varied the colors of Hybrid Inks that I used to make it even more interesting! I filled in the card with jack-o-lanterns, ghosts, and spiders from the Trick or Treat Pirouette Stamp Set.
I stamped and die cut a spider web and sentiment to sit in the center of my card and popped them up with foam tape.
Things are spooky on the LDRS Creative blog today as we kick off the September features! I made a shaped slimline card with a mini scene!
I mixed together two Halloween stamp sets on my card - one from this year and one from last year - Trick or Treat and Spook Ya Later. They go perfectly together!
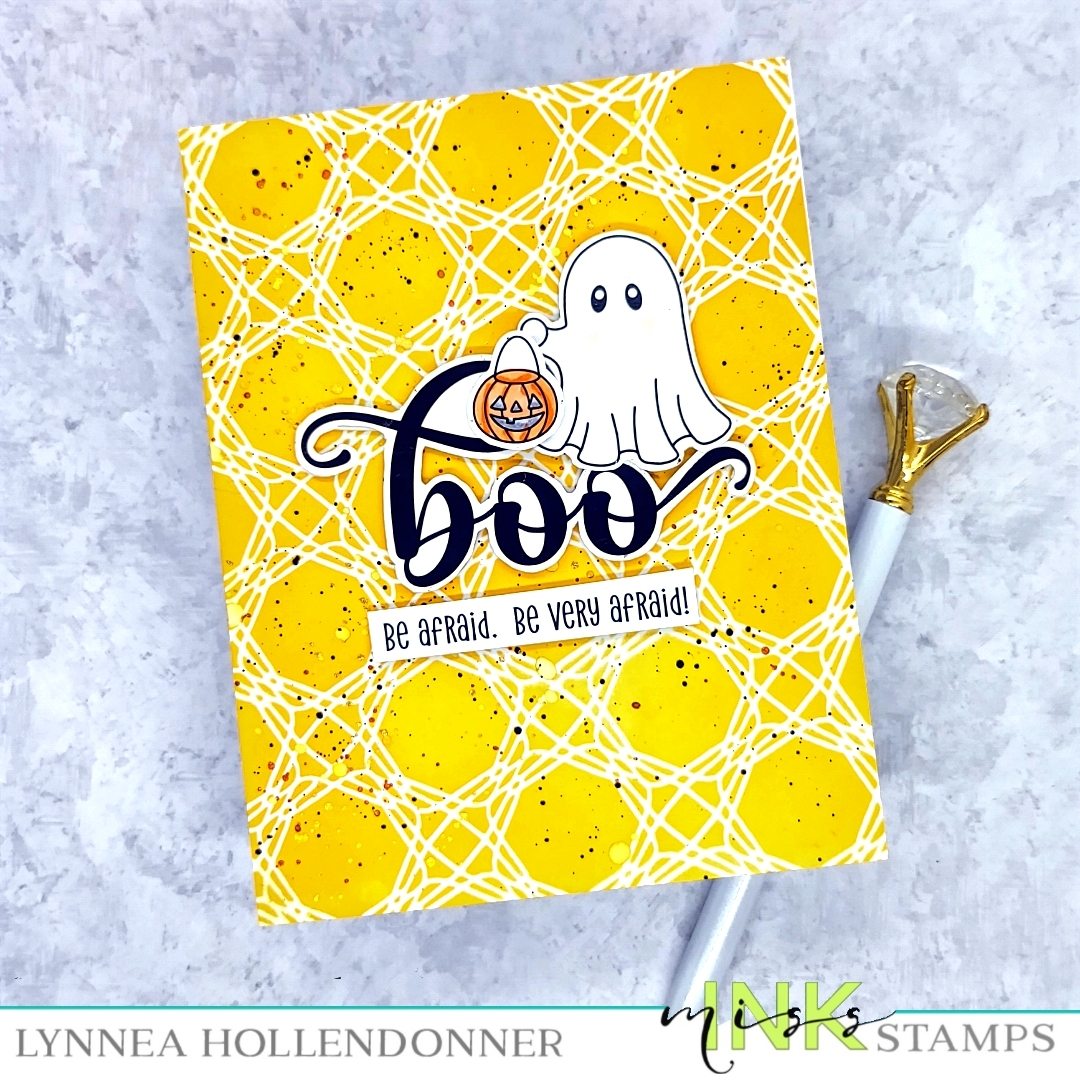
It's sneak peek time for the new Miss Ink Stamps release! I'm using the new Boo Sheet and Halloween Sentiments Stamp Set on this cute and spooky card. All of the new products will be available on Tuesday the 21st!
I started with a simple background - just a bit of yellow ink over the Basket Case Stencil. I added a bit of texture by flicking on black, gold, and orange glitter watercolor.
I stamped the adorable ghost and his little bucket from the Boo Sheet Stamp Set (coming soon!) and colored them with Copic Markers and cut them out.
I am obsessed with the Halloween Sentiments Stamp Set! There are big sentiments and smaller sentiments that you can mix together. I stamped the large "boo" and cut it out and then stamped a coordinating sentiment onto a strip.
I stamped the cute little ghost from the All About the Boos Stamp Set and colored it with Copic Markers. I kept the colors to traditional Halloween colors, but you could mix it up and throw in some pink or aquas to be different!
I created a simple shaker frame and glammed it up a bit by adding some Green Sketch Brutus Monroe Foil. Watch my video above to see how easy it is to bring some extra glam!
Thanks so much for joining me on this spooky tutorial! See you again soon!
Hey, hey! I am going live on the Trinity Stamps Facebook Page TODAY at a new time - 12pm CT/ 1pm ET! I'm creating a spooky ink blended card with a bit of Glitz Glitter Gel for some extra shine. See you there!
I have been loving the Pirouette Pattern Templates! So much fun to be had! Backgrounds have always been my favorite part of the card - that's why I start with the background and work around that. Very rarely do I have a complete picture of the card in my head when I sit down to create. I work on the background and let the background carry the card and I think that's why I love the Pirouette Pattern Templates so much. I am able to stamp and customize my backgrounds with the images and colors I want.
I cut a piece of spider web patterned paper from the Trick or Treat 6x6 Paper Pack to 4.75" square and then matted everything onto a 5x5" square card. Thanks for joining me for this spooky card!
I love to make Halloween cards, but I am definitely more cutesy spooky than scary! I mixed together some stamps, dies, and papers from Pink & Main for this cute and spooky card!
I colored my images with traditional Halloween colors, so I thought it would be fun to add a bit of something nontraditional to my background. I chose two colors of matching polka dot patterns from the Pumpkin Season 6x6 Paper Pack and trimmed the aqua to 4.25" x 5.5" and die cut the orange piece with a die from the Zig Zag Circles Die Set. I have been obsessed with this die set! I just love it! I thought the background needed something else to help break up the matching patterns so I die cut white cardstock using the Plaid Cover B Die and glued that on top of the aqua piece. I added my images and a sentiment from the Batty for You Stamp Set with foam tape.
I finished off the card with some pearls from the Pastel Pearls Pack - they match the background perfectly! Thanks for coming on this cute and spooky journey with me!
I die cut the shaped cup from the Trini-Tea Cup Card Die Set and used a Blending Buddy to blend on orange ink and then added the black die cut shapes to create a jack-o-lantern tea cup.
You can also create a little ghosty! Look how scared he looks! And if you don't want to put these pieces onto a cup you definitely don't have to! You can use them on their own to create spooky cards!