Showing posts with label Concord & 9th. Show all posts

Saturday, February 26, 2022

Annalisa's 1K Subscriber Video Hop

Welcome to Annalisa's 1K Subscriber Video Hop! I'm honored to call Annalisa my friend and so proud of her HUGE accomplishment!


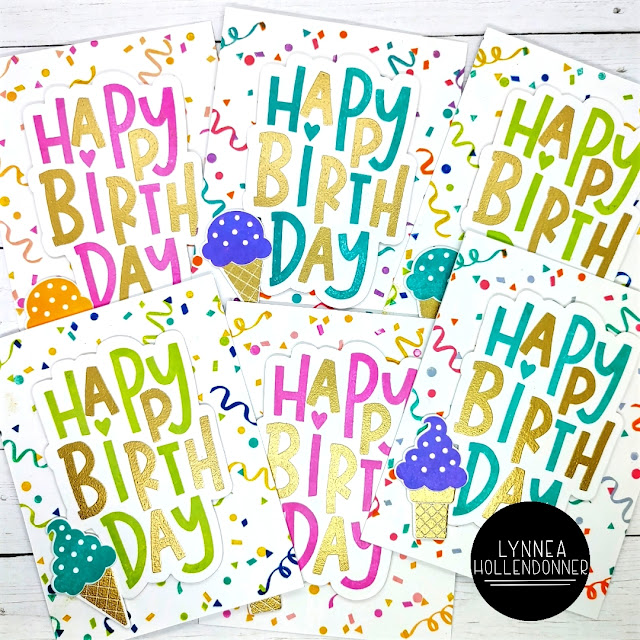
One of Annalisa's favorite techniques is heat embossing, so you'll see lots of heat embossing inspiration throughout the hop! I kept it simple with. some heat embossed sentiments and solid images for my set of cards. 


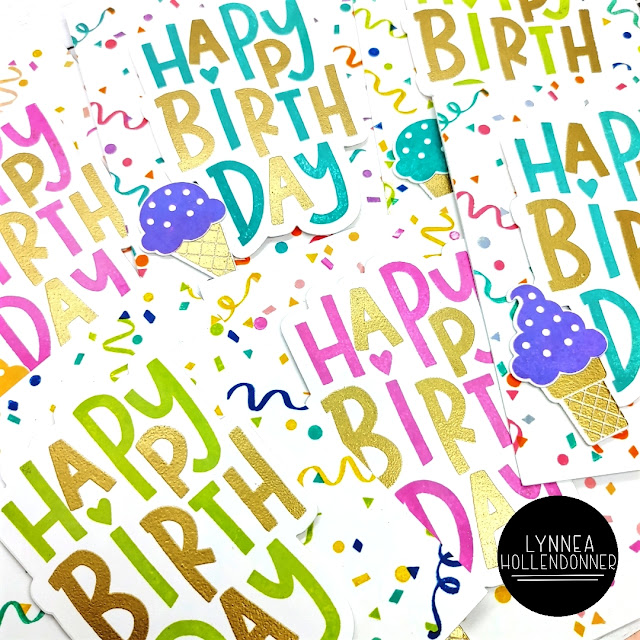
I really need to work on bulking up my stash of birthday cards, so I grabbed some Concord & 9th birthday themed products that were still fresh and new in my craft room! 


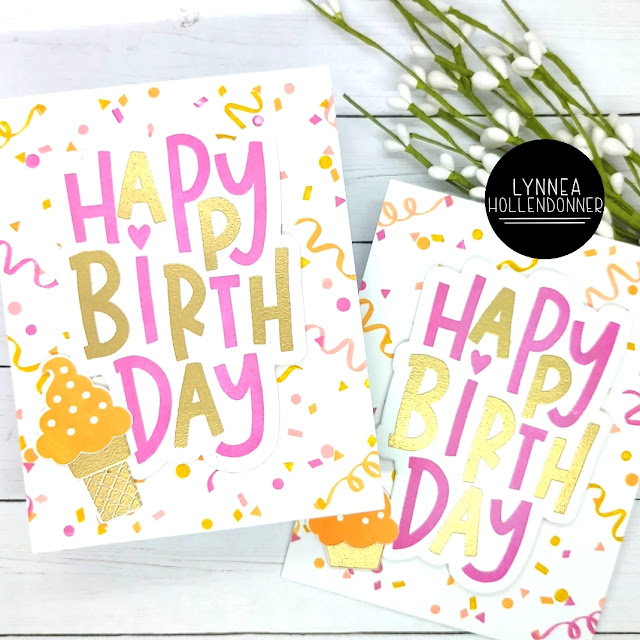
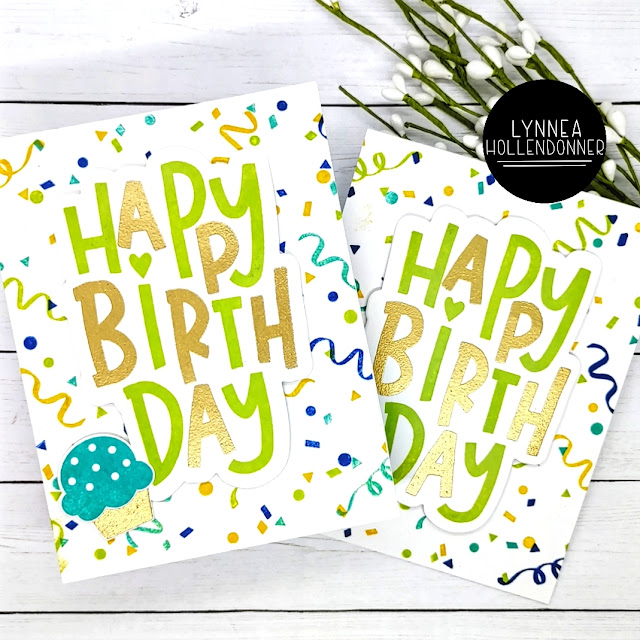
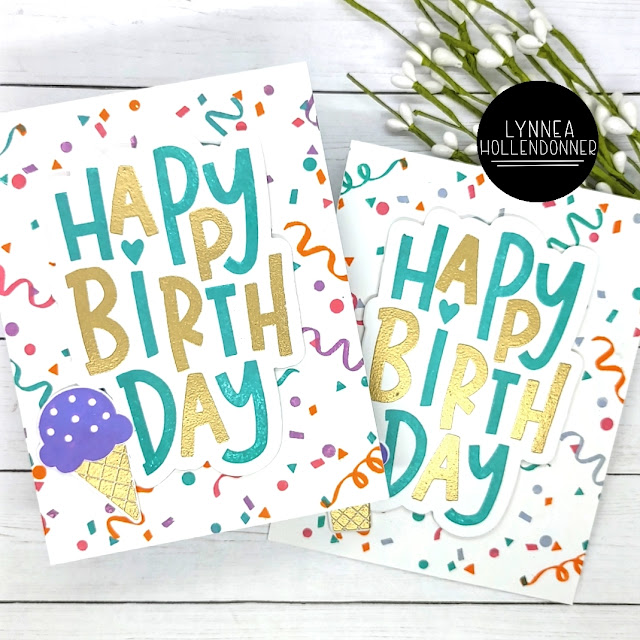
I used a variety of LDRS Creative Hybrid Inks along with the Concord & 9th Celebrations Turnabout Stamp Set and made six backgrounds in a variety of colors. I created doubles of each color scheme to make the process go faster. I stamped the large sentiment from the Concord & 9th Birthday Scoops Stamp Set using a mix of colored inks and Versamark with gold embossing powder. I used the Birthday Scoops Coordinating Die Set to cut out the sentiment and pop them up onto the cards. 


I stamped the ice cream and cupcake tops from the Birthday Scoops Stamp Set with colored inks and then heat embossed the cupcake wrappers and cones for another pop of shiny gold color. 


I hope you enjoyed this set of cards! And a HUGE congratulations to Annalisa for hitting the 1K YouTube subscriber milestone! 

Thursday, September 9, 2021

InkOn3 | Atelier Ink Cube Instagram Hop + BONUS GIVEAWAY

There are new Atelier Mini Ink Cubes in town and we are celebrating with an Instagram hop! Read below for giveaway details and then head to my YouTube video for a BONUS GIVEAWAY! 


I used the new Atelier Mini Ink Cubes on each of my three cards - the first I did stamp layering and the second and third cards use the same cubes for ink blending and stencil layering. 


I started by showing how easy it is to stamp with the new Atelier Mini Ink Cubes. These cubes are so juicy and vibrant! I stamped with the A Pocket Full of Happiness Mosaic Circle Builder Stamp Set and then ink blended Blackout Hybrid Detail Ink over the Taylored Expressions Triangle Toss Stencil for my background. The inks just POP against the black! 


I love ink blending with the Atelier Mini Ink Cubes as much as I love stamping with them! I created two ink blended backgrounds. The first one features the Taylored Expressions Half a Heart Layering Stencils. Be sure to check out the video above for tips and tricks for layering stencils! 


I saved the brightest and best ( I think! ) for last! Just look at how BRIGHT those Atelier Mini Ink Cubes are! I love all that color! I used the Taylored Expressions The Right Angle Layering Stencils for this one and it's definitely my favorite! 


I finished off all three cards using the Concord & 9th Big on You Stamp and Die Set. I wanted the colorful Atelier Mini Ink Cubes to be the focus of each of the cards, so I kept it simple with a bold black sentiment. That's it! Remember to head over to Instagram for a fun hop with lots of colorful inspiration and check out my YouTube video for a BONUS GIVEAWAY! Good luck to everyone! 

Saturday, August 28, 2021

InkOn3 | Floral Atelier Ink Watercolor

This card was so easy to make and it's one of my favorites I've made in a long time! I watercolored these gorgeous florals with InkOn3 Atelier Inks and they're just gorgeous! 


Atelier Inks are great for stamping and ink blending ... but I really LOVE the way they work as watercolors! They are so vibrant! I stamped the Concord & 9th Heartfelt Blossoms Stamp Set with Blackout Hybrid Detail Ink and heat embossed with Crystal Clear Fine Detail Embossing Powder. The embossing helps to keep the watercolor in the lines - which is something I definitely need! I used Goddess Green, Bee Sting Yellow, Sweet Petunia Pink, and Trinity Teal Atelier Inks to watercolor my background and then used the coordinating die to cut it out. 


I created a peek through background by stamping the Altenew Pinstripe Stamp with Blackout Hybrid Detail Ink and popped up my watercolored image on top with foam tape. I wanted a sentiment that would perfectly match my background, so I blended Trinity Teal Atelier Ink onto white cardstock and then die cut the sentiment. The color of the sentiment perfectly matches my watercolored frame! 


I finished off this pretty Atelier Ink watercolored card with some pastel pearls. Thanks for joining me! 

Friday, November 29, 2019

Crafty Festival of Christmas - Easy Mass Produced Cards

Hello! I'm so excited for the second week of the Crafty Festival of Christmas! This week you'll see inspiration for mass produced or fancy folded Christmas cards! Just what we need this time of year! I'm going to be showing you an easy mass produced design. So simple that I was able to make 50 of these cards quite easily! And I have lots of tips for you in my video below!


Probably my biggest tip for making mass produced cards is to pick a clean and simple design. I'm not good at coloring. It takes me HOURS to color! No joke! So for me I need to choose a design that involves stamping instead of coloring. And it really really makes things faster to use a stamp platform. My favorite is the MISTI! I used it in just about every step for these cards! Check out my video above for even more tips for mass produced cards!


I chose to use the Snow Flurry stamp set from Concord & 9th because of the large snowflake image. It takes up almost the whole card front! I stamped the snowflake in a mint ink on all 50 of my cards with my Mini MISTI before moving on to the next step. This helps make things go faster! I filled in the inner part of the snowflake with some ice blue ink. Again - I did this for all 50 of my cards. I added a sentiment from the Snow Flurry stamp set with Versafine Onyx Black Ink right on top of the stamped snowflake.


I wanted to add some fun embellishments to my cards, but since I was making 50 of them I needed something simple. Pink & Main has a whole bunch of Glossy Dots and I really love how the Rose Gold Glossy Dots pair with the mint and blue stamping in the background! I hope you got some helpful tips and tricks for creating mass produced Christmas cards! And now you can hop through the rest of the blogs for more mass production or fancy fold Christmas cards!


Blog Hop


Lynnea Hollendonner - YOU ARE HERE!


Thursday, October 11, 2018

Concord & 9th Thankful Leaves Turnabout Cards

Hi! I have a few cards to share today using the Thankful Leaves turnabout stamp from Concord & 9th! I LOVE making fall themed cards, but I rarely get the time to mail them - so this year I made it a point to mail my friends a fall card! Now that they've received them I can share with you, too!


I did a video a while back on how I let the turnabout stamp hang off the edge of my paper. I liked it so much that I used the technique again! I used Oxide inks and added a gold foil leaf die cut!


Of course I thought of falling leaves while using this stamp set! I grabbed a bunch of inks - yellow, orange, red, and brown - and used the rock and roll technique to give my stamping a gradient of color!


For my last card I used the turnabout stamp in the original way - to fill up the whole card front!


I added a gold foil cardstock leaf die cut and a vellum sentiment on top of the leaf! I hope these cards made my friends smile! Thanks for joining me!


Monday, September 17, 2018

Concord & 9th Snowflakes Turnabout

Hello! I still have some fall cards to share with you, but I just got a package of gorgeous snowflake stamps from Concord & 9th and couldn't wait to make some cards! 


I used the Snowflakes Turnabout stamp and stamped it only once onto my cardstock. Since I had my stamp mounted in my MISTI I decided to make a couple of cards. I changed the position of my cardstock slightly each time I made a new card so that each one would be unique...just like a snowflake! This Turnabout stamp can be stamped 4 times with 4 different colors of ink, but I LOVE the look of it stamped just once! I used Broken China Distress Oxide ink for the snowflakes and stamped the GORGEOUS sentiment from the Snow Flurry stamp set and used some Ranger Liquid Platinum embossing powder to make it pop.

I made more cards with these stamps, so check back soon for more inspiration!


Friday, August 31, 2018

Thankful Leaves Turnabout Clean and Simple Card

Hi, everyone! Today I have a video sharing a quick clean and simple card using the new Concord & 9th Thankful Leaves Turnabout stamp set and some Distress Oxide Inks.


I used Vintage Photo Distress Oxide ink for the sentiment and Wild Honey, Fossilized Amber, Spiced Marmalade, and Fired Brick Distress Oxide inks for the four turns of the turnabout.


I added some gold watercolor spatters and some blue and gold foil cardstock to the left side of the panel and that's it! Check out the video below:


Thursday, July 26, 2018

Painted Rose Card Set

Hello! I'm here with a quick and easy card set using the Painted Rose stamp set from Concord & 9th! It's a gorgeous stamp set and the rose image is big enough to almost cover a card front!


I used my MISTI so that I could easily create multiple cards at once. I started with the black outline and sentiment and then added the floral ink layering on top of that. I found that the easiest way to line up the stamps. I used the lightest color of ink to add some spatters across 3 sides of the card. I had three cards in about 10 minutes!


Saturday, December 23, 2017

Last Minute Shiny Christmas Cards

Hello, everyone! Merry Christmas to you on this day before the day before Christmas! This is truly a magical time for me and my family and I hope it is for yours, too! I have two cards on the Butterfly Reflections, Inc blog today! I've made a few Christmas cards the past couple days and I can't wait to share them! I'll leave the photos here, but be sure to head over to the Butterfly Reflections, Inc blog to see more photos and all of the details!


I wish all of you a Merry Christmas!


Friday, December 22, 2017

Classic Christmas Card

Hello! I have a clean and simple Christmas card to share with you! I made a whole set of these as a special order for someone and I thought I would share them! I just love the way this card turned out and I love how classic the design is! 


I started by stamping the main image from the Concord & 9th Ornamental stamp set and heat embossing it with Hero Arts Gold embossing powder. I chose to fill the ornament with the large sentiment, but this card would look stunning using the floral images to fill in the ornament as well! I think I might try that!

I used my Gansai Tambi watercolors to mix up a blue - I used mostly cornflower blue with a bit of cobalt blue. Then I used a large round brush and simply watercolored in a circular shape around the ornament. Once it was dry I used a mixture of white acrylic paint with a bit of water and added some spatters to mimic the look of snow.

This set of cards is so classic and elegant! I love it!


Friday, December 1, 2017

Concord & 9th #FeatureFriday - Dahlia Turnabout

Hello! I can't believe it's already my last guest design post for Concord & 9th! This month has FLOWN by! Today I'm using the Dahlia Turnabout. This is my absolute FAVORITE from the November release. I've always been a fan of the turnabout stamps and I love that this one is smaller! I made a bunch of projects again, so let's get started!


Let's start with one of my favorites, shall we? This card is such a happy accident! This is the first time that a turnabout stamp has come with a matching die and I love it! I was messing around with the die trying different techniques - what it looked like cutting once or all four times, etc. I was stacking up all of my scrap pieces in a pile and my husband walked by and commented how cool my new card was! Little did he know he was looking at my garbage pile! But lo and behold...he was right! So I stacked up all of my pieces and added a happy die cut from the Bits & Pieces stamp set!


I love how it looks like one of those layering dies that are all the rage right now!


For this card I stamped the dahlia image four times and white heat embossed the image. Then I watercolored over the top with Gansai Tambi colors. I added about 5 layers of color because I wanted the image to really pop. I heat embossed the greeting and added some Nuvo drops!


This was actually the first time I stamped this image and again it was just me messing around and practicing! I loved the color combo so much that I made it into a card! The sentiment is from Bits & Pieces stamp set and added some Sparkling Clear sequins from Pretty Pink Posh.


I loved my other watercolored card so much that I did another version! I love the little pops of black!


Tis the season for stretching stamps to be Christmas stamps!! My original plan was to do a trio of dahlias, but I thought the card wouldn't be balanced if I did a third dahlia image. Instead, I pulled out the large merry and bright sentiment from the Ornamental stamps and added it where I had planned to stamp another dahlia!


This one is a little different - instead of stamping the image I used the coordinating die cut all four times and used the piece as a stencil! I added some of my favorite Distress Inks to create a gradient of color. I love how it turned out! I stamped the sentiment in a coordinating color and added some clear shimmer Nuvo drops.


I made a shaker card with the Bits & Pieces bundle last week and I loved how the red beads looked with gold glitter paper! I wanted to try it again - but with a twist! Instead of creating a shaker card I spread a puddle of glue onto a piece of cardstock and added enough beads to cover the glue. I LOVE the texture! It's like a peek-a-boo card with an insane amount of texture!


I just love love LOVE it!!


While I was glueing things down I thought I would make a non holiday version! And of course I had to include a rainbow - so why not a rainbow of sequins!!?!? I put down lines of glue and added colorful sequins to fit behind the turnabout die cut.


If you look close you can see that some of those red beads got stuck in my card! Ah! They are so tiny I didn't even realize! Oh well...they kind of look like they were added on purpose! :)


Thank you for joining me these past 4 weeks! I can't believe it's over! But believe that I will be using these products again!


Friday, November 24, 2017

Concord & 9th #FeatureFriday - Bits & Pieces

Hello, everyone! I hope you all had a marvelous Thanksgiving! Today is Friday, so that means it's time to feature another stamp and die set from Concord & 9th and today is the Bits & Pieces bundle! I have to tell you...I've been waiting for this one! It's so versatile! I made 9 cards for today and I still have the stamps on my desk! Since I have so many cards to share I won't be giving step by step instructions, just a general overview. If you have questions leave me a comment and I will answer them for you!


As I said before - I love the versatility of these stamps! Looking at the stamp set it just looks like a bunch of little images...but when you start putting them together magic happens!! I paired the large circle and the leaf/petal image together to make flowers!


I added some sparkling clear sequins from Pretty Pink Posh. I can't keep my hands off of them! You'll see! The sentiment is from another Concord & 9th stamp set released this month - the Dahlia Turnabout.


I'm a sucker for geometric shapes! I grabbed all three circle images - the solid, dotted, and striped - and stamped them randomly around my card in 5 shades of ink - a yellow, pink, mint green, a warm gray, and purple. When I was done stamping I didn't think the lighter colors stood out enough, so I used a black pen to draw in an outline. I'm terrible at freehand drawing, but the loose style of outline went well with the design!


I stamped the sentiment on black cardstock and added quite a bit of Wink of Stella shimmer along with sparkling clear droplets from Pretty Pink Posh.


Since we are talking about geometric patterns...how about this one! I wanted to use all of the pieces to build up a rainbow patterned card. I started with the yellow stripe and worked out in both directions keeping my stamping in rainbow order. I added some of the overlay images in a gray ink and again outlined the shapes with a black pen. I used the sentiment from the stamp set and added some black Nuvo drops.


My original idea for this card was to make a cake with flowers on top. In the end...I don't think it looks like a cake, but it's one of my favorites that I made! I stamped the flowers first using a bit of masking and then used coordinating inks to stamp the stripes below. I'm in love with the hello sentiment, so I used it again on this card!


Let's shift gears a bit! I wanted to show how you can use this stamp & die set to make a Christmas card! This is my absolute FAVORITE that I made! I started by using the hexagon die to cut my piece of paper. I thought the white paper was too plain, so I grabbed my Ornamental stamps from the last release and used a few of the images along with gray ink to fill up the paper. There were empty spaces, so I used Jennifer McGuire's trick and used my stylus to fill in some dots.


Then I made my shaker card! I used gold glitter paper for the background and filled up the hexagons with red seed beads from American Crafts. I used the merry die from last month's release and cut the top from gold glitter paper and also cut 4 gray pieces to use to stack up my die cut. I really love this one!


Since we are already talking about Christmas cards I will share my other 2 with you! I used the solid hexagon stamp in 2 shades of red, 2 shades of green, and gold embossing to create this background. I just stamped the first one in the middle and worked outward in a spiral. My only concern was not putting the same color directly next to each other.


I stamped the sentiment from last month's Ornamental stamp set and embossed with glittered embossing powder. I added some sparkling clear confetti from Pretty Pink Posh and this one is done!


One more Christmas card! This one is so easy! I used silver and gold embossing powder for the stripes and just die cut the merry from red and green glittered papers!


I again used some gray papers to stack up the die to give it some dimension. This card is so glittery! - perfect for Christmas!


I wanted to show how you can use the same design from the last card, but tone it down so it's not so Christmasy! I used the same gold embossing powder, but I stamped the other stripes in regular gray ink. Then I stamped and die cut some flowers and leaves and added them to the card front.


The die cut is from the Bits & Pieces die set. I love the script! I stacked up 5 die cuts and added Wink of Stella and Glossy Accents for shine.


On to the last card! This is another one of my favorites because I love how ingenious Concord & 9th stamps are! They've included a stamp that builds to make a background and then you add flowers and other doo dads to create a whole card! I'm in love!! I used black ink for the stripes, gray for the fill in branches, and then I used 2 colors of inks for my flowers.


It's amazing how quickly this card came together! I stacked up some gold and black die cuts for the sentiment and covered it in Wink of Stella and Glossy Accents. I partially stamped a sentiment from the stamp set and cut them out and popped them up with foam tape. In the end, I wanted a bit more sparkle, so I added more gold glitter paper underneath!


And that's all 9 cards! I had so much fun with this stamp and die bundle! The possibilities are amazing! I hope you all have a great weekend!