Showing posts with label Taylored Expressions. Show all posts

Wednesday, January 19, 2022

ThermOWeb | Kids Valentines Lunch Notes with Glitz

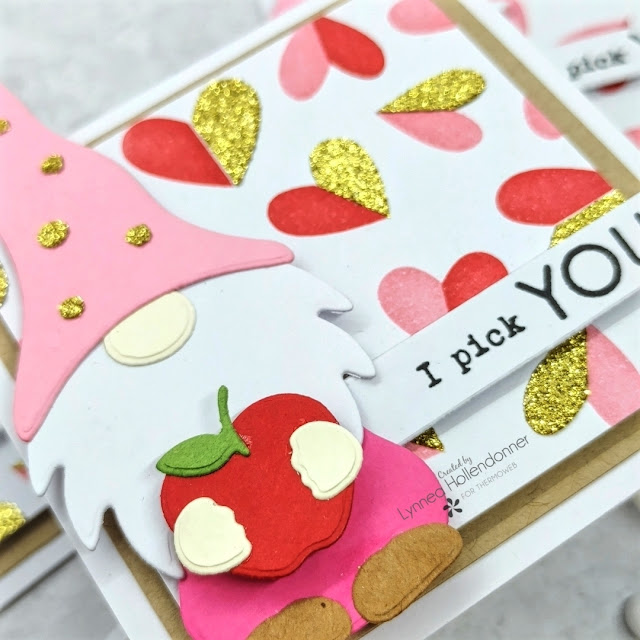
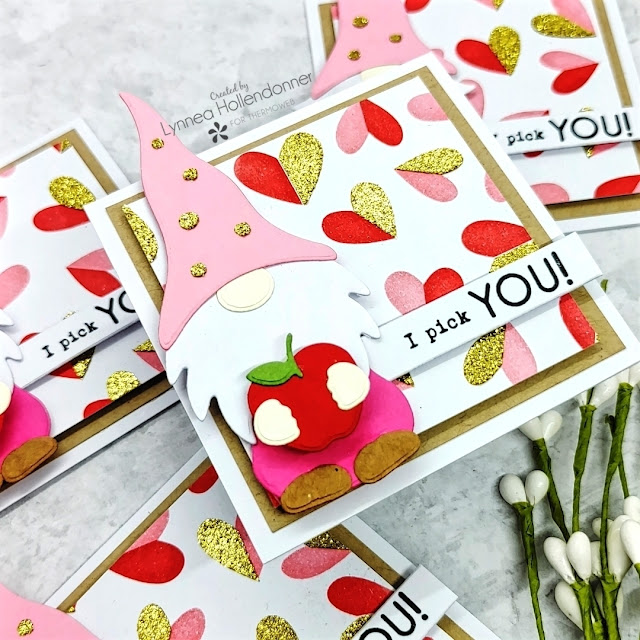
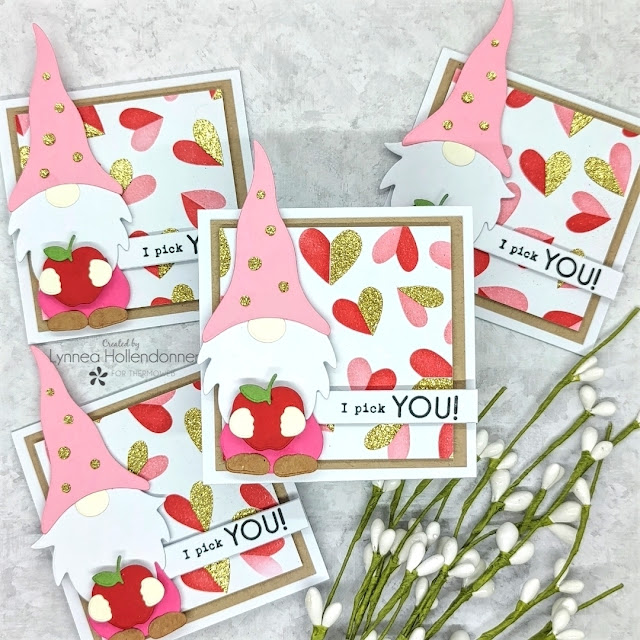
I love sending my son to school with little lunch notes and sometimes I make enough for his whole class! I have an easy to mass produce mini lunch box notes using ThermOWeb Glitz Glitter Gel and some Gina K Designs gnomes


My son has a decent sized class - 27 kids! - so I need to keep ideas for cards for the class simple and easy to mass produce. I started by creating a background that I could easily cut into four pieces to get four mini lunch notes out of one background. I sprayed the back of each of the Taylored Expressions Half a Heart Layering Stencils with Pixie Spray and added pink and red ink over the top of the first two stencils. I wanted to add something special for the third layer, so I used a Stencil Pal and added a layer of Gold Glitz Glitter Gel to complete my background. Then I set that aside to dry for about 30-45 minutes. 
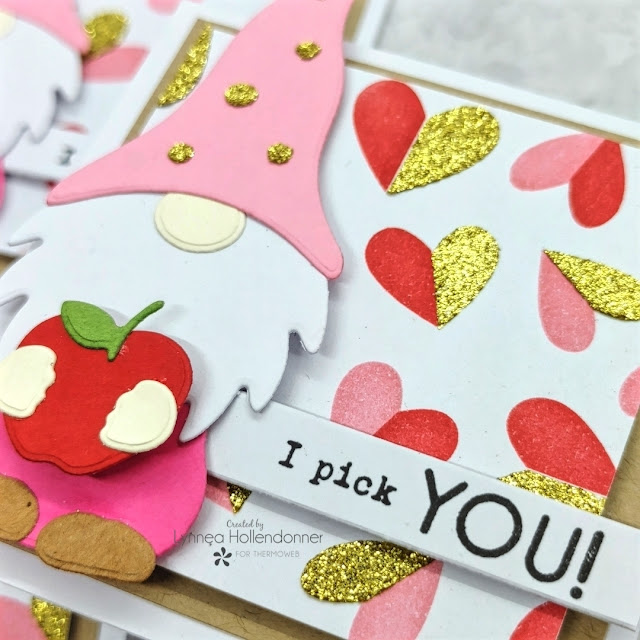


I started working on my adorable gnomes while my background was drying. I cut my pieces with colored cardstock, but you could use patterned paper or Flock for more fun! I used the dies from the Gina K Designs Gnome for the Holidays Craft Kit to cut the feet, body, beards, and noses for my gnomes and the Gina K Designs Festive Fall Add On Craft Kit for the hats, apples, stems, and the adorable little hands. I added a bit of extra sparkle to the hats using the Festive Fall Add On Stencil and some Gold Glitz Glitter Gel and then used my iCraft Ultra Bond Liquid Adhesive Pen to adhere the gnomes together. 


I needed a sentiment to coordinate with the little apples my gnomes were holding, so I stamped "I pick you" from the Taylored Expressions I Pick You Stamp Set and trimmed the sentiments into strips. Once my background was dry I cut the one background down into four squares sized 2.5" and cut a kraft mat to 2.75". I adhered the pieces onto a 3" white mini card base using a mixture of iCraft Ultra Bond Liquid Adhesive and iCraft 1/16" White Jumbo Foam Tape


Thanks so much for joining me in creating these adorable mini Valentine lunch notes! I'll see you soon! 

Sunday, January 9, 2022

Taylored Expressions | 4 Cards with the Abstract Accents Stencils

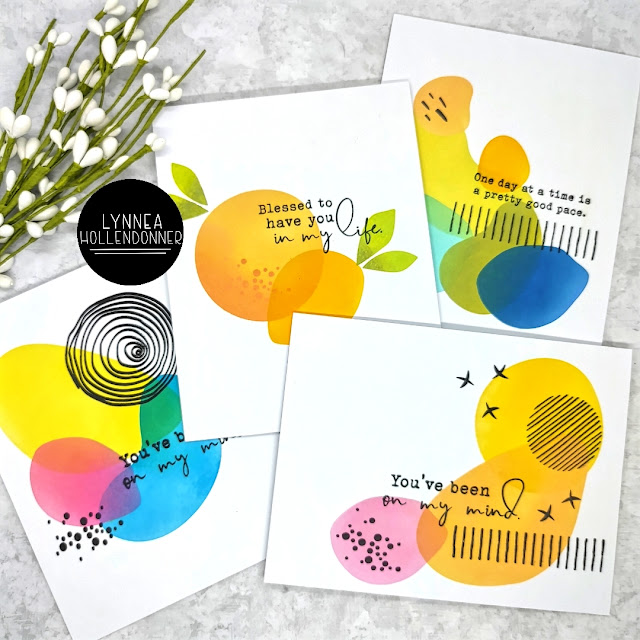
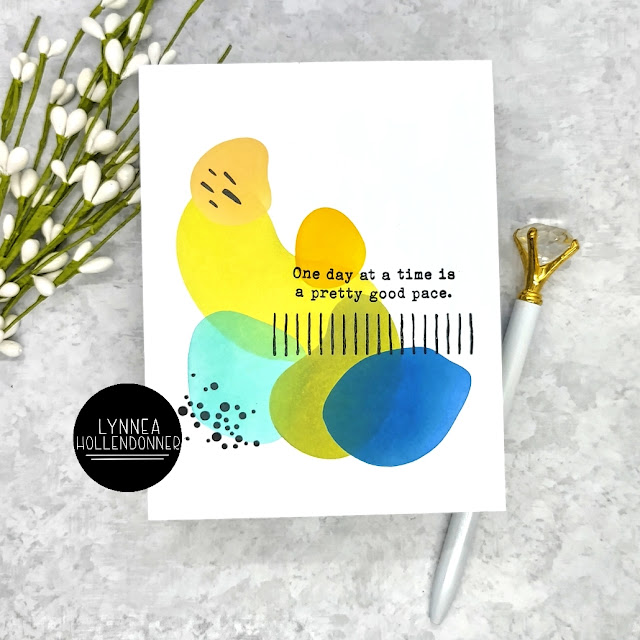
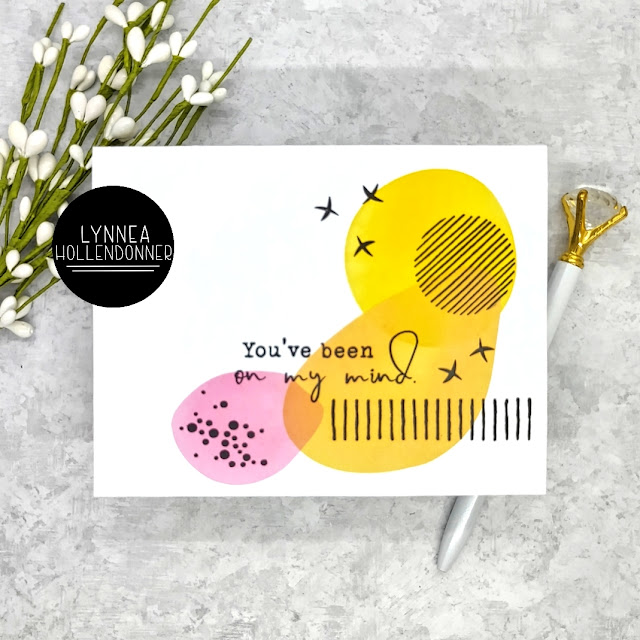
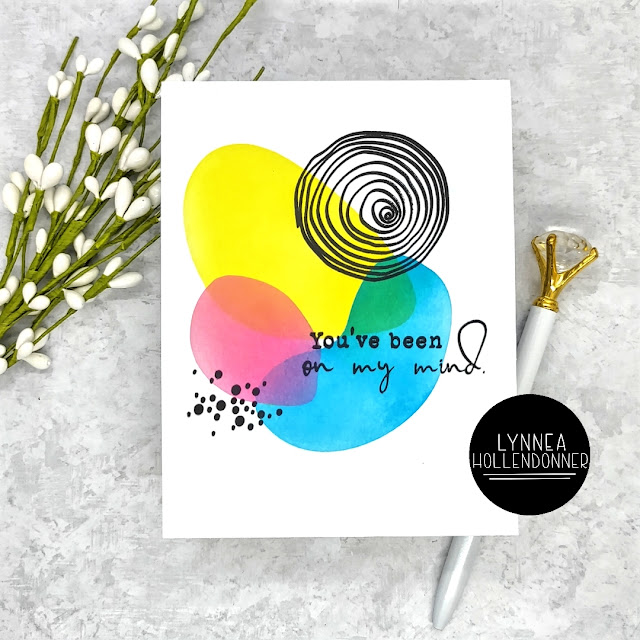
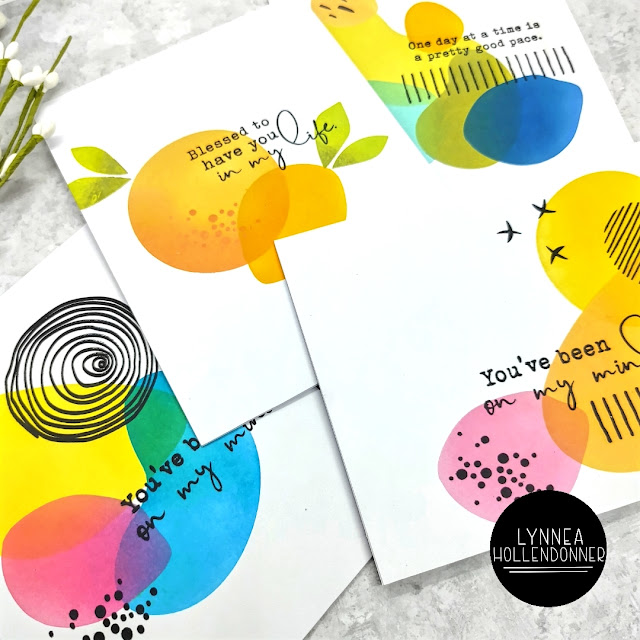
I love splashes of random color with lots of white space, so the Taylored Expressions Abstract Accents Stencils are perfect for me! I made four cards and they took me less than an hour to make! 


I actually made all four of these cards on the go! I packed up by stencils, some masking tape, blending brushes, and Distress Oxide Inks and my son and I went to the play yard! 


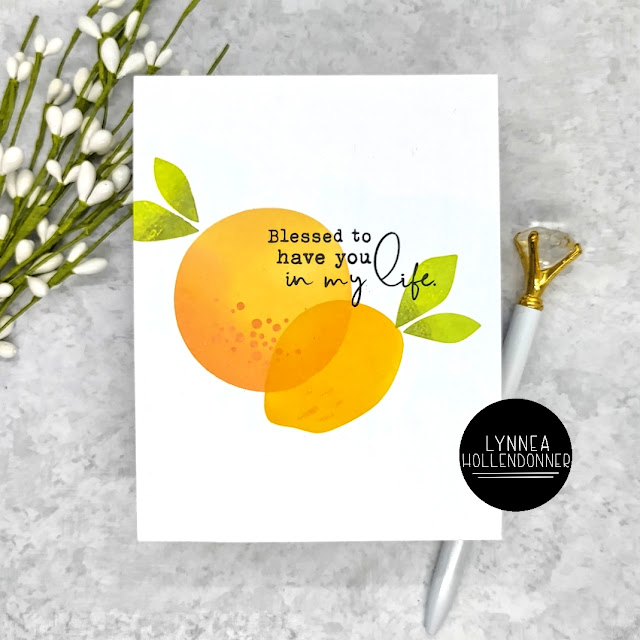
Let's start with my FAVORITE! I started with this first one and just wanted to play around with some basic fruit shapes. It took about 5 minutes and I love it! 


Then I decided to go big and use a bunch of shapes! I did a more muted color palette with masculine colors. 


Here's another of my favorites! Just a few shapes, a scattering of stamped accents, and a sentiment! 


I couldn't leave this set behind without creating a rainbow! I made sure to overlap the stencils to create the secondary colors and then added my sentiment and some shapes to balance out the design. 


I completed all of these cards in less than an hour. That's super awesome in my book! Thanks for stopping by! 

Friday, January 7, 2022

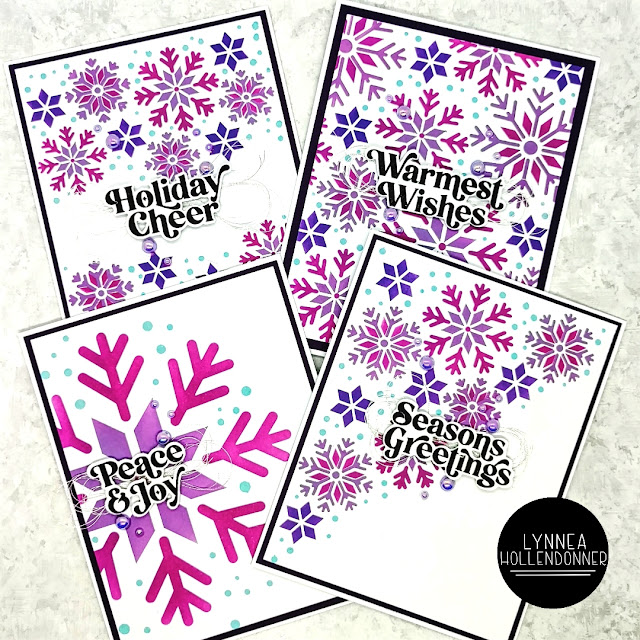
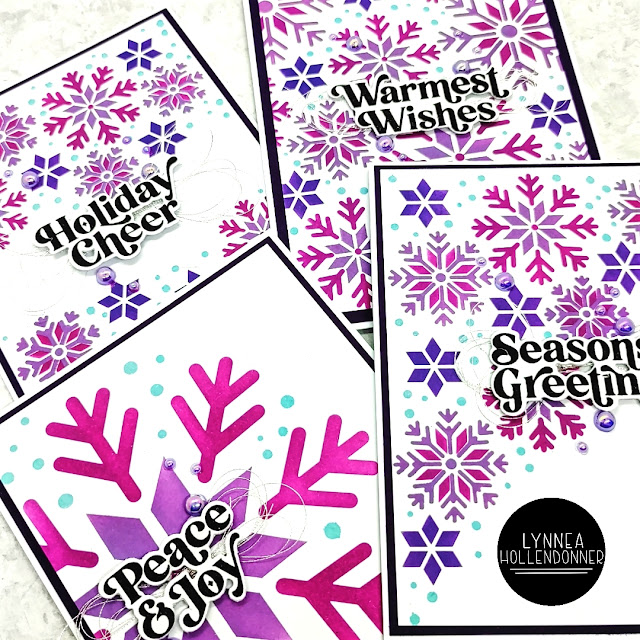
Taylored Expressions | Create in Quads Snowflake Stencils

I needed a few last minute Holiday cards before Christmas and the Create in Quads Snowflake Stencils came in handy! 


I used a few colors of Distress Oxide Inks and blended four cards at once and finished them off with some purple gems, silver thread, and some Holiday sentiments from my stash. 


I am in LOVE with the Create in Quads concept! It makes it so easy to create multiple cards at once! 

Saturday, September 25, 2021

InkOn3 | Atelier Ink Set of Teacher Cards

My son started kindergarten a few weeks ago and I decided to spoil his teacher with a set of cards stamped with InkOn3 Atelier Inks


Teachers work so hard and I wanted to show my son's teacher how much I appreciate her! I thought a long time about what style of card to make, but when I saw these apples I knew they were perfect!


I made one card to give to her and then a set of five cards to give as a gift. I used the Taylored Expressions I Pick You Cling & Clear Combo for all of the cards. This was the perfect set because it gave me an excuse to bust out my Atelier Inks and do some solid stamping! 


I started by stamping the background - the apple outlines - with Blackout Hybrid Detail Ink and then used the coordinating stamp set to fill in the centers of the apples. I love that there are so many different styles of apple "fillings"! I used Marilyn Red, Marigold Orange, Bee Sting Yellow, and Goddess Green Atelier Inks to create my apples. 


Once all of my apples were stamped I used the I Pick You Stencil to add more detail to the backgrounds. This stencil perfectly masks off the apples in the background and creates some fun horizontal stripes. I used Peacock Blue, Paint It Black, and Twiggy Brown Atelier Inks to add ink blending to the backgrounds. 


Even thought all the backgrounds are different I decided to keep things consistent by using the same sentiment on each card. I die cut using the My Favorite Things Sweet Hello Die Set and popped the sentiments up onto my card. I stamped a coordinating sentiment from the I Pick You Stamp Set with Blackout Hybrid Detail Ink to complete the look. 


I hope this project inspires you! Thanks so much for watching! 

Thursday, September 9, 2021

InkOn3 | Atelier Ink Cube Instagram Hop + BONUS GIVEAWAY

There are new Atelier Mini Ink Cubes in town and we are celebrating with an Instagram hop! Read below for giveaway details and then head to my YouTube video for a BONUS GIVEAWAY! 


I used the new Atelier Mini Ink Cubes on each of my three cards - the first I did stamp layering and the second and third cards use the same cubes for ink blending and stencil layering. 


I started by showing how easy it is to stamp with the new Atelier Mini Ink Cubes. These cubes are so juicy and vibrant! I stamped with the A Pocket Full of Happiness Mosaic Circle Builder Stamp Set and then ink blended Blackout Hybrid Detail Ink over the Taylored Expressions Triangle Toss Stencil for my background. The inks just POP against the black! 


I love ink blending with the Atelier Mini Ink Cubes as much as I love stamping with them! I created two ink blended backgrounds. The first one features the Taylored Expressions Half a Heart Layering Stencils. Be sure to check out the video above for tips and tricks for layering stencils! 


I saved the brightest and best ( I think! ) for last! Just look at how BRIGHT those Atelier Mini Ink Cubes are! I love all that color! I used the Taylored Expressions The Right Angle Layering Stencils for this one and it's definitely my favorite! 


I finished off all three cards using the Concord & 9th Big on You Stamp and Die Set. I wanted the colorful Atelier Mini Ink Cubes to be the focus of each of the cards, so I kept it simple with a bold black sentiment. That's it! Remember to head over to Instagram for a fun hop with lots of colorful inspiration and check out my YouTube video for a BONUS GIVEAWAY! Good luck to everyone! 

Saturday, July 10, 2021

InkOn3 | Christmas in July Poinsettia Card

It's no secret that I LOVE all things winter and Christmas! I get so happy when July comes around because it gives me an excuse to share Christmas cards again! 


I wanted to have bold images against a wintery background, so I placed a snowflake stencil over a piece of black cardstock and used Shark Tooth White Atelier Ink to create the background for my card. For a bit more interest I spattered on some Liquid Pixie Dust. I love how easy it can be to create a magical background! 


I stamped out flowers, leaves, and twigs from the Poinsettia Stamp Set with Blackout Hybrid Detail Ink and colored them with Copic Markers and cut them out with the coordinating Poinsettia Die Set. I arranged them onto my background with foam tape for dimension. I wanted a simple sentiment that wouldn't take away from the background and bright images, so I stamped a sentiment from the Merry & Bright Stamp Set with Juicy Watermark Emboss Ink and heat set it with Arctic White Ultra Fine Embossing Powder


No Christmas card is complete without adding even more shimmer so I covered my colored images with Liquid Pixie Dust! Now they sparkle and shine and make my heart so happy! Thanks so much for joining me! 

Tuesday, June 22, 2021

ThermOWeb | Layering Flock, Enamel, and Glitz Glitter Gel

Where do you find your inspiration? This week the ThermOWeb team is getting inspired by each other! I loved the way the lovely Ellen Haxelmans created a layered die cut card made from ombre colored Deco Foil Flock Transfer Sheets! I took her idea and put my own spin on it! 


Ellen layered up a few colors of Deco Foil Flock Transfer Sheets onto some pretty glitter cardstock, but I am such a sucker for Neon Glitz Glitter Gel and it's been a while since I whipped it out! I decided to replace her idea of glitter cardstock with a Poppin' Pink Neon Glitz Glitter Gel stenciled background! I sprayed the back of the Taylored Expressions Triangle Toss Stencil with Pixie Spray and used a Stencil Pal to spread the Poppin' Pink Neon Glitz Glitter Gel over the top and set the panel aside to dry.


Now let's do some die cutting! I used the Birch Press Desing Calen Layering Die Set for the focal point of my card. I wanted to keep with Ellen's ombre theme, but switch it up and go pink! 


I went through my stash and found three products that work together PERFECTLY! I used Pink Carnation Deco Foil Flock Transfer Sheets, Poppin' Pink Neon Enamel Transfer Sheets, and Poppin' Pink Neon Flock Transfer Sheets in my design. I used layers A and C to cut the Flock Transfer Sheets just like you would cut cardstock. So easy! And I love the added texture! In order to cut the layer of Poppin' Pink Neon Enamel I had to first transfer it onto cardstock. I added a piece of a 6x6 Easy Cut Adhesive Sheet to white cardstock and added the Poppin' Pink Neon Enamel Transfer Sheet on top of that and then cut it with the B layer of the Birch Press Design Calen Layering Set. I used an iCraft Ultra Bond Liquid Adhesive Pen to adhere all three layers together. 


I wanted something a bit special for my sentiment, so I cut the Simon Says Stamp Sending Smiles Die three times from white cardstock and once from White Latte Deco Foil Flock and layered them together with an iCraft Ultra Bond Liquid Adhesive Pen. It wasn't standing out enough, so I used the background die to cut a piece of vellum and layered it behind the sentiment. 


I just love how the Flock, Enamel, and Neon Glitz all pair together! A HUGE thank you to Ellen for the inspiration! See you again soon! 

Friday, December 13, 2019

Crafty Festival of Christmas - Card and Detachable Magnetic Ornamnet

Hi, everyone! This week for the Crafty Festival of Christmas we are bringing you some inspiration for ornaments, gifts, and/or treat containers! I created a simple card with a detachable magnetic ornament! And it's really easy to do!


I love the Taylored Expressions Iconic Wishes - Christmas stamp and die combo! And I thought it would be perfect to add an ornament on to the front of a card - but I wanted the actual card to be fun and festive as well! I stamped the Taylored Expressions Boughs and Berries background stamp onto a piece of green cardstock with Simon Hurley Create. Later Gater ink. This gave me a fun tone on tone look!


I stamped and gold heat embossed the ornament from the Taylored Expressions Iconic Wishes - Christmas stamp set twice and then die cut them with the coordinating die. I wanted to be able to have an ornament that was identical on both sides. I added a magnet at the back of one of the die cuts and then added foam tape and adhered the two ornament pieces together back to back. I heat embossed a sentiment onto the card background from the Avery Elle Comfort and Joy stamp set where I would be adding my ornament. I added another magnet behind the sentiment on the back of the green cardstock and added foam tape before adding the background to my card base.


So there you have it! A fun gold heat embossed ornament that is held onto the front of the card with a magnet! You won't even notice the magnet in the ornament when you hang it on the tree! And you could even put it on the fridge if you want! Super fun, right?! Hop through the rest of the blogs for more fun Crafty Festival of Christmas inspiration!

Blog Hop


Lynnea Hollendonner - YOU ARE HERE!

Thursday, October 17, 2019

All Things Santa with Glitz and Flock!

It's all about Santa this week for ThermOWeb! He's seriously one of my favorite guys! I'm pairing him with Gina K Designs Glitz Glitter Gel and Deco Foil Flock Transfer Sheets to create a super sparkly winter scene!


This simple scene card is packed full of everything sparkly and wonderful!


I used the Gina K Designs Turquoise Sea Glitz Glitter Gel on top of the Blue Sky Flock Transfer Sheets to get a sparkly tone on tone snowfall! I needed lots of shimmer for my snow, so I used a palette knife and added texture to the snowbanks with Gina K Designs White Glitz Glitter Gel. And by the way - the snowbanks are made from White Latte Flock Transfer Sheets!


See all that shimmer on the border and on the snow? That's from the Silver Glitter Dust Spray from ThermOWeb! I use this stuff ALL the time! It doesn't rub off and it looks fantastic on top of the Ruby Red Flock frame!


I finished off the scene with some cutie stamps from the Simon Says Stamp Christmas Squad stamp set! I hope you love this card! See you soon!