Showing posts with label Sneak Peek. Show all posts

Monday, March 2, 2026

LDRS Creative | Fuzzy Wuzzies Under Construction Add-On

It's time for a bright, fun, and playful Fuzzy Wuzzies card! LDRS Creative has a new collection releasing Thursday, March 12th and I'm SO excited to bring you a sneak peek of one of the new stamp sets. Let's take a peek!


Products used -


Fuzzy Wuzzies have been one of my favorite LDRS Creative product lines since they were first introduced and I'm so happy that the line is continuing to expand! These little fuzzies are absolutely adorable. I stamped a trio of characters on my card and dressed them up with the accessories included in the stamps and dies. I even took some creative license and used the die that creates the eyes to make some shiny sunglasses for the fuzzies on the ends!


You can completely customize the colors on this card for anyone in your life, but I'm definitely sending this one to the guys in my life for Father's Day! Be sure to swing by LDRS Creative social media from now to March 12th more sneak peeks! 

Monday, May 27, 2024

SNEAK PEEK!! | LDRS Creative Wildflower Wreath Impress-ion Press + Foil Plates

Hi! It's Lynnea! The LDRS Creative Summer Collection release is right around the corner! Get a sneak peek of a couple of the new products and set your alarms for Thursday, May 30th for the full release!

Layering stencils are a fabulous way to add easy ink blended color to letterpress images. Watch me make a quick and easy square notecard featuring summery orange flowers using the Wildflower Wreath Impress-ion Press + Foil Plates.

*Links to products included in the Summer Collection will be live on Thursday, May 30th at 12:01am ET*


I started by pressing the wreath image and sentiment from the Wildflower Wreath Impress-ion Press + Foil Plates into an A2 Cotton Watercolor Panel with Raven Hybrid Ink. I used two shades of orange, a light green, and a brown ink to add color to the image using the Wildflower Wreath Layering Stencils.


I trimmed the panel down to 4" square and added black watercolor ink spatters to the panel. I used foam tape and mounted the letterpress panel onto a 4.25" square black card base. That's it! Come back tomorrow for more inspiration using new products from the Summer Collection!

Saturday, September 9, 2023

Intro to Oh Christmas Tree Impress-ion Letterpress Dies

Ready for another LDRS Creative sneak peek?! I think you're going to LOVE this one! I used a product that is NEW for the Fall, Winter, and Holiday 2023 Collection to mae my card. Can you guess what it is? Watch my intro video to learn all about it!

*Links to products in the Fall, Winter, and Holiday 2023 Collection will be live Monday, September 11th at 8am ET*


BIG NEWS!! There will be NEW Impress-ion Letterpress Dies in the Fall, Winter, and Holiday 2023 Collection! AHHH!!! These Impress-ion Letterpress Dies are absolutely AMAZING! You use them to press a design into your cardstock giving you a detailed impression that is sure to WOW! 

** Just a note - you DO need to use the Impress-ion Letterpress Dies with a letterpress platform. Using them with your regular die-cutting platform and cutting plates will damage your cutting machine. **


I used the Betterpress platform and centered the Oh Christmas Tree Impress-ion Dies into the center of the A2 area and inked up the tree with Evergreen Hybrid Ink. I pressed the image into LDRS Creative Watercolor Cardstock and then removed the tree from the platform, added the star, inked with Dan-D-Lion Hybrid Ink, and ran the piece through my machine once again. I used a red alcohol marker to add some color to the garland and spattered the cardstock with gold shimmer watercolor.


I cut the Merry Christmas Word Dies from gold foil cardstock and the shadow from vellum. I layered them together and glued them towards the bottom of my card. I trimmed the background and added it onto a gold foil card base. That's it! Make sure you come back tomorrow for another sneak peek video. Then come to the LDRS Creative store on Monday, September 11th at 8am ET for the launch of the Fall, Winter, and Holiday 2023 Collection!

Thursday, September 8, 2022

LDRS Creative | Halloween & Christmas 2022 Collection - Fall Features

The new release from LDRS Creative is just around the corner! I have a fun Fall themed card sneak peek video to share with you! 


I started by stenciling some Dan-D-Lion Hybrid Ink with the dotted layer from the Diamond Leaf Stencils and then using Grass Green Glitz Glitter Gel for the second layer. I set the panel aside to dry. 


I stamped the floral images from the Hello Sunshine 4x6 Stamps and colored them with the Hello Sunshine Layering Stencils and a handful of LDRS Creative Hybrid Inks. I used the Hello Sunshine Coordinating Dies to cut out the images as well as a sentiment and shadow. 


I added everything onto my card with foam tape and that's it! The new Halloween & Christmas 2022 Collection will be available TOMORROW, September 9th at 8am ET! All links will be live with the new product release. Come back tomorrow - I have another video to share with you!

Monday, May 9, 2022

Pink & Main | Sketched Florals Sneak Peek

Can you believe it's time for the May release sneak peeks from Pink & Main?! I created a shimmer watercolored background with the NEW Sketched Florals Stamp Set! 


Watercoloring is one of my favorite ways to color. And I really love when I can effortlessly add some shimmer to my coloring! I used an easy heat embossed resist technique with some Nuvo Shimmer Powders to create this card. 


I started by prepping my watercolor cardstock panel with the Pink & Main Magic Anti-Static Brush so that my embossing powder would only stick where I wanted it to. I used Pink & Main Watermark Ink to stamp one of the large florals from the new Sketched Florals Stamp Set and sprinkled on Licorice Embossing Powder

I tapped on some yellow, blue, and red Nuvo Shimmer Powders and spritzed my panel with water. I picked up my cardstock and tilted the panel side to side so that the colors would run together and mix to create a nice rainbow background. Once the panel was completely dry I die cut it with the second largest die from the Stitched Rectangles 1 Die Set and cut a plain white panel with the largest die so that I could layer them. 


I stamped a sentiment from the Sketched Florals Stamp Set with Watermark Ink and heat set it with Licorice Embossing Powder and used scissors to fussy cut the sentiment. 


I assembled my card using foam tape for dimension and added a few Silver Glossy Dots to finish the card. I hope you enjoyed this sneak peek! The Sketched Florals Stamp Set and the rest of the May release will be available later this week! 

Monday, April 11, 2022

Pink & Main | Floral Sprays Sneak Peek

It's time to share a sneak peek of the Pink & Main April release! I used a new stamp set and a brand new product to make this card! 


I wanted to make a clean and simple card that would highlight some of the new products coming from Pink & Main. I chose three colors of inks and used skinny 1/8" masking tape to mask off horizontal lines on the front of a 4" x 5.25" panel. I used an Ergonomic Blending Brush to add inks to my background and then dried the inks completely with a heat tool. 


Once my inks were completely dry I stamped the large floral image and the sentiment rom the new Floral Sprays Stamp Set with Pink & Main Watermark and Embossing Ink. This new ink pad is so juicy I only had to stamp my images once! I sprinkled on some Licorice Embossing Powder and set the powder with my heat tool. 


Just LOOK at the shine from the Licorice Embossing Powder! It's STUNNING! I usually stray away from black embossing powder, but this one is a game changer!


I popped up my panel onto a card base with foam tape and added a sprinkling of pearls from the Unicorn Pearls 2 Set to finish the card. Thanks for joining me! The Pink & Main April Release will be available this Friday! 

Sunday, March 6, 2022

Miss Ink Stamps | Jungle Ruins Sneak Peek

Here's a peek at the Jungle Ruins Stamp Set coming to Miss Ink Stamps on Tuesday the 8th! 


It's super easy to make this card! I stamped the large background image from the Jungle Ruins Stamp Set onto white cardstock and swiped a warm gray ink pad across the panel to create a worn look. 


I stamped some more images from the Jungle Ruins Stamp Set onto a separate piece of cardstock and colored them with Copic Markers and fussy cut them out. I cut a piece of A2 sized cardstock and added watercolor spatters to the background and foreground panels. I popped up my images with foam tape and that's it!


You'll be able to grab the Jungle Ruins Stamp Set along with the rest of the release on Tuesday the 8th in the Miss Ink Stamps Store

Monday, February 14, 2022

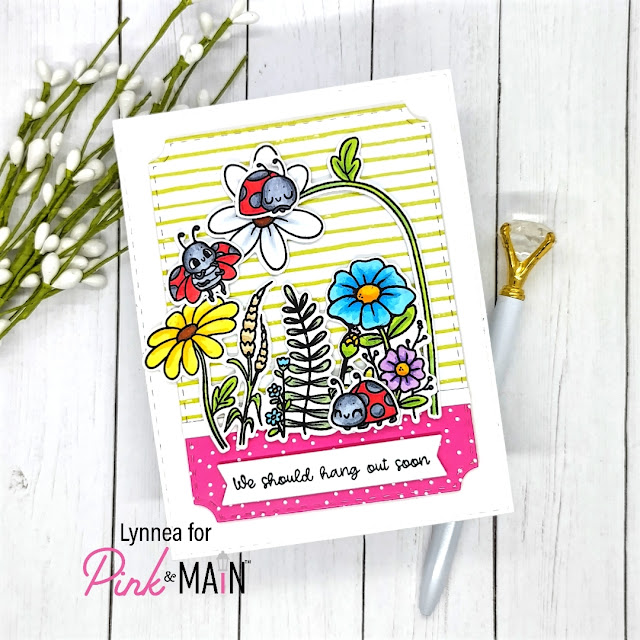
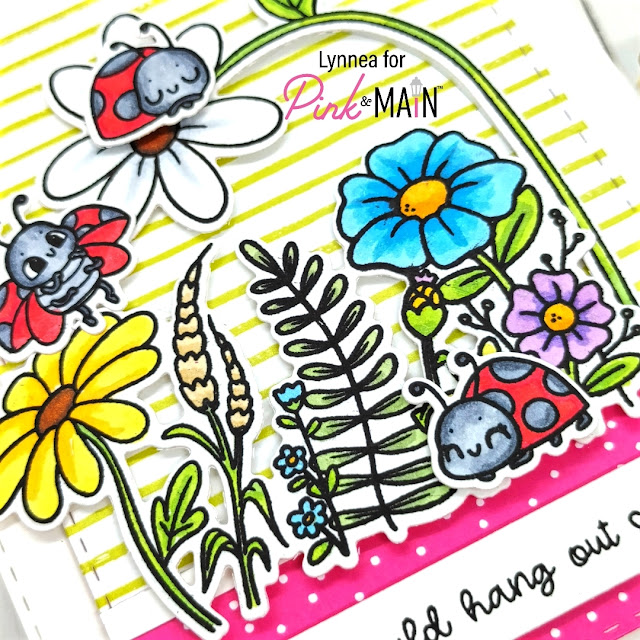
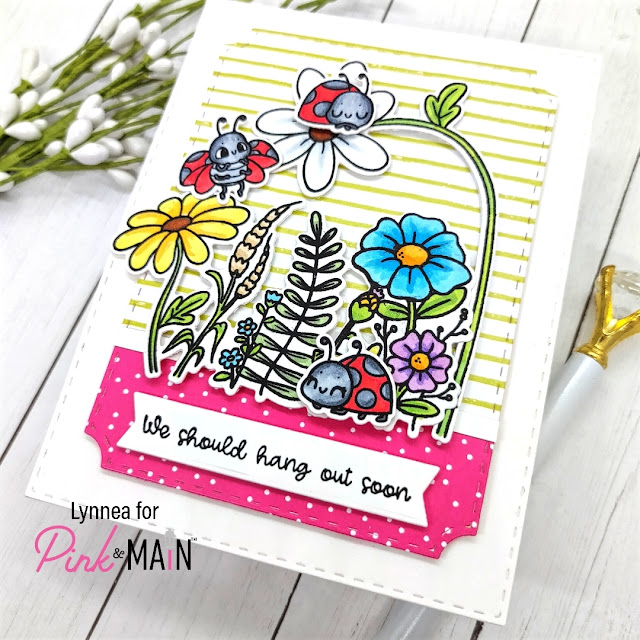
Pink & Main | Ladybug Garden Sneak Peek

Are you ready for a little sneak peek at the Pink & Main February release?! Here you go! These cute little ladybugs will be ready crawl into your craft room this Friday! 


Aren't those little ladybugs the cutest?! They're from the new Ladybug Garden Stamp Set! I stamped three of the ladybugs, the large flower, and the floral cluster and colored them with Copics and cut them out with the coordinating die set. 


I wanted to create a simple, but colorful background for my bugs, so I chose some of my favorite patterns from the All Occasion Florals 6x6 Paper Pack. I die cut them with the Notched Corners Die Set and trimmed a piece of the pink piece to represent the ground and added.a thin strip of white cardstock to cover the seam where the two patterns meet. I cut a panel of cardstock using the largest die from the Stitched Rectangles 1 Die Set and started layering my pieces together. 


I finished the card by stamping a sentiment from the Ladybug Garden Stamp Set and cutting it out with a die from the Large Sentiment Strip Die Set. I hope you've enjoyed this sneak peek! 

Monday, January 17, 2022

Pink & Main | You're One Smart Cookie

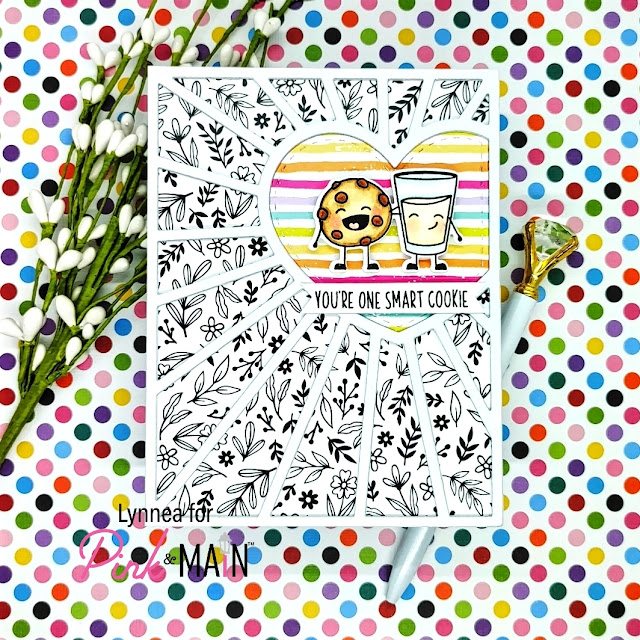
Quick, cute, and easy is the name of the game for today! I am sneaking a peek at the Pink & Main January release with this adorable Valentine's Day card! 


This card is easily mass produceable - especially with all the cute images from the One Smart Cookie Stamp Set (releasing on the 20th!). I used just one of the adorable pairs on my card, but you could easily create a set of cards in no time at all! I used the Heart Spotlight Cover Die (also releasing on the 20th!) and die cut it from white cardstock four times so that I could layer up the pieces for dimension - you could skip this if you wanted and just cut it once. I chose the bright rainbow striped patterned paper from the Best Friends 6x6 Paper Pack and used the Heart Spotlight Cover Die to cut just the heart portion for a pop of color. I glued all of my cover dies together and adhered them onto a black and white floral paper from the Best Friends 6x6 Paper Pack and inlaid the colorful heart piece into the negative area of the heart. 


I stamped the milk and cookie image from the One Smart Cookie Stamp Set and colored it with Copic Markers. This image was so easy to color and I just love their happy little faces! I used the One Smart Cookie Coordinating Dies to cut out the image and stamped a sentiment and trimmed it into a banner strip. 


I popped up my image with foam tape and added the sentiment strip across the bottom of the heart. That's it! So quick! Be sure to check the Pink & Main blog over the next couple of days for more sneaks of the January release and then visit the shop on January 20th for the reveal of the full release! 

Wednesday, November 24, 2021

Miss Ink Stamps | Ice Day Sneak Peek

The Thanksgiving Holiday weekend is almost here and Miss Ink Stamps is celebrating with a winter release! I'm sneaking the Ice Day Stamp Set with this fun slider card! 


There will be FOUR new stamp sets released on Small Business Saturday - November 27th! They are perfect for all of your wintery cards! 


I created my background by blending Mustard Seed, Picked Raspberry,  and Mermaid Lagoon Distress Oxide Inks over the Frosty Flakes Stencil. I let all the colors mix so that I would get a full rainbow without any effort. 


As soon as I saw the little penguin on his belly in the Ice Day Stamp Set (releasing on the 27th!) I knew that I wanted to make a slider card with him sliding down the iceburg! I stamped three of the penguins, some Santa hats, and the iceburg and colored them with Copics and cut them out with scissors. 


Once I had my images and background ready to go I created a simple slider card. Check out my video above to see how the interactive portion of the card came together! 


I hope you've enjoyed this sneak peek of the Ice Day Stamp Set! This stamp set and the rest of the release will be available on Small Business Saturday - November 27th! Keep your eye on the Miss Ink social media channels for more sneaks and special sales announcements! 

Thursday, November 11, 2021

Trinity Stamps | A-7 Snowflake Frame Die Set Sneak Peek

It's sneak peek time for the Trinity Stamps November Release! I have a video sharing the A-7 Snowflake Frame and Simply Sentimental Thanks Die Sets! 


I say it every time ... but this is the best Trinity Stamps release of the year! Everything hits the shop on November 18th, so get your wallet ready!


The A-7 Snowflake Frame Die Set is gorgeous! And easy to create a bunch of winter cards all at once! Almost everything on this card is from that one die set! I also am sneaking the Simply Sentimental Thanks Die Set. I know you guys are going to LOVE that one! 


Remember to visit the Trinity Stamps store on November 18th for the full release! 

Monday, September 20, 2021

Miss Ink Stamps | Bugs and Kisses Sneak Peek

Let's sneak a peek at the new Bugs & Kisses Stamp Set from Miss Ink Stamps! Creepy crawlies are my thing and mixing them with lovely foiling makes it even better! 


I stamped the beetles from the Bugs and Kisses Stamp Set onto a piece of white cardstock and used a stitched die to cut out the panel and colored them with Copic Markers. 


I love beetles and think they are truly gorgeous. I wanted to create a shiny background to mimic their shiny coverings, so I added Deco Foil Transfer Gel Blanco over the Wonky Checker Stencil and let it dry. Once it was dry I used my laminator to transfer Brutus Monroe Rainglow Foil over the stencil. I LOVE the effect! 


I stamped a sentiment from the Bugs and Kisses Stamp Set and created a drop shadow with a piece of black cardstock. I used foam to mount all of my pieces onto my background. 


I hope you've enjoyed this quick peek at the new Bugs and Kisses Stamp Set! Visit the Miss Ink Stamps store tomorrow for the full release! 

Saturday, September 18, 2021

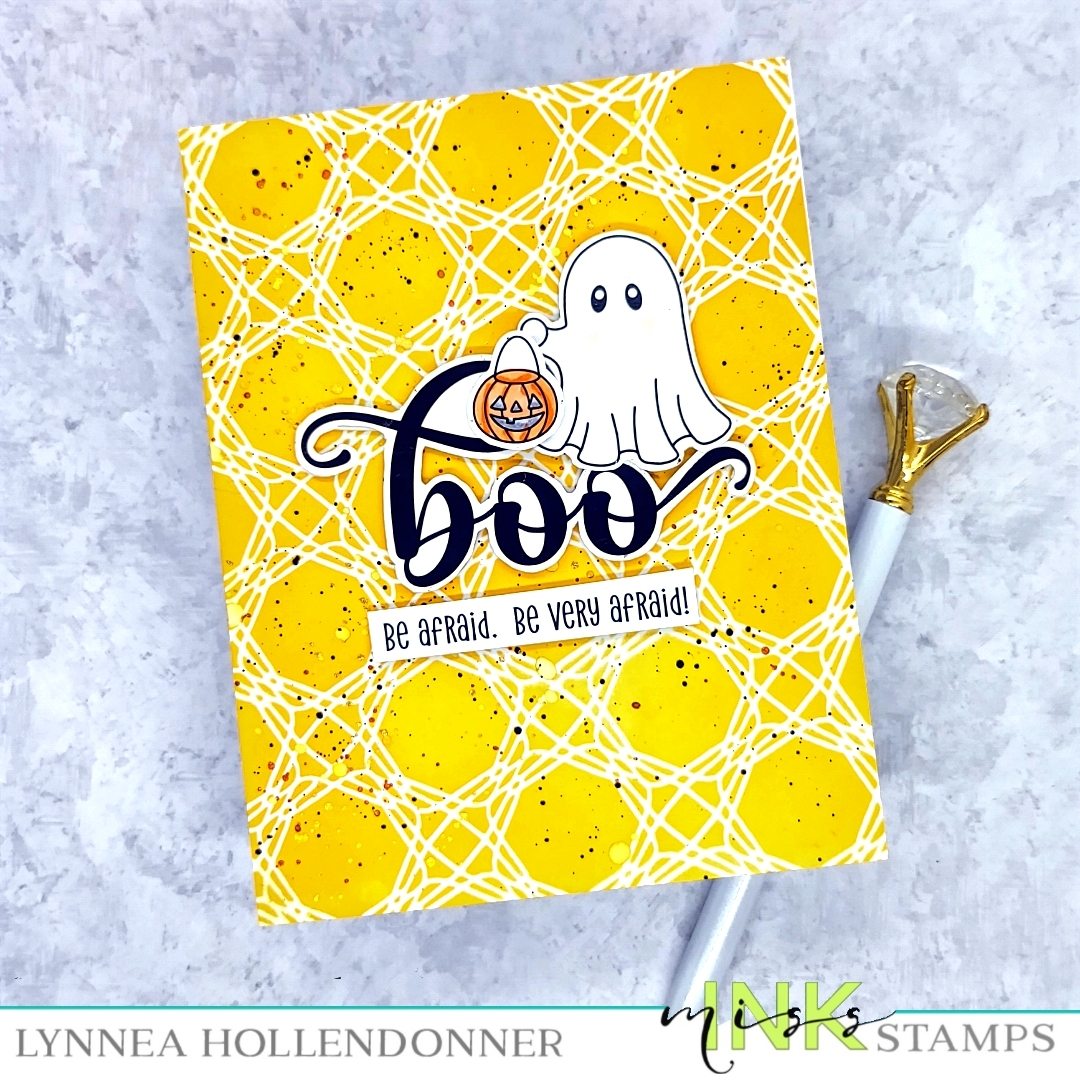
Miss Ink Stamps | Boo Sheet Sneak Peek

It's sneak peek time for the new Miss Ink Stamps release! I'm using the new Boo Sheet and Halloween Sentiments Stamp Set on this cute and spooky card. All of the new products will be available on Tuesday the 21st! 


I started with a simple background - just a bit of yellow ink over the Basket Case Stencil. I added a bit of texture by flicking on black, gold, and orange glitter watercolor. 


I stamped the adorable ghost and his little bucket from the Boo Sheet Stamp Set (coming soon!) and colored them with Copic Markers and cut them out. 


I am obsessed with the Halloween Sentiments Stamp Set! There are big sentiments and smaller sentiments that you can mix together. I stamped the large "boo" and cut it out and then stamped a coordinating sentiment onto a strip. 


I popped everything up with foam tape in the center of my card. The new Halloween release will be available on Tuesday, September 21st! See you then! 

Friday, July 23, 2021

Miss Ink Stamps | Blossoming Brushes Sneak Peek

There's a new release from Miss Ink Stamps hitting the store tomorrow and I am sneaking my favorite stamp set from the release - Blossoming Brushes! 


I stamped the large brush, paint drips, and some flowers and leaves from the Blossoming Brushes Stamp Set and colored them with Copic Markers and cut them out with scissors. 


I swiped Salvaged Patina and Peacock Feathers Distress Oxide Inks onto a slimline card front to mimic a swipe of paint and added flicks of gold watercolor for texture. I added my Blossoming Brushes stamped and colored images on top. 


I added my panel onto a teal slimline card base and placed a bunch of teal colored pearls around the card. Thanks for joining me! The new release from Miss Ink Stamps hits the shop tomorrow! Happy shopping! 

Monday, July 19, 2021

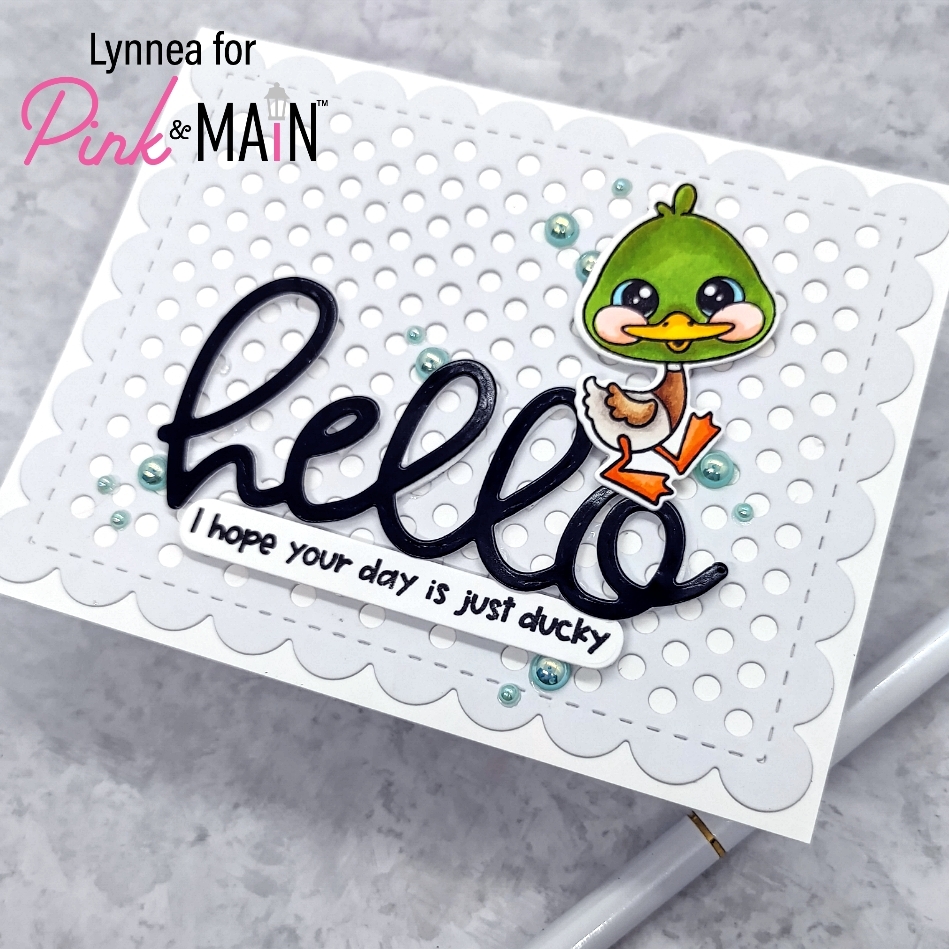
Pink & Main | Just Ducky Sneak Peak

Everyone ready for sneak peek of the new Pink & Main release?! I used a new cover die and a sentiment die that has quickly made it to the top of my favorites list! 


I decided to pair some new release items with the Stamp & Die of the Month for July! I die cut the new Dotted Cover Dies from white card stock. There are two dies - one that cuts the outer scallop and one that cuts the inner dots. When you stack them together you get this gorgeous dotty background! 


I stamped the duck from the Just Ducky Stamp of the Month and colored it with Copics and cut it with the coordinating dies. That cute little coordinating sentiment is stamped from the same set and cut from the coordinating die set, too! I love the rounded edges! I cut the new Big Hello Die from glossy black cardstock and popped it up with foam tape near the bottom of the card. 


I finished off the card with some mint pearls from the new Pastel Pearls Set. Thanks for joining me for this sneak peek from the July release