Showing posts with label Birthday. Show all posts

Monday, March 23, 2026

LDRS Creative | Easy No-Stamping Cards with Patterned Paper

Let's create 3 quick and easy cards with the Celebration Paper Collection from LDRS Creative - no stamping required! 


Products used - 


In today’s video, I’m sharing how I mix patterned papers, ephemera, and rub-on transfers to create three fun and girly cards in under 5 minutes each. With just a few layers and a little adhesive, you can have beautiful, celebratory cards ready to go in no time!


I kept the sentiments versatile - “congratulations,” “today is your day,” and “simply the best”—so these designs work for so many occasions. Plus, the little pops of gold foil add the perfect touch of shine.


If you love quick cardmaking or need cards in a hurry, this is the perfect place to start. Just grab the Celebration Paper Collection and add adhesive!


Thanks so much for joining me! I hope these cards inspire you! 

Monday, February 2, 2026

LDRS Creative | Sugar Rush Collage Stamps Card Tutorial

Let’s make a sweet and colorful collage card using the Sugar Rush Collage Stamps from LDRS Creative! In this tutorial, I’ll show you how I built this freeform collage design with a bold pink, blue, and lime green color combo and pops of black for extra contrast. This is an easy, playful card that’s perfect for birthdays or any cake-worthy occasion - and it’s so fun to customize!


I love to freeform collage, but if you like a more structured look, you could use a grid-style outline with one of the LDRS ledger stamps. In my video, I show and talk about a few tips and tricks that I find helpful for collage stamping, so be sure to watch! I kept to a bright and happy color palette, but you could easily customize the colors to anything you wish! 


I finished the card with a bold background using the Floral Reverse Background Stamp. Then I layered the stamped panels onto an A2 card and that's it! 

Monday, January 5, 2026

LDRS Creative | Fuzzy Wuzzies Birthday Suit Add-On

Let's stamp a cute birthday card together! You know I love quick, easy, and colorful cards - and this one is no different! I’m using the adorably fun Fuzzy Wuzzies Birthday Suit Add-On Stamps and Dies from LDRS Creative to create a cheerful birthday card that’s full of snarky personality!


I used the largest die from the Delicate Stitches Scalloped Rectangle Dies to cut a piece of white cardstock. I love the small scallop pattern border! Here's a tip that I use every time I'm stamping - I like to lay out all of my stamps onto my card just to see the placement and how things will look at the end. I did that, and then used a handful of LDRS Creative Hybrid Inks to stamp the Fuzzy Wuzzy and a bunch of presents. 


Once all my stamping was done, I used the Fuzzy Wuzzies Birthday Suit Add-On Coordinating Dies and cut out the eyes, beak, bow tie, hat, and the pieces for the hat. I used liquid adhesive to add the majority of the accents, but I popped up the party hat with foam tape for some dimension. I grabbed a gray card base that matched my Fuzzy Wuzzy and that's it! Thanks so much for joining me! 

Thursday, December 4, 2025

LDRS Creative | 2 Easy Birthday Cards with Bold Color

Need a birthday card in a hurry? 🎉 Watch me create two vibrant, colorful cards using the Floral Reverse Background and Winding Celebrations Stamps from LDRS Creative’s Untamed & Unfiltered Collection. These cards are quick, easy, and full of bold color, with a touch of black spatters to add contrast and pop!


I stamped the Floral Reverse Background 6x6 Stamp onto the bottom of a panel of cardstock, keeping about an inch and a half of white space at the top. This is a pretty solid stamp, so you may need to stamp a few times to get a better impression. I love to add dimension with ink spatters - if you know me, then you know that's no surprise! I went with black spatters this time and accented the panel with a slim strip of black cardstock.


I finished off the cards with a sentiment from the Winding Celebrations 5x7 Stamps I stamped onto white cardstock cut with one of the Pinpoint Circles Dies. I added a layer of black cardstock with the Hand Torn Circles Dies and that's it! Thanks for joining me! 

Monday, July 10, 2023

LDRS Creative | Sunny Big Word - Birthday Card

I'm sharing a birthday card that reminds me of sunshine and flowers on the LDRS Creative YouTube Channel! It's an easy card to make and completely color customizable to fit anyone's personality! 


Today is a difficult day for me - it's my Gramma's first birthday since she's been gone. She was such a special woman, and always so supportive of me. I thought I'd make a birthday card to honor her. She loved gardening and was the type of person who radiated joy and happiness. I started by die cutting the large sentiment from the Big Word - Birthday Dies from gray cardstock. I wanted to bring a hint of flowers into the card, so I used Alloy Hybrid Ink and stamped the images from the Hand-Tied Bouquet 4x6 Stamps all over the large word die-cut. 


Now it's time to create my sunny background. I used an LDRS Creative Blender Brush and blended In Your Face Orange Hybrid Ink onto the bottom of a piece of white cardstock and Dan-D-Lion Hybrid Ink onto the top being sure to blend well where the two colors overlapped. I stamped the Old Brick Wall 6x6 Stamp with Alloy Hybrid Ink onto the ink blended background to add some extra texture into the background. You know it's not me if I don't add some ink spatters! I used my shimmer black watercolor and spattered my background for some shimmery shine.


I added the background onto a black card base and mounted my sentiments with foam tape. That's it! I hope this card brings the same sun-shiney happiness to your day that my Gramma always brought to me. See you soon!

Monday, July 3, 2023

LDRS Creative | Intro to Natasha Alphas Jumbo XL Dies

I love building my own sentiments with alpha dies! The new LDRS Creative Natasha Alphas Jumbo XL Dies are perfect for building big and bold sentiments! Watch the video tutorial for this card on YouTube to see how everything came together. 


I die cut the letters to form the word "Old" from brown cardstock using the Natasha Alphas Jumbo XL Upper and the Natasha Alphas Jumbo XL Lower Dies. I stamped the Snarky Birthday Stack as well as the "you're" from the Poppy Posy 4x6 Stamps with Coffee Bean Ink and cut them out using the Poppy Posy Coordinating Dies and the Sentiment Stack II Die.


I tore the edges of a piece of white cardstock and blended Iced Tea Hybrid Ink along the edges. I also took the ink pad directly to the edge of the paper to further distress the edges and make it look like a piece of old parchment. I used foam tape and added all of my sentiments to the center of the card and that's it!

Wednesday, June 28, 2023

LDRS Creative | Intro to Big Word - Birthday Stamps and Dies

Sending a BIG happy birthday has never been easier! Check out the LDRS Creative YouTube Channel to see how FAST and simple it is to create a birthday card in no time with the Big Word - Birthday Stamps and Dies


I stamped the large sentiment from the Big Word - Birthday 4x6 Stamps with Bali Blue and Mrs. Periwinkle Ink to create a gradient effect. I used the Big Word Dies - Birthday to cut out the sentiment and set it to the side. I used the "happy" sentiment from the same stamp set and used Alloy Hybrid Ink to stamp it all over a piece of 4.75" x 6.75" cardstock. I added the panel onto a gray 5"x7" card base and popped up my large sentiment with foam tape. 


I used the Big Word Dies - Birthday to cut the word "happy" from black and white cardstock and stacked them together, slightly offset, and adhered them to my card. I finished off the project with a scattering of shiny baubles. Thanks for joining me!

Saturday, June 24, 2023

LDRS Creative | Intro to Snarky Birthday Stack

Everyone loves a snarky birthday sentiment, right? How about 11 of them! The Snarky Birthday Stack from LDRS Creative is the perfect way to send a fun happy birthday to your loved ones. Watch the video tutorial and learn how to make this snarky card on YouTube!


This card mixes a handful of products from the new Summer 2023 Collection with a handful of products from other collections. I LOVE that LDRS makes things that are timeless and you can reach for over and over again! I used the Dot to Dot Stencil with Key Lime Pie and Bali Blue Hybrid Inks and then blended the same inks over the edges of the card to add a little more color to the panel. 

I set the panel aside and stamped the Snarky Birthday Stack with Raven Hybrid Ink and die cut all 11 sentiments at once with the Sentiment Stack Die II. I knew I wanted to add a shadow, so I cut black cardstock with the Sentiment Stack Shadow Straight II Die and adhered my chosen sentiments onto their matching shadow pieces.

The rest of the card is just die cutting and gluing! I cut the numbers from the Natasha Numbers Jumbo Dies and the letters from the Jordan Alphas Jumbo Upper Dies. These dies are big, bold, and certainly make a statement! I cut each piece from both white and black cardstock and adhered them together, slightly offset, to create a drop shadow. 


I added all of the pieces to my card with liquid adhesive and spattered the whole panel with gold shimmer watercolor. Every birthday card should sparkle! That's it! Thanks for joining me!

Wednesday, May 31, 2023

Shimmery Birthday Card ++ YOUTUBE HOP & GIVEAWAY!

I'm excited to be part of a YouTube hop featuring all kinds of celebratory cards! We could all use a little bit of crafty happiness, so join me on YouTube and hop along for a chance to win some prizes! 


I hope you enjoyed the video! Make sure you hop through to see all kinds of inspiration. Leave comments at each stop to be entered to win a gift card to some of your favorite crafty stores!


PRODUCTS USED


Monday, March 27, 2023

LDRS Creative | Rainbow Birthday Card

Colorful birthday cards are my jam! I used a fun new stencil from LDRS Creative to make a rainbow background with pops of gold. I created a quick video tutorial so you can make your own!


I love the A2 Confetti Spotlight Stencils! There are two pieces to this set and you can use them separately or together. My card today uses all aspects of the stencils (just to show you how FABULOUS they are!). I even mixed in a bit of heat embossing! I die cut black cardstock with the Happy Birthday Word Die and stacked it in three rows in the center of my card. I heat embossed a little cupcake from the It's Just a Number 4x6 Stamps and popped it up onto my card.


I added some gold baubles to accent my card. I left the card background as is in my video, but I decided it needed another little pop of black. I trimmed off 1/8" from each side of the card front and added it onto a black card base. VOILA! I hope you enjoyed this tutorial! 

Tuesday, August 30, 2022

LDRS Creative | Adding a Pop of Color with the Ginkgo Leaves Dies

I'm sharing a pretty slimline birthday card using stamps and dies from the new LDRS Creative Summer 2022 Collection


I love a black background with a bold pop of color! I started by covering a couple of pieces of cardstock with shimmer watercolors and then used the Ginkgo Leaves Die to cut out two large sprigs. 


I used the Elegant Stitched Frames Slimline Dies and cut a white card base, a gold and black layer, and then a gold, black, and white layered label shapes. I stamped a sentiment from the Essential Birthday Sentiments 4x6 Stamps onto the white label. I added shimmery white watercolor spatters to the black panel and added the Ginkgo Leaves die-cuts on top and trimmed off the excess. 


I layered all of the various pieces together with a mixture of liquid adhesive and foam tape for dimension. Thanks for joining me!

Wednesday, August 17, 2022

LDRS Creative | Colorful Birthday Bash Card

I'm sharing a fun and colorful birthday card using a handful of products from the LDRS Creative Summer 2022 Collection


I love the versatility of the Natural Granite 6x6 Stamp! I've used it to add texture to an outdoors themed card, to mimic ink spatter, and now to create faux confetti for a birthday card! I stamped the Natural Granite 6x6 Stamp onto a piece of A2 sized cardstock with Dan-D-Lion, Fandango, and Tropical Sea Hybrid Inks. I made sure the inks overlapped a bit to create a rainbow background. I used the small 'hooray' sentiment stamp from the Birthday Bash 4x6 Stamps and stamped 'hooray' all over the background.


I stamped the monkey and flamingo from the Birthday Bash 4x6 Stamps with Raven Hybrid Inks and colored them with glitter gel pens. This coloring medium is so easy to work with and adds a LOT of shimmer without any extra work. I cut them out with the Birthday Bash Coordinating Dies. I used the largest die from the Scalloped Circle Frames Dies to cut out a circle and stamped a sentiment from the Essential Birthday Sentiments 4x6 Stamps near the bottom and added the critters to the top with foam tape. 


I added the scalloped circle die-cut to the top of my card with foam tape and that's it! I'll see you soon!

Tuesday, June 28, 2022

LDRS Creative | Two for One Birthday Bash Cards

I have a video on the LDRS Creative YouTube Channel sharing a sneak peek at some new birthday products that will be released TOMORROW June 29th!


The Birthday Bash 4x6 Stamps are some of my favorite stamps ever! The critters are just too cute! I mixed them up with some previously released items to help me make a two for one card design. Let's get started!


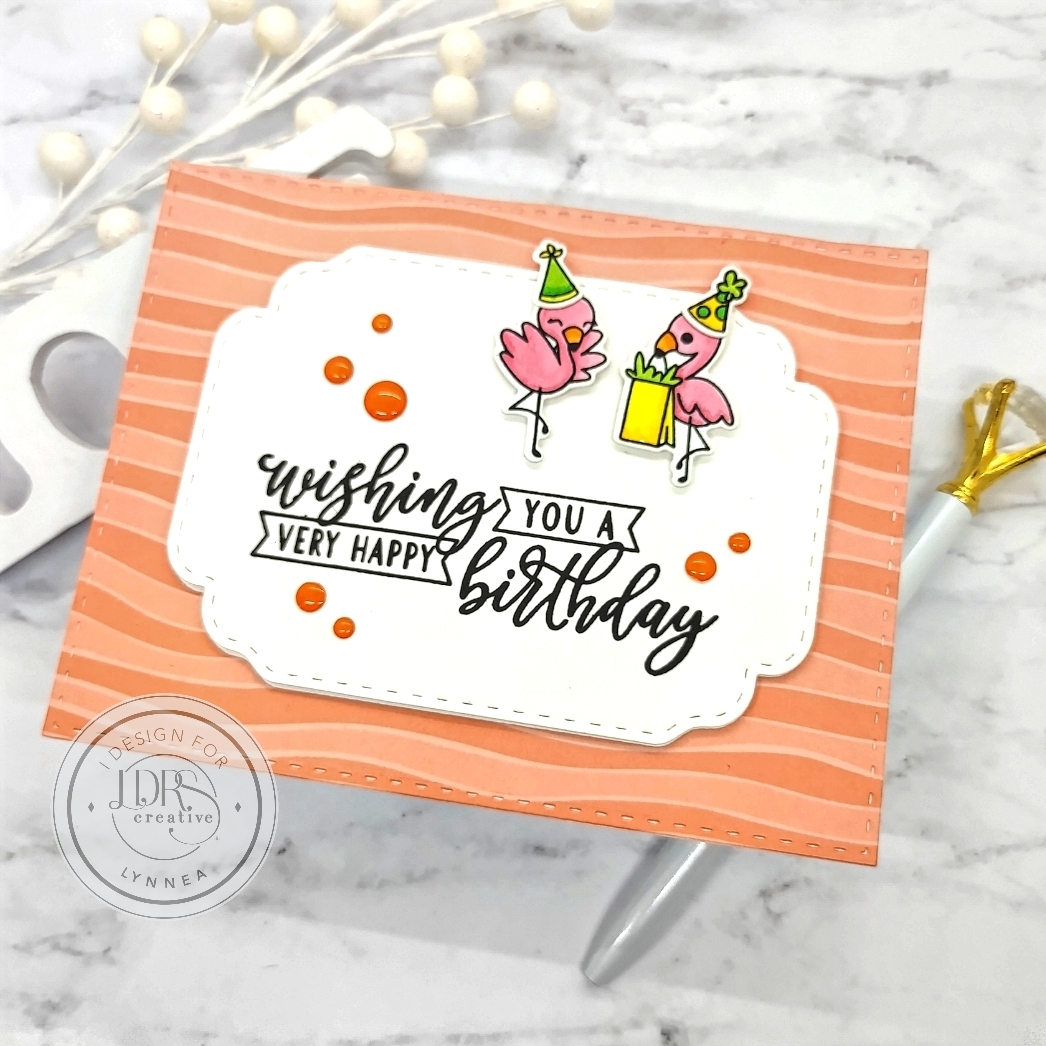
I chose a piece of coral patterned paper from the Songbird Fields 6x6 Paper Pack and die cut it with the largest die in the A2 Stitched Layered Card Toppers. I also cut out the center with the largest die from the Stitched Decorative Label Dies. I repeated the same steps with a piece of white cardstock. 


I set the pieces aside and used Raven Hybrid Ink to stamp some critters from the Birthday Bash 4x6 Stamp Set and colored them in with alcohol markers. I used the Birthday Bash Coordinating Dies to cut them out. 


I used Raven Hybrid Ink and stamped a sentiment from the Essential Birthday Sentiments 4x6 Stamp Set near the bottom of each die-cut label. I am in LOVE with this stamp set! There are 5 large birthday sentiments that are big, bold, and perfect! I added foam tape behind my labels and pieced them into the backgrounds and popped up the critters with foam tape for dimension. 


That's it - I hope you love these cards! Remember that you'll be able to find the entire LDRS Creative Summer 2022 Collection in the LDRS Creative store TOMORROW June 29th! 

Monday, June 6, 2022

Pink & Main | Hoppy Birthday to You!

I'm wishing you a 'hoppy' birthday with the adorable Ribbit Stamps and Dies from Pink & Main!


I love a good pun, don't you? And I love that this card is great for kids or adults! It's quite simple to make and I just used a few supplies. I wanted to create a centered focal point on my card with my stenciling. You could use masking tape, but I'm not very good at keeping things straight, so I find it MUCH easier to use the Pink & Main Mask-It Rectangle Stencil. There are guidelines etched into the stencil so you know right where to line it up on an A2 Card. I first adhered the Garden Gate Stencil to my card and then the Mask-It Rectangle Stencil and used an Ergonomic Blender Brush and two shades of green ink to stencil my background. 


I am a HUGE fan of adding spatters to my background. I think it adds texture and something interesting to a simple background. I used two colors of shimmer watercolor - green and gold - drying in between colors so that they wouldn't mix. I set the panel aside to dry for a bit and worked on the rest of the card. 


I stamped the frog, log, and two fireflies from the Ribbit Stamp Set and colored them with Copic Markers. I used the Ribbit Coordinating Dies to cut out each of the images and started adding them to my card with foam tape. 


I stamped the 'hoppy birthday' sentiment onto a piece of white cardstock and used one of the Large Sentiment Strip Dies to cut it out and added it below my scene. That's it! Thanks for joining me!

Monday, April 4, 2022

Pink & Main | Colorful Layered Birthday Candles

I just love layering stencils! There are so many ways to step them up. I used the Pink & Main Birthday Candles Stencils and did some ink blending and added some Glitz Glitter Gel for a touch of something special! 


I don't know about you, but rainbow is my favorite color! It's very easy to mask off the Birthday Candles Layering Stencils and add multiple colors. I positioned the first stencil over an A2 card and used a bit of masking tape so that I would only ink one row of candles at a time. I used an Ergonomic Blending Brush and blended on ink, moved my masking tape and blended the next color, and repeated until all of my candles were colored. I used a slightly darker shade of ink over the 2nd layer for the details on the candles. 


I used a yellow ink for the large candle flames and a bit of neon orange Glitz Glitter Gel for the centers. It adds just a touch of something special and rounds out the rainbow! I stamped a sentiment from the Party Animals Stamp Set and trimmed it out with my scissors leaving a small white border. It wasn't standing out from my card, so I adhered it to a black piece of cardstock and created a shadow. 


I popped up the layered sentiment in the center of my card with foam tape and that's it! Thanks for joining me! 

Monday, March 28, 2022

Pink & Main | Let's Eat Cake!

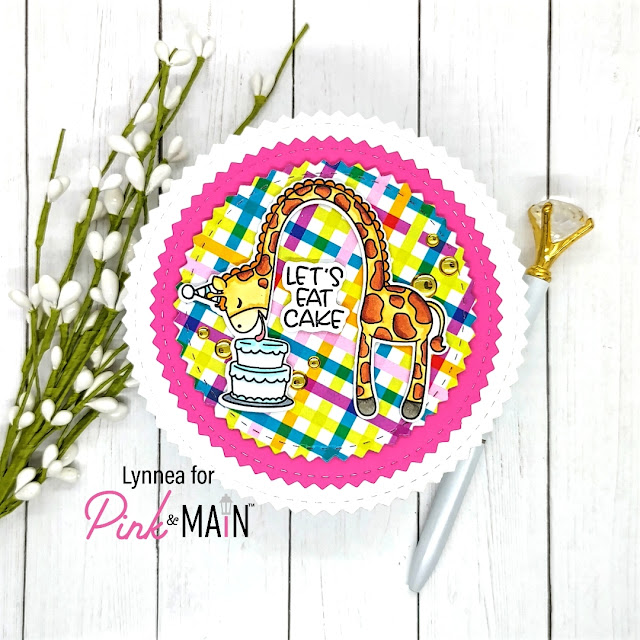
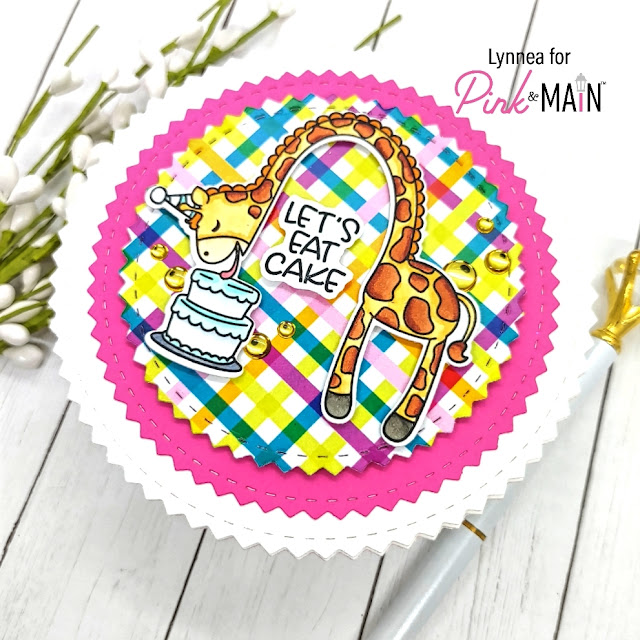
Let's eat cake! This circle shaped card using Pink & Main products is the perfect way to celebrate a birthday! 


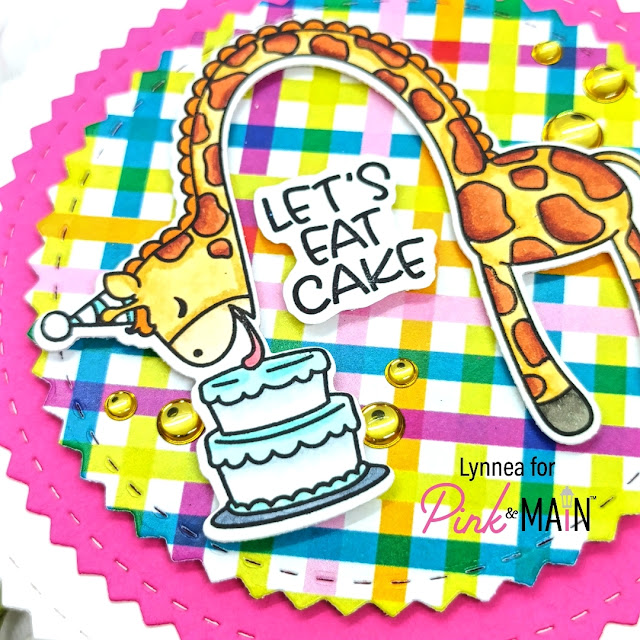
This shaped card is SO easy to make and only uses a handful of products! I stamped the giraffe image from the Party Animals Stamp Set and colored it with Copic Markers and die cut the image with the Party Animals Coordinating Dies. I stamped a sentiment and used scissors to bubble cut around the sentiment leaving a white border. 


I created a shaped card by cutting two white circles using the largest die from the Zig Zag Circles Die Set. I scored about 3/4" from the top of one of the circles and adhered them together on the flap I created by scoring. That's the easiest way I know to make a shaped card and you can use that trick with practically any shape die! I used the second largest Zig Zag Circles die and cut a pink circle and the third largest die and cut a plaid piece of patterned paper from the Happy 6x6 Paper Pack and adhered them to the card base. 


I added my colored image and sentiment to the top of my card and embellished with some Gold Glossy Dots to finish the card. See you again soon!