Make your holiday gifting extra magical! In this tutorial, I'll show you how to create matching tags and a gift card envelope straight from the North Pole using the North Pole Collage 4x6 Stamps, Mixed Tag Dies, and the Gift Card Scallop Envelope Die. Watch this Stack & Collage technique in action and see just how easy it is to make Santa’s special delivery part of your holiday crafting!
Aren't these tags just the most adorable things you've ever seen?! I just LOVE how the North Pole Collage 4x6 Stamps let you customize tags (and more!) with sentiments that you can check off naughty or nice, sleeping or awake, etc. It's so much fun!
While I had my supplies out, I decided to make a gift card envelope that matches the tags so that I could have a full set of gift giving goodies ready for the holidays! So perfect, right?! Make sure you check out my video at the top of this post to see how quickly and easily everything came together!
Eeeek!! Halloween is in just over a week! It's time to kick those spooky projects into high gear! Join me on the LDRS Creative YouTube Channel for a stack and collage spooky Halloween tag that you can attach to a gift or add to a card.
I love stacking and collaging! It looks like a lot of time and effort went into creating a project, when really it's just casual stamping! I used the Any Size Tags Dies to create a basic tag shape and stamped the Ledger 3x4 Stamp in the center. I wanted to have a big and bold sentiment in the center, so I used the Kringle Numbers Jumbo 4x6 Stamps to stamp the "31" in black ink and then filled in around the numbers with icons and sentiments from the Wicked Collage 4x6 Stamps.
I wanted to have something special in the background, but something that wouldn't distract too much from my focal point tag. I trimmed a piece of black cardstock and cut it with the Quilted Plaid A2 Coverplate Die and added it to a card base with a bit of gold for some shine.
Little duckies are my favorite things to put on baby cards and tags. They're just so CUTE! I used some LDRS Creative stamps and created a quick and easy (and super adorable) tag and coordinating baby card!
I love how easy it was to create this card and tag set. You could customize them to any color or switch up the duckie for a different element and change the theme completely!
I started with the tag - in fact - I was only going to make a tag, but the idea of a coordinating card was too enticing to let pass! I trimmed a piece of cardstock and cut the top with one of the dies from the Any Size Tags Dies. Then I just started stamping! I used the Ledger 3x4 Stamp first and built the rest of my design around the grid. I stamped a bunch of sentiments, a couple of ducks, and some additional elements from the On This Special Day 4x8 Stamps using a variety of LDRS Creative Hybrid Inks.
If you thought the tag was simple, just wait until I tell you how easy the coordinating card was to make! I stamped a row of ducks with yellow ink and used the outline stamp from the On This Special Day 4x8 Stamps to give them a defined edge. Then I stamped a sentiment under the row of ducks and finished it off with a strip of cardstock. Wham, bam, that's all done! Thanks for joining me!
I'm sending you Easter smiles with this quick card using LDRS Creative patterned papers, stamps and dies!
I love the line of Gift Tag Stack stamps. You can quickly stamp 6 tags and cut them out at once with the Gift Tag Stack Die. The Spring Gift Tag Stack Stamp Set is great for a bunch of occasions - birthdays, Mother's Day, thank you, etc. I decided to use them on a light an airy Easter card. I stamped the Spring Gift Tag Stack with Raven Hybrid Ink and colored the flowers with alcohol markers. I cut out all six tags with the Gift Tag Stack Die and chose two of my favorites for my card. I stored the extra tags with my stamp set, but you could easily create a trio of cards if you want!
I needed a simple background to keep the focus on the pretty tags, so I chose two patterned papers from the Lovely Watercolor 6x6 Paper Pack. I cut the busier floral pattern with the largest die in the A2 Stitched Layered Card Toppers Die Set and the watercolor spattered background with the middle die in the set.
I didn't want to take away from the papers and tags with a large sentiment, so I opted for a sentiment strip from the Easter Sentiment Stack. I stamped them with my Raven Hybrid Ink and cut out the strips with the Sentiment Stack II Die. I added the tags and sentiment to my card with foam tape, added some twine, and finished the card with some Lovely Watercolor Enamel Dots. Thanks for joining me! I'll see you soon!
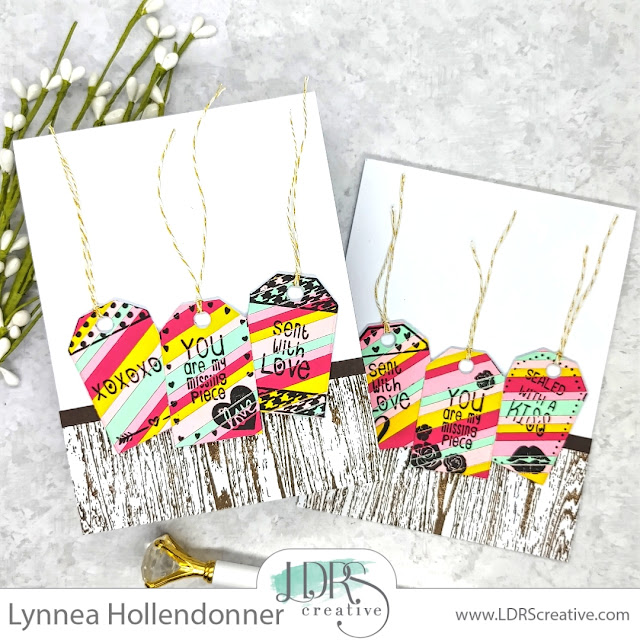
The new release from LDRS Creative is here! I pulled together a few items from the latest collection and made a pair of Valentine's Day tag cards.
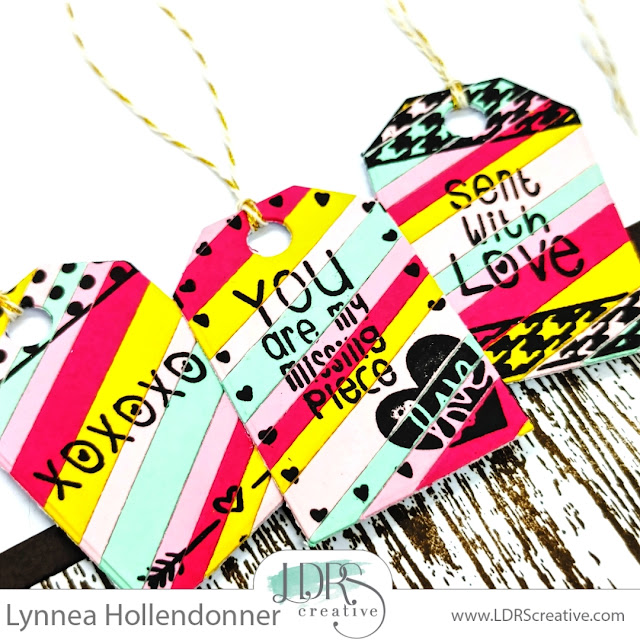
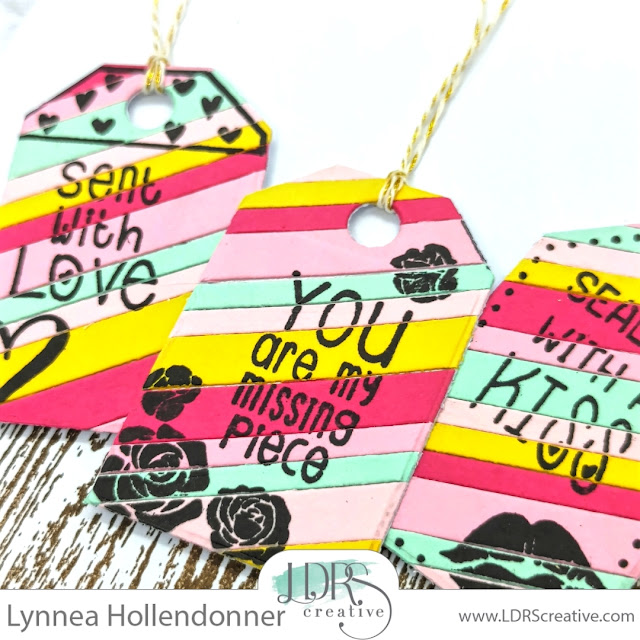
I'm SO excited about the new Background Strip Dies! AHHHHH!! I've wanted something like this in my craft room for a very long time! They come in both A2 and slimline size and in a variety of widths, so my every paper strip dream is covered. YAY! I used the 1/8" A2 Background Strip Die and the 1/4" Background Strip Die to cut some yellow, mint, and two shades of pink cardstock and covered a piece of 4.25" square cardstock with the strips. I varied the colors and widths to create a random striped background pattern and I fell in love with it!
I stamped the Love Tag Stack Stamp with Raven Hybrid Ink over the striped background and added a few different sentiments from the same stamp set. Then I cut out the tags all at once with the Gift Tag Stack Die and added a bit of twine through the top of each of the tags.
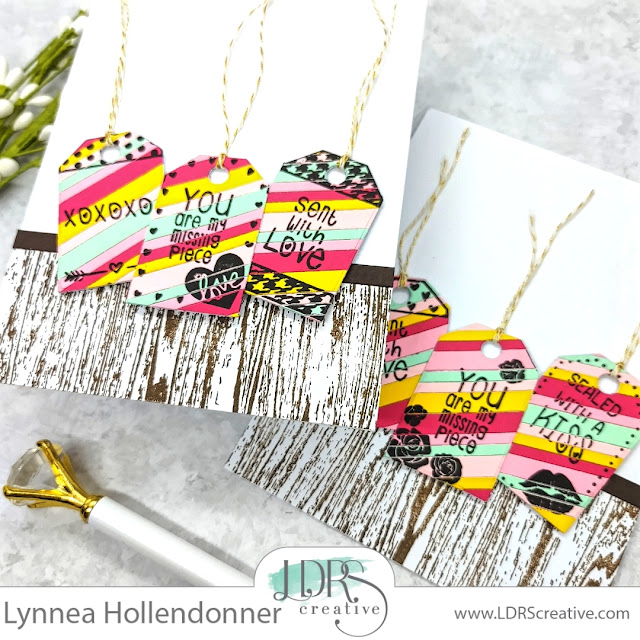
I stamped the new Wood Grain 6x6 Stamp with Coffee Bean Hybrid Ink onto white cardstock and cut the background down to cover about a third of the bottom of my card. Here's another way to use those background strips! I used the 1/4" A2 Background Strips Die to cut some brown cardstock and used it to create a border between the white portion of my card and the woodgrain.
I added three tags to each of my cards with foam tape and that's it! I hope you enjoyed this peek at some of the products from the latest collection. Everything is available now in the LDRS Creative store!
I have a special project to share with you LIVE on the ThermOWeb YouTube Channel this Wednesday, November 17th at 11am CT / 12pm ET! And I'll be joined by a special guest - my son, Jax! If you've joined me before you may have heard his sweet voice or seen his little hands pop into the screen. He's been wanting to craft live with me, so we're going to show how easy it is to create a set of ornaments with Glitz Glitter Gel!
I'm going to be sharing tips and tricks for getting your kids involved in crafts for the Holidays! Jax has been crafting with me since he was almost 2 (he's 6 now) and he LOVES to make handmade gifts to give at Christmas (though he has informed me that these cute ornaments will be hanging on his tree this year!).
I created this quick set of tag ornaments, but you'll see just how easy they are to create with little hands when you join me live! This design is easily customizable. Jax's favorite colors are blue and green and he loves dinos! I used Turquoise Sea Glitz Glitter Gel for these samples, but who knows what color he'll pick when we're live!
I hope you're excited to come craft with me and Jax! He is SO excited to craft with all of you. We'll see you LIVE on the ThermOWeb YouTube Channel on Wednesday at 12pm CT / 1pm ET!
I LOVE the new gift tag stack system! Such an easy way to make a bunch of tags at once! I wanted to create some Autumn treat tags, so I stamped the new Thankful for You Gift Tag Stack with Coffee Bean Ink. LDRS Creative Inks are a hybrid ink, which means I can add whatever color medium I want without worrying about my ink smearing. Yay! I used alcohol markers and quickly colored the tags and cut them out all at once with the Gift Tack Stack Die. I chose two tags that went well together and glued them back to back so that my tags are pretty on both sides.
I wrote little notes on the back of teach tag and threaded some twine through the hole at the top and added my critters with foam tape. These tags are PERFECT for adding to sweet treats for my son! I hope this project inspires you!
The September release from Pink & Main is here and it includes the FABULOUS Homespun Christmas Kit! I made a 5 cards 1 kit video to show off the amazingness of this kit!
I'm in love with the Homespun Christmas Kit! Perfect for both traditional and non traditional Holiday projects. This kit is not part of the regular Crafty Courtyard subscription and WILL need to be purchased separately. Grab it up quick! There are limited quantities and it's a fabulous kit! There is so much packed into this kit - a large 6x8 stamp set WITH coordinating dies, a full patterned paper pack as well as a pack of foiled cardstock, a stencil, and MORE!
I went classic and simple with my first card. I used the Pink & Main Stitched Rectangles 1 Die Set to cut out various patterned papers from the Homespun Christmas Kit and stacked them together. I added a bit of baker's twine from my stash for a small detailed accent and added the mason jar of poinsettias in the center of my card. This image is gorgeous! You can color the poinsettias traditionally as I have or color them with teals for a non traditional look.
I can't create with a card kit without creating a shaker card! I decided to mix traditional and non traditional colors on my card. I used the Reverse Scalloped Rectangle Dies to cut out a frame from a piece of patterned paper and used acetate and foam tape to create a shaker well. I filled it with sequins from the kit and backed it with a cream colored paper. I colored the bells and stamped a sentiment and added them to the center of the shaker.
My third project is a tag - I thought it would be cute to have something a bit different! I used the stencil included in the Homespun Christmas Kit and stenciled some light brown ink onto white cardstock and used the Fancy Tag Die Set to cut my tag shapes. I accented with some of the gold foil cardstock in the kit and added a sentiment strip and the candy cane image.
I liked the stencil so much that I decided to use it again and stretch it across a slimline card! I ink blended with a light blue ink and then shifted the stencil to the right and blended ink over the rest of the panel. I used the frame die from the Blessings Slimline Die Set to create a nice scalloped edge and added the lantern and a sentiment.
I went with non traditional colors for my last card - lime green and pink! And I colored the stocking with some aqua markers, too! I used the Concave Rectangles Die Set and hung the die-cut piece off the edge of the card for some interest. The patterned papers in the Homespun Christmas Kit are stunning!
I am over the moon in love with the Homespun Christmas Kit! Remember that it's a limited edition kit and not part of the regular Crafty Courtyard subscription, so hurry over to the Pink & Main Store and grab yours!
Just like the sentiment stack sets from LDRS Creative the new Gift Tag Stacks allow you to stamp SIX tags all at once and then use one die to cut them all at once! I mixed up my LDRS Creative Hybrid Ink colors for more variation, but you could make these tags even quicker if you keep the ink to just one color.
With six tag designs and four sentiment options there are so many possibilities for these little guys! See you tomorrow for more LDRS Creative inspiration!
I'm feeling in the Holiday sprit and wanted to use the new Pink & Main Fancy Tag Dies to create some easy Christmas tags!
The Fancy Tags Die Set has a bunch of dies that you can use to create simple or fancy tags! I decided to layer together a bunch of pieces to create fancy, but still easy, tags! I die cut the smaller stitched tag shape from two pieces of white cardstock and planned to layer it onto the scalloped tag, but I wanted to give it some extra interest. I used the Holly Layering Stencil and an Ergonomic Blending Brush to give the white tags a cute pattern. I cut the larger scallop tag from two pieces of black cardstock and then cut the tag topper from white. I used the small circle die to cut a hole through all three pieces of the tag and looped white ribbon through the top.
The Stocking Stuffers Stamp Set was one of my favorite Holiday sets Pink & Main released last year. I LOVE how you can build a stocking with an elf, cat, dog, or some presents! So many fun possibilities! I stamped the stocking twice and the elf and dog and colored them with water brush pens then die cut them with the coordinating Stocking Stuffers Die Set.
I stamped the sentiment from the Stocking Stuffers Stamp Set and trimmed it in half so that I could stack it to the left of the cute images. And that's it! Two easy tags to add to my Holiday stash! Thanks for stopping by!
I know they seem far away, but the Holidays seem to sneak right up on me each and every year! I have an easy to make Gnome for the Holidays gift tag to share with you!
I used the recently released Bookmark and Tag Die Set for my tag background - even thought the die that I used is technically for bookmarks! There's nothing wrong with an oversized tag, right?
I finished the tag with some twine at the top and that's it! It would be super easy to create a bunch of these adorable gnome tags! See you next week with a new Friday Frenzy video!
Hi hi! I have a quick video tutorial showing you how to put together the i-crafter Zip Gift Tags. They're super easy and a fun interactive way to give cash or gift cards! And you could totally use these dies on their own, too!
Be sure to watch the video tutorial above for step by step instructions on how to put together the Zip Gift Tags. I cut my tag bases from some rainbow patterned paper. The Zip Gift Tags have a BUNCH of extra dies that you can use with the main tag die to embellish the tags. For these I decided to die cut a "for you" sentiment right out of the tag. There are other sentiments included in the die set as well as some little icons. So fun!
The absolute BEST part of the Zip Gift Tags die set is right in the name! The tags have an optional die that you can use to create a pull strip to reveal a hidden pocket for a gift card. How awesome!! I finished off these tags with a heart die cut from the Heart Hands Wiper die set.
I love adding homemade tags to my Christmas gifts! It's such a fun way to add a personal touch to a gift! I grabbed the Warm Hug stamp set and Be Merry Paper Pad as well as some other coordinating Pink & Main products to make a cute trio of tags!
I thought about leaving the tags just as the rectangles, but I didn't want to mess up my design by punching a hole for the ribbon ... so I got creative! I die cut the top of the main die from the Pull & Flip die set and punched a whole in the top of that! It looks just like the top of a tag! All I did was adhere it to the back of the Reverse Scallop Rectangle die!
There are cute sentiments in the Warm Hug stamp set, but I love the mix of print and script fonts in the Holly Jolly stamp set! I've been using it for all of my Christmas sentiments! I stamped the sentiment onto a strip of white cardstock and cut the edges into a banner end and added them to the bottom of my tags along with the cute penguin die cuts.
I finished off the tags with some Silver Glossy Dots and ribbon and twine! I think they turned out super cute! Christmas is just around the corner! I hope this gives you some inspiration for your gift tags! See you soon!
Hey, there! It's time for another Crafty Festival of Christmas event! This week we'll be sharing tag or gift card holder projects for your Holiday inspiration! I decided to create some pearly tags!
I used my MISTI so that I could add a bunch of snowflake stamps from the Pink & MainFlurries stamp set and stamp them with Versamark Ink all at once. You could definitely add some pretty embossing powders to the tags, but I decided to cover the snowflakes with Perfect Pearls! I used to use them all the time and I recently saw Simon Hurley use them and it inspired me to use them again!
I used a Perfect Pearls Flat Brush to pounce some of the Perfect Pearls on top of the Versamark Ink. You want to be careful to pounce the powder up and down on top of the ink and not drag the brush through the ink or it will smear. Ask me how I know! Haha! Once the ink is covered in the powder I will rub a slightly stiffer brush back and forth across the powder to remove the excess. A little bit of water is all you need to set the powder. I used my Tim Holtz Distress Sprayer to spritz some water into the air and then waved the tags through the mist.
Hello! A big, huge welcome to everyone! I'm super excited to be part of the ThermOWeb and Gina K Designs Mix n' Mingle blog hop celebrating the release of two new Stamp n Stencil sets! Design team members from both Gina K Designs and ThermOWeb are creating with these fabulous new products and will be sharing inspiration with you! Since we're mixing it up with inspiration from both teams there will be prizes from both teams, too! ThermOWeb and Gina K Designs are each giving away a $50 to their stores! To enter head over and enter the Rafflecopter giveaway! Your next stop on the hop is Lisa Hetrick! If you get lost at any point in the hop you can head over to the ThermOWeb blog or the Gina K Designs blog for the full blog hop list!
There are two new Stamp n Stencil sets being released from ThermOWeb and Gina K Designs today! One is perfect for autumn and one is perfect for winter! Each set comes with a large stamp set, coordinating dies, and a stencil - and they work together perfectly!
I had a set of five off white tags in my stash leftover from last year, so I decided to get a start on my Christmas tags! You may not know, but I'm in love with snowflakes! I just LOVE them! I used the Wishing You Joy stencil and sprayed the back with Pixie spray and used a Stencil Pal to add White Glitz Glitter Gel to each of my five tags and set them aside to dry.
I stamped the ornament and ornament topper from the Wishing You Joy stamp set and die cut five of them with the coordinating dies. Check out my video below for a tip on mass stamping die cut images! I added the details to the ornament with the Wishing You Joy stencil and Gold Glitz Glitter Gel and White Glitz Glitter Gel letting the Glitz dry between colors.