Showing posts with label ThermOWeb. Show all posts

Monday, December 12, 2022

LDRS Creative | Gardenia Layering Stencils - Two Ways

I LOVE stencils! They are an inexpensive tool that never gets 'used up' and there are so many ways to make them look fancy! I am showing two ways to use the Gardenia Layering Stencils from LDRS Creative and step them up to take them to the next level! 


Layering stencils are SUPER fun to play with! I love the dimension they bring to my projects. As gorgeous as the Gardenia Layering Stencils when used with inks to create a one layer card, I wanted to show you a couple of ways that you can use these stencils and bring a bit of extra WOW to your projects! 


My first way to step up layering stencils is to use glitter pastes! I started by stenciling the first layer of the flowers from the Gardenia Layering Stencils with Marina Madness Hybrid Ink (stencil 1A). Instead of adding the second layer on top of the flowers with a second color of ink I went right to the first layer of the leaves and blended Prickly Pear Perfection through the stencil to create the base layer of the leaves (stencil 2A). I used an aqua glitter gel for the second layer of the flowers (stencil 1B) and a green glitter gel for the second layer of the leaves (stencil 2B). I added the aqua glitter gel, set the panel aside for about 10 minutes and then added the green glitter gel. It's still a one layer panel, but just LOOK at the glitter!!


I didn't want to distract from my background, so I trimmed the stenciled panel down to 4" x 5.25" and popped it up onto a black A2 card base. I cut a sentiment from the Everyday Word Dies and backed it in white and popped it up in the center of my panel. That's it for card one! Imagine how pretty this card would be if you added a transfer gel and foiled the various parts of the Gardenia Layering Stencils!


The second way to step up layered stencils is a bit less obvious, but still really pretty! I worked on two panels so that I could cut out the flowers and pop them up for some dimension. The gardenias are SO easy to fussy cut and it hardly took any extra time, but the results are gorgeous! 

I blended the flowers from the Gardenia Layering Stencils on one panel with Banana Cream Pie and Peachy Keen Hybrid Inks and then cut them out with my scissors leaving a white border. I blended the leaves for the flowers on a second panel using Olive Branch and Evergreen Hybrid Inks. I cut down the base panel (with the leaves) to 4" x 5.25" and added some black ink spatters. Then I added the flowers to the card front with foam tape. 


I cut out a sentiment using the All Occasions Word Dies and added it to the card with foam tape. I wanted to bring a bit of sparkle to my card, so I used my clear shimmer pen and added glitter to the flowers and to the sentiment. 


I hope these two techniques inspire you to grab your Gardenia Layering Stencils and add a bit of WOW to your projects! I'll see you soon!

Monday, April 4, 2022

Pink & Main | Colorful Layered Birthday Candles

I just love layering stencils! There are so many ways to step them up. I used the Pink & Main Birthday Candles Stencils and did some ink blending and added some Glitz Glitter Gel for a touch of something special! 


I don't know about you, but rainbow is my favorite color! It's very easy to mask off the Birthday Candles Layering Stencils and add multiple colors. I positioned the first stencil over an A2 card and used a bit of masking tape so that I would only ink one row of candles at a time. I used an Ergonomic Blending Brush and blended on ink, moved my masking tape and blended the next color, and repeated until all of my candles were colored. I used a slightly darker shade of ink over the 2nd layer for the details on the candles. 


I used a yellow ink for the large candle flames and a bit of neon orange Glitz Glitter Gel for the centers. It adds just a touch of something special and rounds out the rainbow! I stamped a sentiment from the Party Animals Stamp Set and trimmed it out with my scissors leaving a small white border. It wasn't standing out from my card, so I adhered it to a black piece of cardstock and created a shadow. 


I popped up the layered sentiment in the center of my card with foam tape and that's it! Thanks for joining me! 

Monday, March 21, 2022

Miss Ink Stamps | Portrait Layering Stencils

Miss Ink Stamps just released new layering stencils and they are amazingly fun! I used a touch of Glitz Glitter Gel for something fun and shiny! 


These cards took just a few minutes to make and look at how fabulous they are! 


I used the Classic Frame Stencil to create a border and then used the Cheetah Portrait and Zebra Portrait Layering Stencils to add my focal points. I used Distress Oxide Inks to add color and then used Black Glitz Glitter Gel over the top layering stencil for extra shine. 


I hope you enjoyed these quick cards! See you soon! 

Thursday, February 24, 2022

ThermOWeb | Simon Hurley create. Collaboration

I am SO excited about the ThermOWeb and Simon Hurley create. collaboration! I have been a long time lover of the Simon Hurley create. line and I loved mixing his products with some Glitz Glitter Gel and a Toner Card Front from ThermOWeb


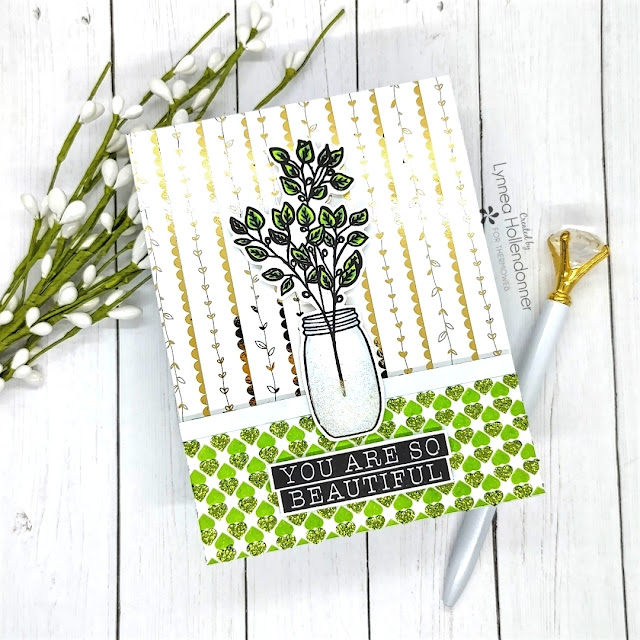
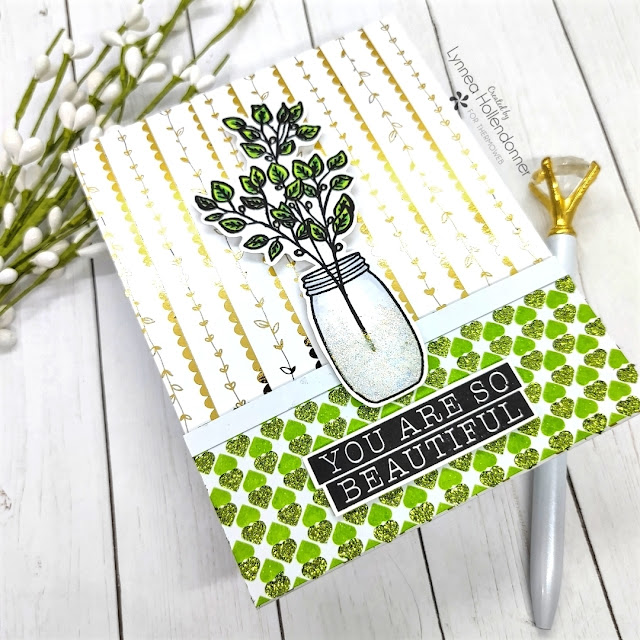
It sure looks like there's a lot that went into this card, but it was so easy to make! I started by blending Simon Hurley create. Overzealous Dye Ink over the Tiny Hearts Stencil onto a strip of white cardstock. I flipped the stencil 180 degrees and lined it up again and used my Stencil Pal and some Grass Green Glitz Glitter Gel to add some sparkle to my design. You could make a fabulous background this way, but I just wanted to have an accent piece at the bottom of my card, so I used a smaller piece of cardstock. 


I love to mix textures, so I decided to add some foiling to my background. I grabbed one of the new Spring Fling Toner Card Fronts and foiled it with Gold Deco Foil using my laminator and a Deco Foil Parchment Paper carrier sheet. Look at the shine!! It's marvelous! I stamped my mason jar and plant images from the Simon Hurley create. Sketched Florals Stamp Set and colored them with Copic Markers. I wanted to add something special to the vase, so I used Pixie Tape to adhere the Simon Hurley create. Vases Stencil over the mason jar and put some Iridescent Glitz Glitter Gel onto my work surface and used my finger to add it over the stencil. It looks like sparkly dimensional water! 


I added my stenciled panel to the bottom of my card with iCraft 1/16" White Foam Tape and used my iCraft Ultra Bond Liquid Adhesive Pen to add a small strip of white cardstock to the top to form a border. I popped up my image and a sentiment and that finishes the card! 

ThermOWeb and Simon Hurley create. Instagram Hop

It's time for an Instagram hop to celebrate the ThermOWeb and Simon Hurley create. collaboration week! After you watch my video be sure to check out Instagram for a hop full of inspiration and giveaways! 


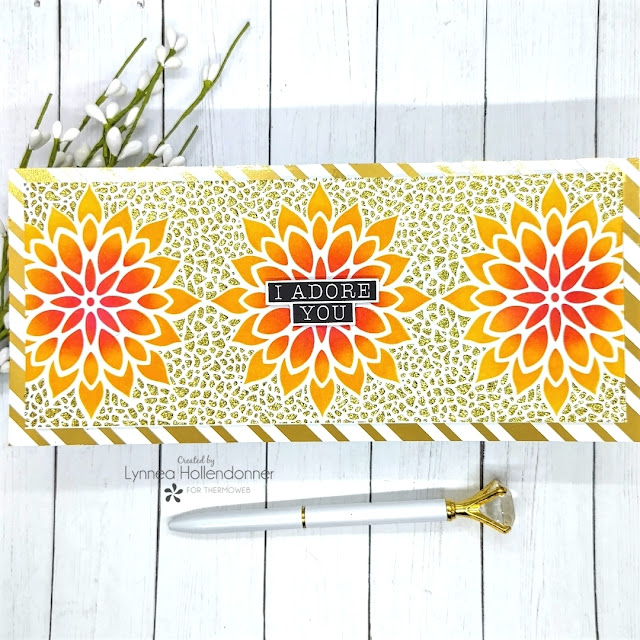
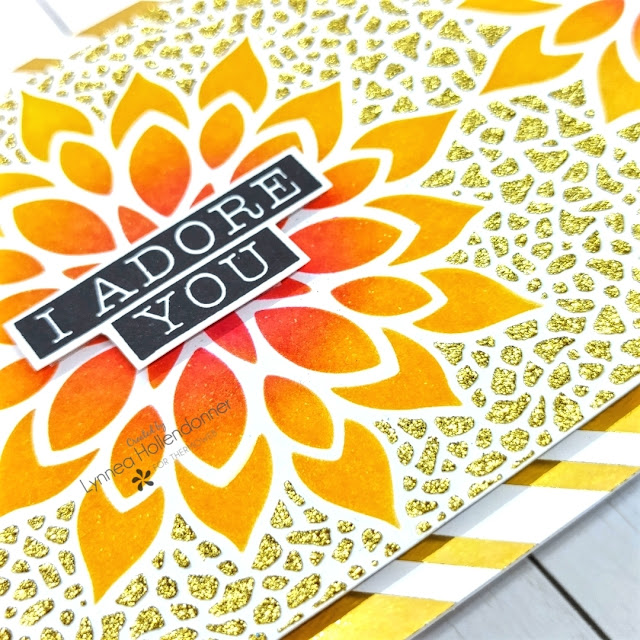
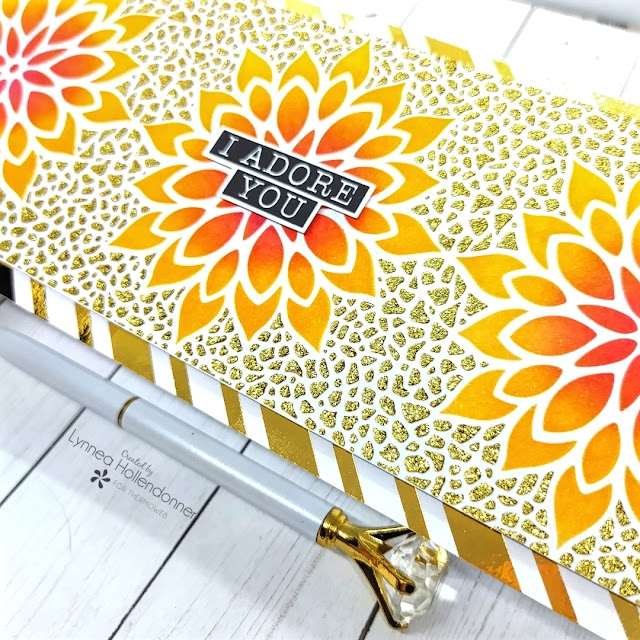
I used the first stencil from the Mosaic Florals Layering Stencils from Simon Hurley create. along with some Prom Queen and Guppy Dye Inks to add color to the flowers. Then I added the second stencil over my panel and used a Stencil Pal to spread Gold Glitz Glitter Gel over the stencil to fill in the background. It looks like tiny golden pebbles! 


I used a piece of Deco Foil Parchment Paper and Gold Deco Foil to foil a Candy Stripes Slimline Toner Card Front. Once my stenciled panel was dry I added it on top of the Toner Card Front with iCraft Foam Tape. I stamped a sentiment from the Simon Hurley create. Sketched Florals Stamp Set and popped it up in the center of my card. 


Don't forget that this is part of an inspiration hop on Instagram! Thanks so much and I'll see you soon!

Wednesday, February 16, 2022

ThermOWeb Live with Lynnea | NEW Product Release

How EXCITED are you for the new release from ThermOWeb?! There are new Toner Card Fronts, Deco Foil Flock Transfer Sheets, AND Deco Foil Transfer Sheets and I'm going to show them off LIVE on the ThermOWeb YouTube Channel TODAY at 11am CT/12pm ET! 


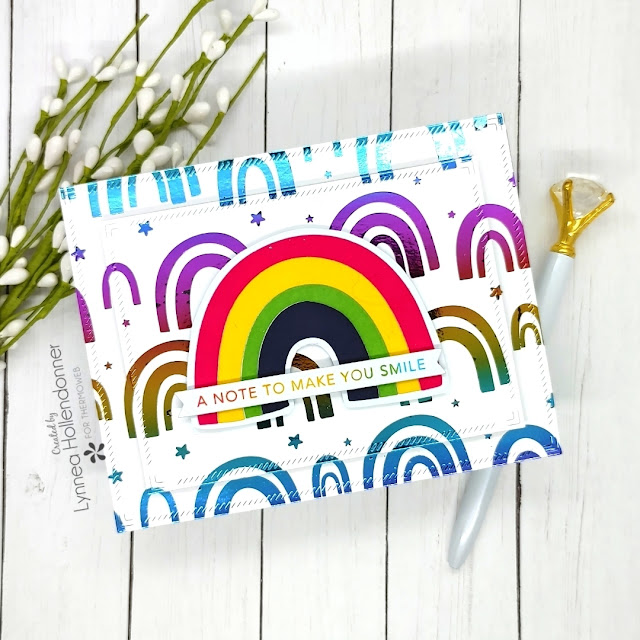
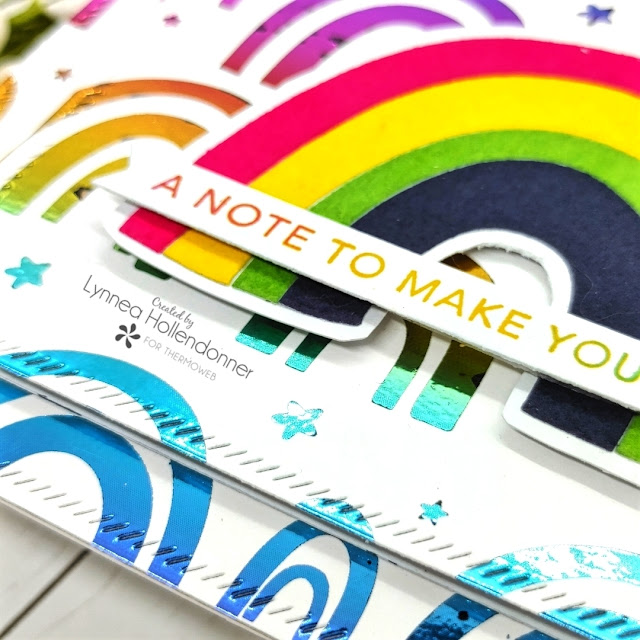
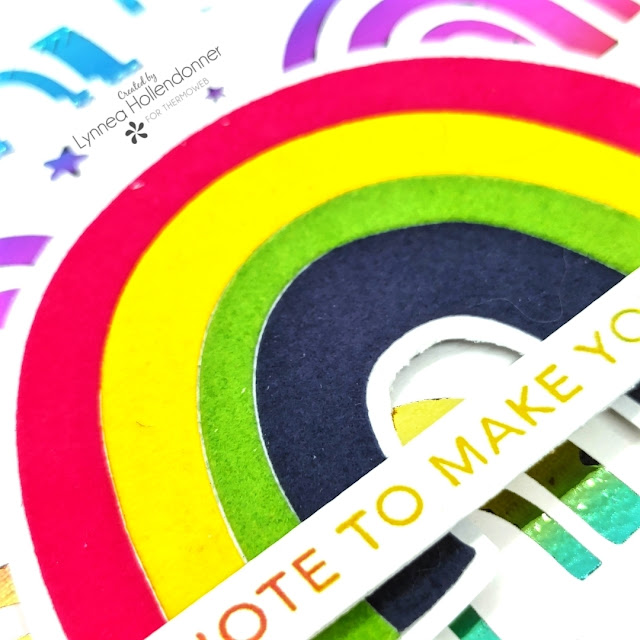
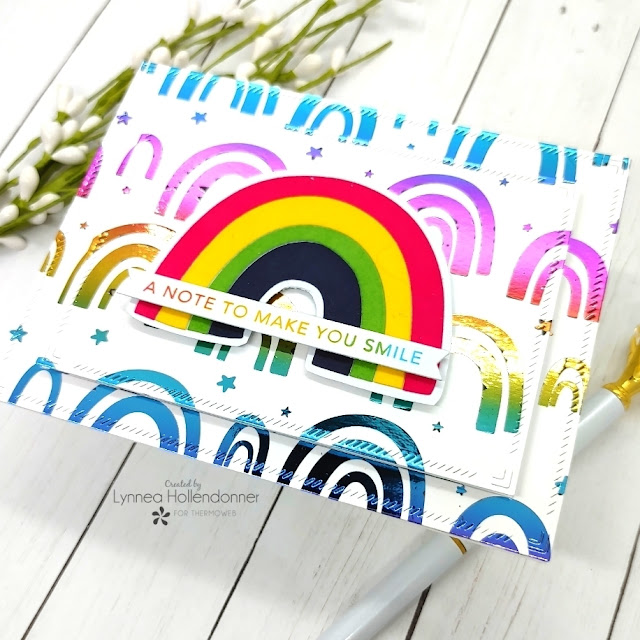
There are a bunch of new Toner Card Front designs and I could barely choose a favorite! It's been a long time since I made a rainbow themed card, so I chose the wonky rainbow pattern from the new Rainbows Galore Toner Card Fronts and foiled it with the new Mystic Rainbow Deco Foil Transfer Sheets


There are so many ways to add interest to foiled backgrounds, but I decided to go simple and create a popped up die cut effect with iCraft 3D Jumbo Foam Tape


I die cut a few colors of Deco Foil Flock Transfer Sheets - including the new Midnight Blue Color! - and added the rainbow to my card. A quick sentiment finishes off the card!


I hope you're jumping over the rainbow for these new products! Join me LIVE TODAY at 11am CT / 12pm ET on the ThermOWeb YouTube Channel for the full tutorial! 

Saturday, February 12, 2022

InkOn3 | Coloring with Ink Blending

 Ink blending with Atelier Inks is such a quick way to add color to images! 


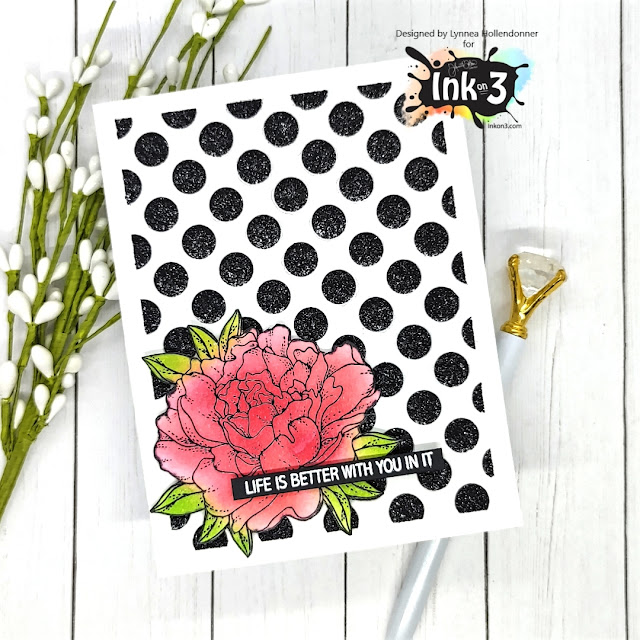
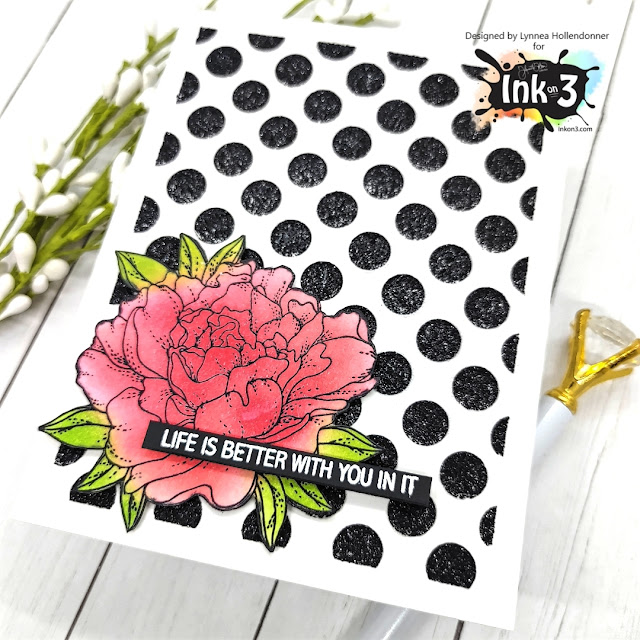
I love when small stamp sets go a long way! The Here for You Stamp Set is a mini set with the most gorgeous floral image and small sentiments. I stamped the image with Blackout Hybrid Detail Ink and heat embossed it with Crystal Clear Fine Detail Embossing Powder. I used Marilyn Red Atelier Ink and Goddess Green Atelier Inks to blend color onto the image and cut it out with my scissors. I masked off the edges of a card and added a bit of Black Glitz Glitter Gel over a polka dot stencil and popped up my flower on top. 


I stamped a sentiment from the Here for You Stamp Set with Juicy Watermark Embossing Ink and heat embossed it with Arctic White Fine Detail Embossing Powder. I trimmed the sentiment out into a strip and added it to the card with foam tape. That's it! Thanks for joining me!
Wednesday, February 9, 2022

ThermOWeb Live with Lynnea | Sweet Treats Card with Toner Card Fronts and Flock

It's Sweet Treats week on the ThermOWeb blog and I have a special project that I'll be sharing LIVE on the ThermOWeb YouTube Channel TODAY at 11am CT/ 12pm ET! 


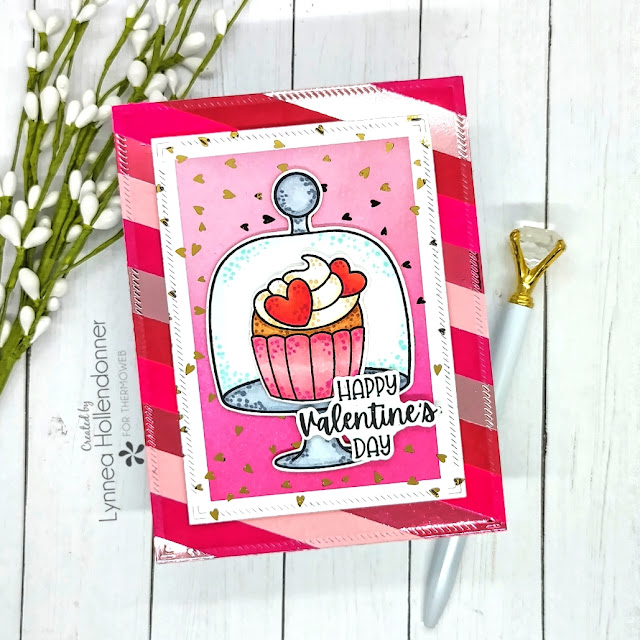
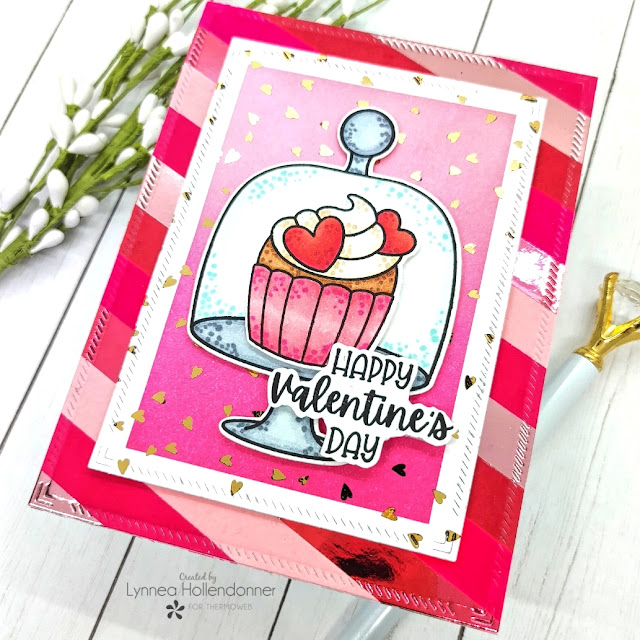
There is a lot packed in to this (almost) monochromatic card! I did some foiling with a laminator onto a Toner Card Front, masking (with the NEW Pixie Tape!), ink blending, and that background is made up of Flock and Foiled strips! 


I created my foreground panel with a Dainty Hearts Toner Sheet that I foiled, masked off the edges, and ink blended. I wanted to create a special background, so I used a couple of colors of Deco Foil and foiled a scrap piece of a Deco Foil Toner Sheet and cut them into strips. I also cut strips of pink and red Deco Foil Flock and added them to a piece of cardstock covered with an iCraft Easy Cut Adhesive Sheet


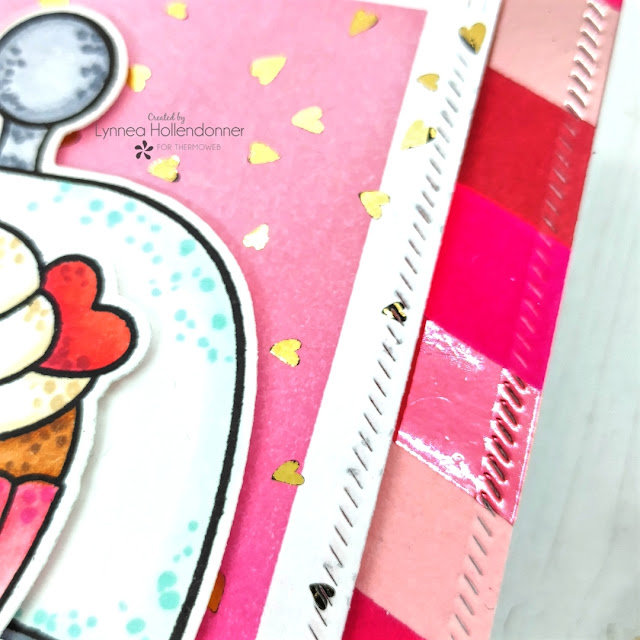
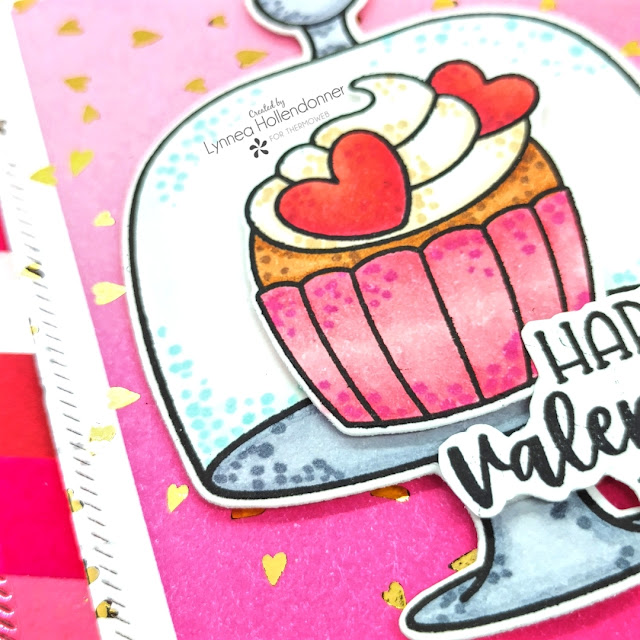
I die cut both background panels for an extra touch of something special and then colored my sweet images from the Pawsome Stamps Sweet Cupcakes Stamp Set and added them to the card


Be sure to join me LIVE on the ThermOWeb YouTube Channel for the full tutorial! This was such a fun card to make! 

Tuesday, January 25, 2022

ThermOWeb Live | Two For One Toner Card Front Backgrounds

I always get asked how I use left over Deco Foil and I'm going live on the ThermOWeb YouTube Channel on Wednesday the 26th at 11am CT/ 12pm ET to show you how to easily get two cards with one piece of foil and a Toner Card Front


Deco Foil Toner Card Fronts are the easiest way that I know of to make two for one backgrounds! I was able to make two cards with one Toner Card Front and one piece of Deco Foil - and they look completely different!


I added some quick ink blending to a Rosy Days Deco Foil Unity Toner Card Front with Distress Oxide Inks and then buffed off the excess ink with a microfiber cloth. I foiled the Rosy Days Deco Foil Unity Toner Card Front with Gold Glitter Unity Deco Foil using my laminator and a piece of Deco Foil Parchment Paper. It's so pretty! 


I never like to waste pretty things and the Gold Glitter Foil is my favorite! I grabbed a solid Deco Foil Toner Sheet and foiled the left over pattern from my Toner Card Front and now I have the reverse pattern with some black peeking through! You could foil the panel again with another color, but I really loved the black and gold. 


I finished off the cards with a simple die cut sentiment. I hope you'll join me LIVE on the ThermOWeb YouTube Channel for the full step by step tutorial! 

Saturday, January 22, 2022

ThermOWeb | You Are Loved Foiled Cards

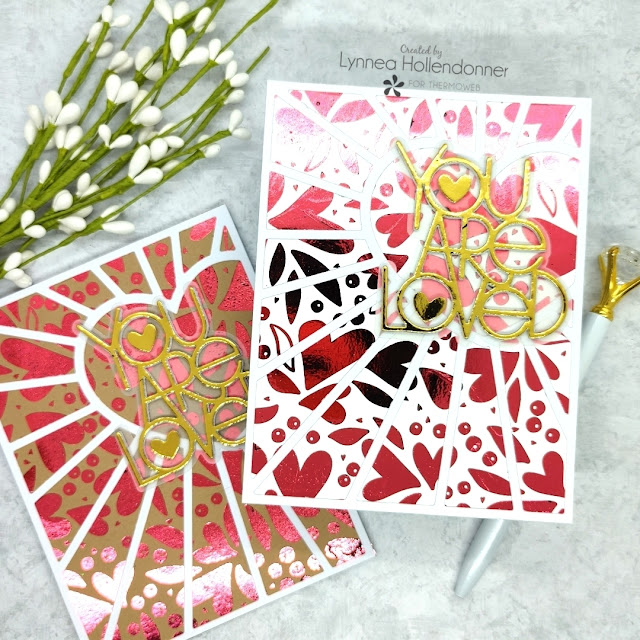
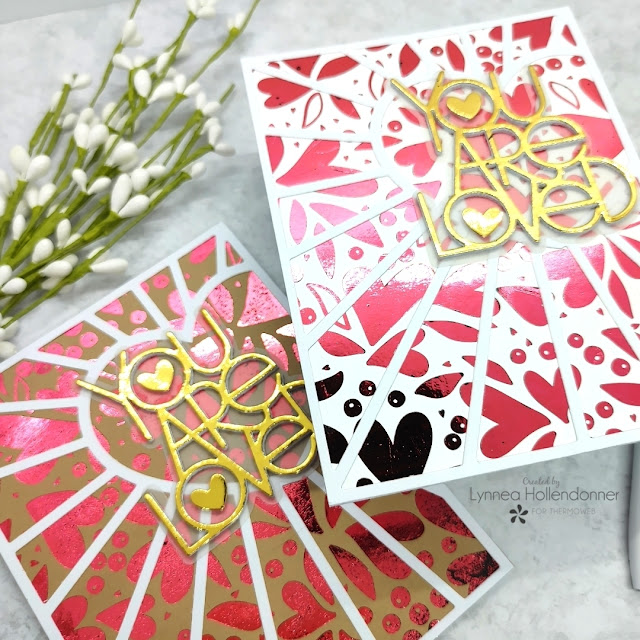
Clean and simple with a pop of flair is my go-to card making style and ThermOWeb Toner Sheets are the easiest way to add a pop of something special! 


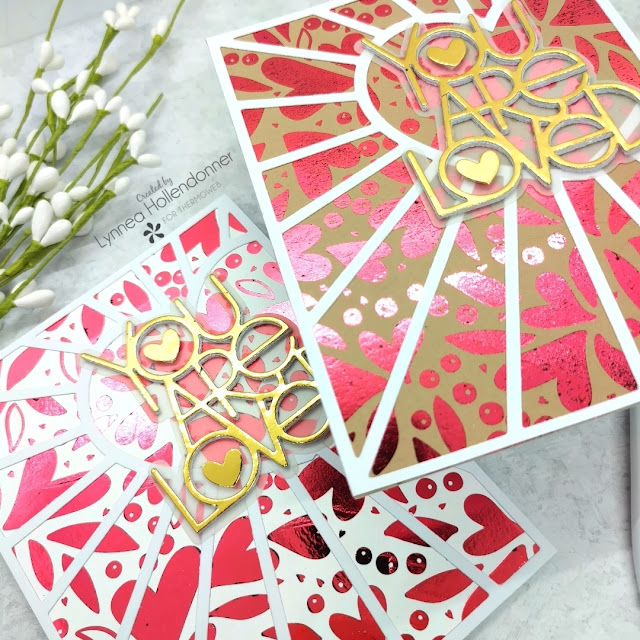
The Love Blooms Toner Sheets are one of my favorite patterns. The hearts are so bold and wonky and just my style. I couldn't decide if I wanted to foil the white or the kraft ... so I decided to do both! This card design is simple and easy and took me no time at all to make two cards full of Deco Foil goodness!


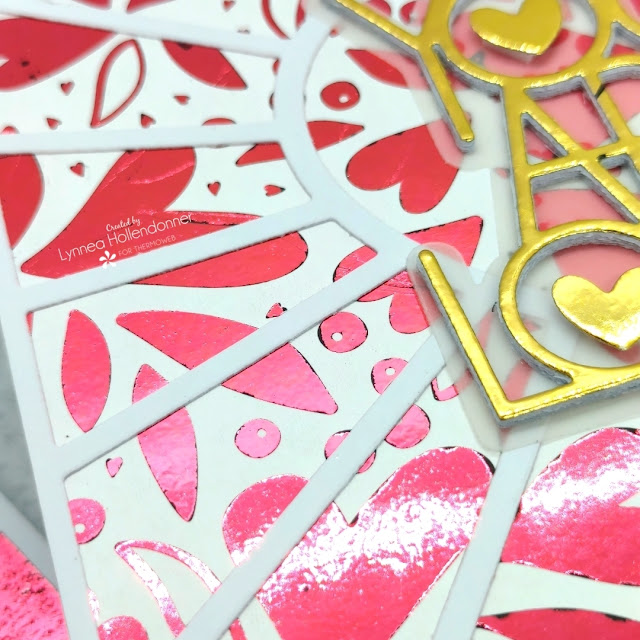
I pre-heated my laminator so that it would be nice and hot and prepped my Love Blooms Toner Sheets by wiping them with a microfiber cloth. Once my laminator was ready I placed a piece of Pink Melon Deco Foil face up over the Love Blooms Deco Foil Toner Sheet and ran it through with a piece of Deco Foil Parchment Paper. I repeated the process with the Love Blooms Deco Foil Kraft Toner Sheet. I'm always so excited when I peel back the foil and have a pretty foiled background! 


I like to add things to my Toner Sheet backgrounds to amp up the design, but not something that will cover up a bunch of the pattern. I used the Pink & Main Heart Spotlight Cover Die and cut two pieces of white cardstock and I love how the Love Blooms Toner Sheets peek through! 


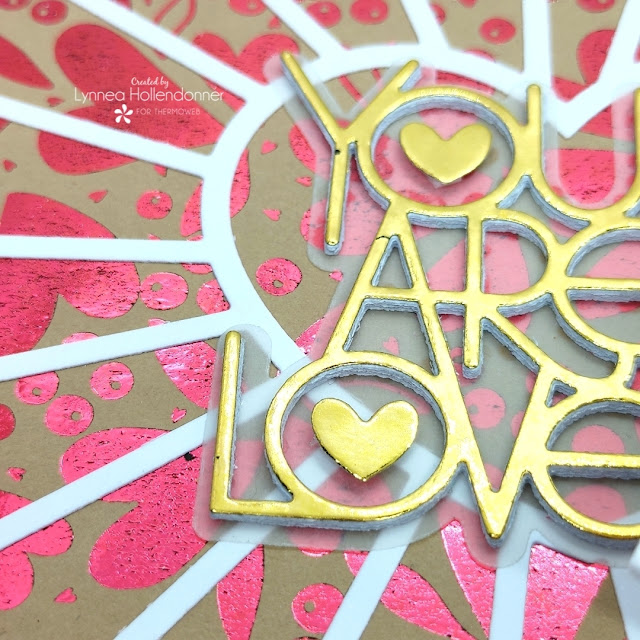
The glam doesn't stop with the background! I decided to add a foiled die cut sentiment. I foiled a piece of a Deco Foil Toner Sheet with Gold Deco Foil and then used the Simon Says Stamp You Are Loved Die to cut the foil. I cut four additional white sentiments for each card and used my iCraft Ultra Bond Liquid Adhesive Pen to stack all the die cut pieces together for dimension. 


I added all of my pieces together using my iCraft Ultra Bond Liquid Adhesive Pen and that's it! Two foiled cards that pack a punch! Thanks for joining me and I'll see you soon!

Wednesday, January 19, 2022

ThermOWeb | Kids Valentines Lunch Notes with Glitz

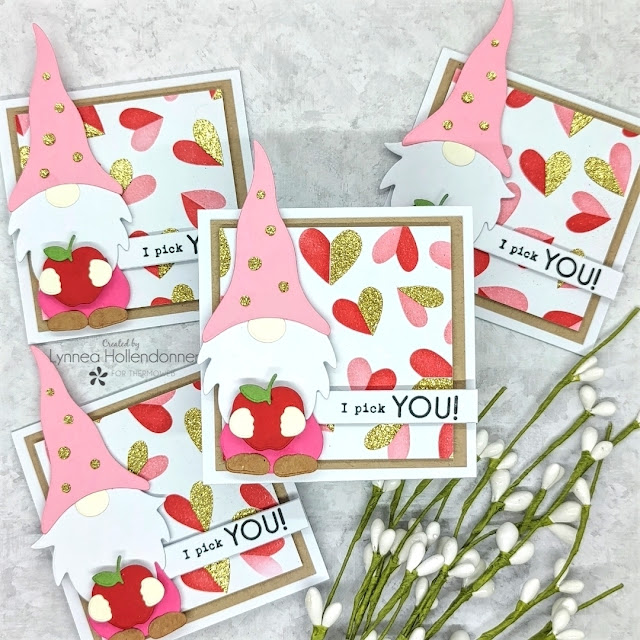
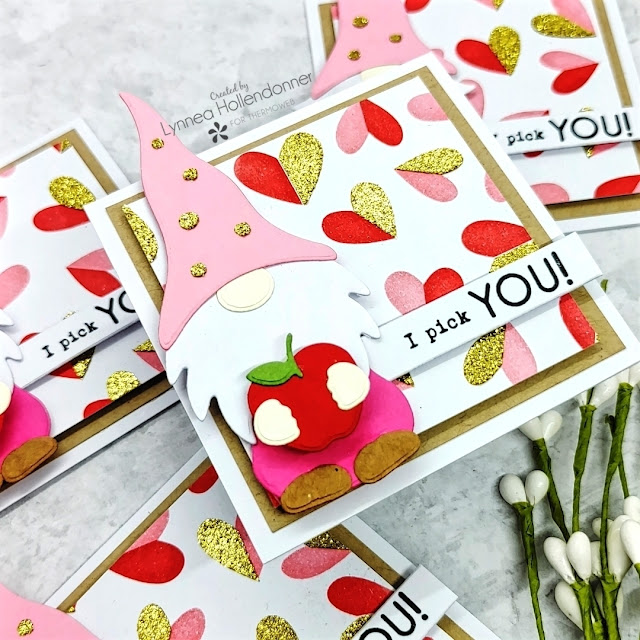
I love sending my son to school with little lunch notes and sometimes I make enough for his whole class! I have an easy to mass produce mini lunch box notes using ThermOWeb Glitz Glitter Gel and some Gina K Designs gnomes


My son has a decent sized class - 27 kids! - so I need to keep ideas for cards for the class simple and easy to mass produce. I started by creating a background that I could easily cut into four pieces to get four mini lunch notes out of one background. I sprayed the back of each of the Taylored Expressions Half a Heart Layering Stencils with Pixie Spray and added pink and red ink over the top of the first two stencils. I wanted to add something special for the third layer, so I used a Stencil Pal and added a layer of Gold Glitz Glitter Gel to complete my background. Then I set that aside to dry for about 30-45 minutes. 


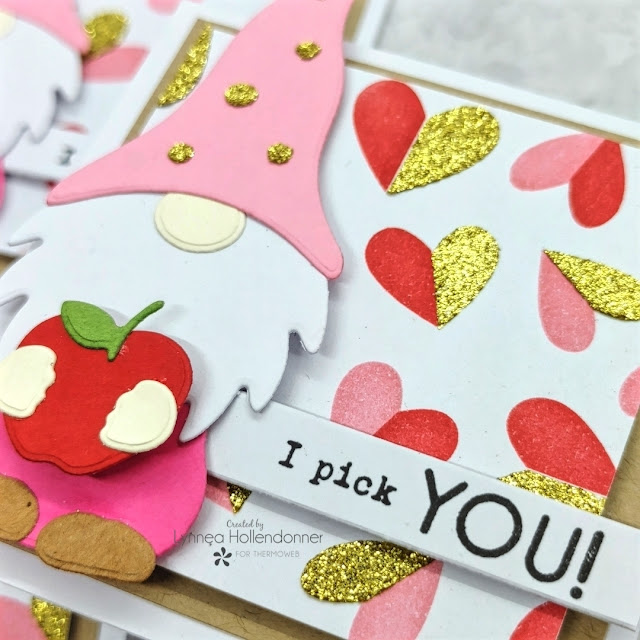
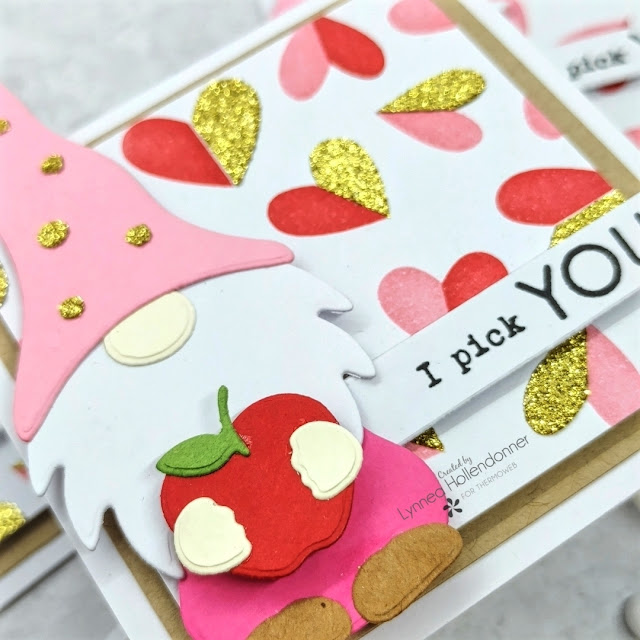
I started working on my adorable gnomes while my background was drying. I cut my pieces with colored cardstock, but you could use patterned paper or Flock for more fun! I used the dies from the Gina K Designs Gnome for the Holidays Craft Kit to cut the feet, body, beards, and noses for my gnomes and the Gina K Designs Festive Fall Add On Craft Kit for the hats, apples, stems, and the adorable little hands. I added a bit of extra sparkle to the hats using the Festive Fall Add On Stencil and some Gold Glitz Glitter Gel and then used my iCraft Ultra Bond Liquid Adhesive Pen to adhere the gnomes together. 


I needed a sentiment to coordinate with the little apples my gnomes were holding, so I stamped "I pick you" from the Taylored Expressions I Pick You Stamp Set and trimmed the sentiments into strips. Once my background was dry I cut the one background down into four squares sized 2.5" and cut a kraft mat to 2.75". I adhered the pieces onto a 3" white mini card base using a mixture of iCraft Ultra Bond Liquid Adhesive and iCraft 1/16" White Jumbo Foam Tape


Thanks so much for joining me in creating these adorable mini Valentine lunch notes! I'll see you soon! 

Wednesday, January 5, 2022

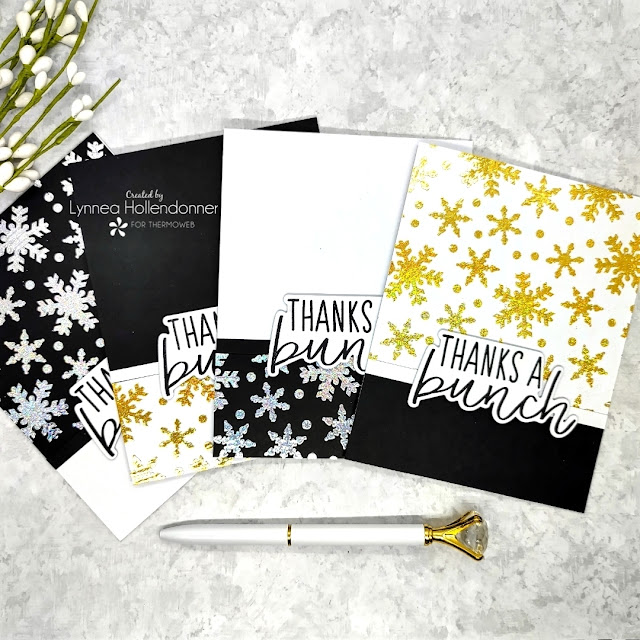
ThermOWeb Live with Lynnea | Snowflake Cards with Unity Foils

Tis the season for sending thank you cards! I have an easy way to make four foiled snowflake thank you cards! I'll share my step by step process LIVE on the ThermOWeb YouTube Channel on Wednesday the 5th at 11am CT/12pm ET! 


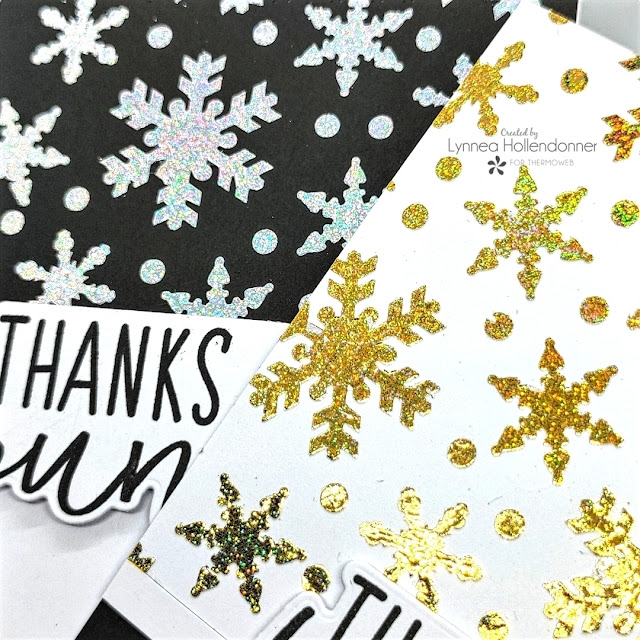
I like to make clean and simple cards with a punch of something special and the Unity Transfer Foils are certainly something special! I LOVE that they glitter!! 


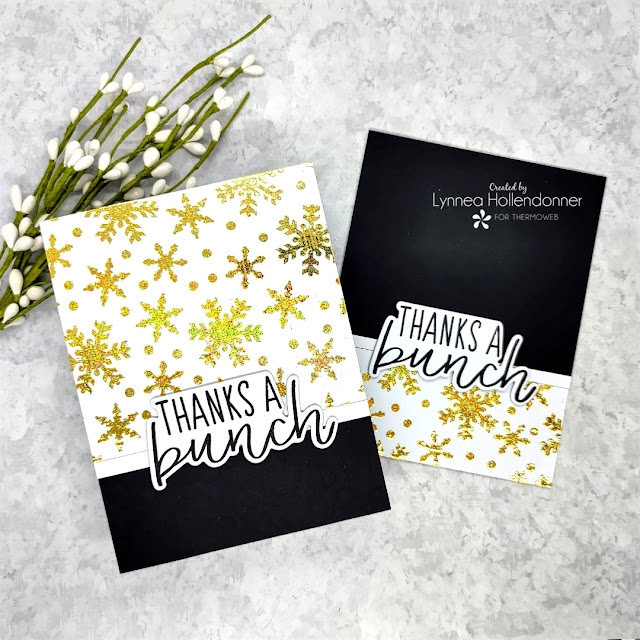
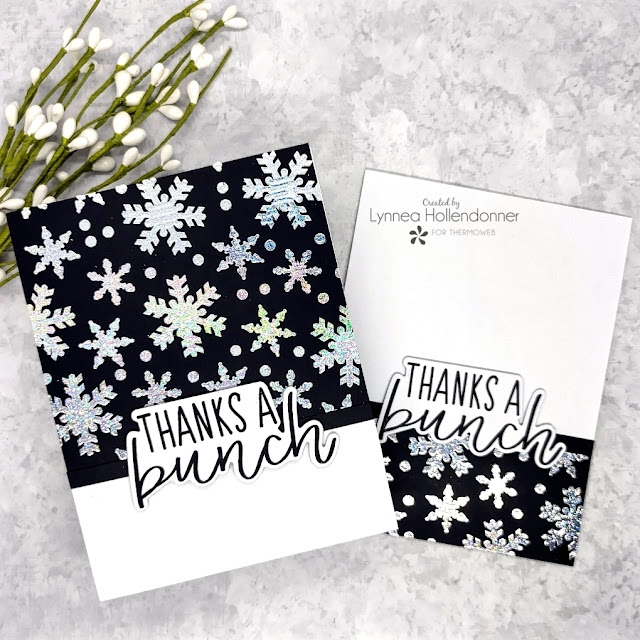
The weeks after Christmas I am busy making and sending thank you cards, so any time I can make a two for one design I will! Cutting a panel in pieces is one of the quickest and easiest ways to make two cards from one panel. Plus it's one of my favorite designs! 


I used a snowflake stencil along with some Deco Foil Transfer Gel Blanco and created both a white and black background. I thought the Deco Foil Unity Silver Glitter Foil would really POP on black and the Gold Glitter Foil would look best on white. I didn't even have to clean my stencil in between applications - I'll show you a little trick for that in the live tutorial! 


I'll see you LIVE on the ThermOWeb YouTube Channel on Wednesday at 11am CT/12pm ET for all the glittery, foiled, snowflake, mass producing goodness! 

Tuesday, December 28, 2021

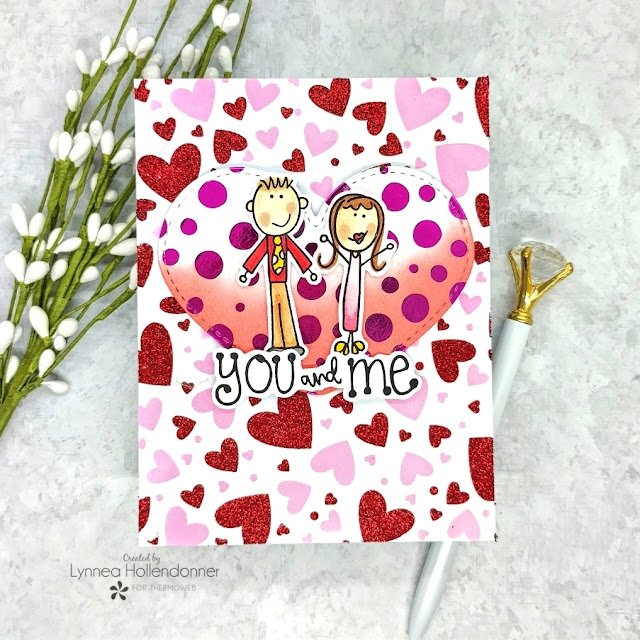
ThermOWeb Live with Lynnea | Love Card with Glitz and Laura Kelly

Love is in the air! Join me on the ThermOWeb YouTube Channel on Wednesday December 29th at 11am CT/ 12pm ET for a love themed card featuring Laura Kelly Toner Sheets and Foils along with Glitz Glitter Gel


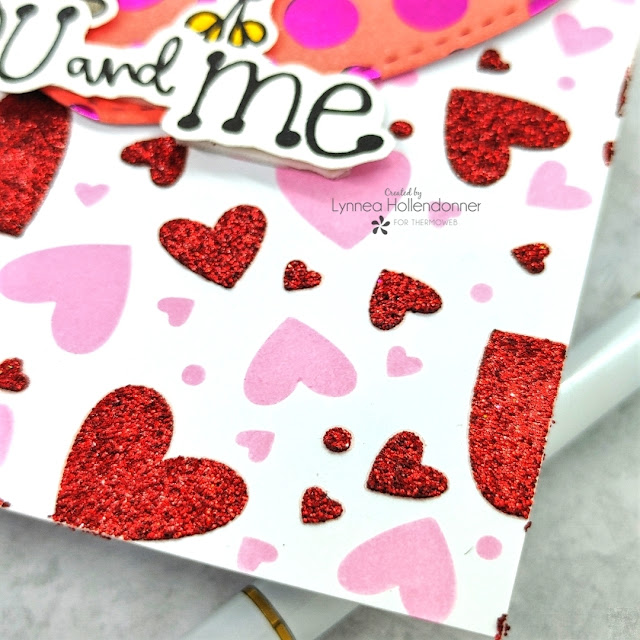
I have used the Laura Kelly Me & My Peeps Stamp Set for customized birthday cards, new home cards, Christmas cards...and now a Valentine's Day card! I love that the people can be colored however you like to represent whomever you want! I created a background using layering stencils with ink and Red Velvet Glitz Glitter Gel to be the backdrop for my cute little people. 


I foiled a Laura Kelly Spotty Dots Toner Sheet with Flamingo Pink Transfer Foil and die cut a portion with a stitched heart die and added my Me & My Peeps characters on top with foam tape. 


I hope you'll join me on Wednesday at 11am CT/12pm ET on the ThermOWeb YouTube Channel for the full tutorial! 

Wednesday, December 15, 2021

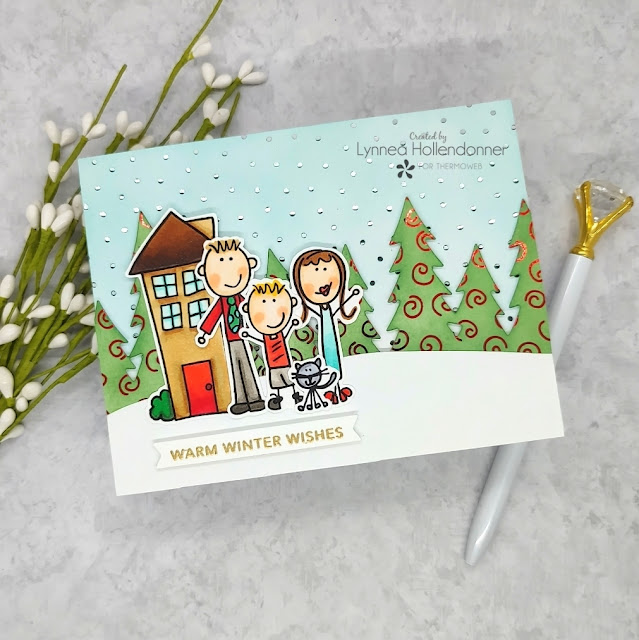
ThermOWeb | Holiday Card with Laura Kelly

Ready for the cutest representation of our family?! ThermOWeb and Laura Kelly goodies make this wintery card too cute for words! 


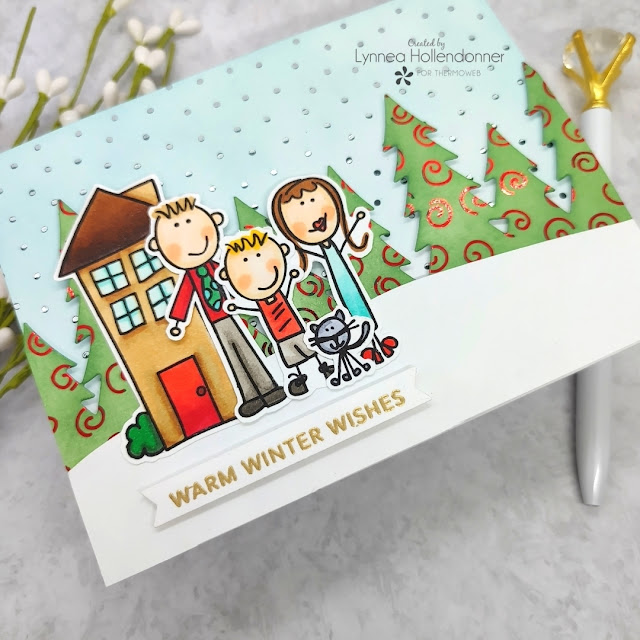
I love the whimsiness of the Laura Kelly line! I mixed some Transfer Foils, Toner Sheets, and the Me & My Peeps Stamp Set and created our little family on a Holiday card! I transferred Magic Wand Silver Foil onto a Baby Swiss Toner Sheet and Wagon Red Foil onto a Sweet Swirls Toner Sheet. Toner sheets are so versatile because you can do almost anything with them! I trimmed down the Baby Swiss background to the size of an A2 card front and blended on blue ink to create a snowy sky. I used a die from Trinity Stamps to die cut the Sweet Swirls background and create a line of trees. I blended green ink over the die-cut and magically created a row of trees with swirly foiled baubles! 


I stamped out the characters that would make up our family from the Me & My Peeps Stamp Set and colored them with Copic Markers. I love this stamp set! It can be used to create just about any family for just about any occasion! Our family is just me, my husband, our son, and our (FIVE!) kitties! 


I cut a white snow bank and adhered it to the line of trees and popped them up with iCraft 1/16" 3D Foam Tape onto the snowy background. I adhered our little family to the left side of the card with an iCraft Ultra Bond Liquid Adhesive Pen and added a heat embossed sentiment strip from my stash beneath the colored images. And that's it! This card was quick and easy to create and I hope it inspires you to put your family on a card this Holiday season!