Showing posts with label Stamp Layering. Show all posts

Wednesday, October 30, 2024

LDRS Creative | Layered Autumn Florals and Foliage Card

It's absolutely gorgeous outside! I love when nature turns to vibrant yellows and reds and the wind scatters leaves across the street. I created a card with colors from my backyard. I hope your view is as gorgeous as mine! 


Products used - 


I used the Autumn Blooms Layering 6x8 Stamps and a handful of LDRS Creative inks to stamp an arrangement hanging off the left side of a white panel measuring 4" x 5.25". I used the Autumn Blooms Masking Stencil so that I could have parts of my arrangement tucked behind the main flower. 


Once my images were stamped, I finished with a mix of sentiments and small fall-related icons from the Giving Thanks Collage 4x6 Stamps. That's it! So easy and pretty for fall!

Tuesday, September 24, 2024

LDRS Creative | Easy Holiday Inlay Card

Mass producing Holiday cards has never been easier! Join me for a quick and easy stamped card using the Cozy Days Inlay Stamps


Products used - 


These inlay stamps are my new favorite style of stamps! It is SO incredibly easy to create beautiful scenes with minimal effort - just my style of papercrafting! I cut one of the Hand Torn Ovals and placed it into my stamping platform and built a scene with the Cozy Days Inlay 6x8 Stamps. I like to start with what I call the "base" of inlay stamping. Simply find the largest image in your scene and stamp that onto your card. In this instance, it's the trees. Then I moved on to the deer, and finished with the stars. Look at the detail! And I didn't have to do anything fancy! I added another oval and popped them up onto a red card base for a pop of color. 


Even though I only made one card in today's video, you could easily create a whole bunch of this design at once! I would create an "assembly line" - die cut all of your ovals at once, stamp all of the trees, then stamp all of the deer, etc. This makes it quick and easy so you don't have to reposition your stamps a bunch of times. Happy crafting!

Monday, June 10, 2024

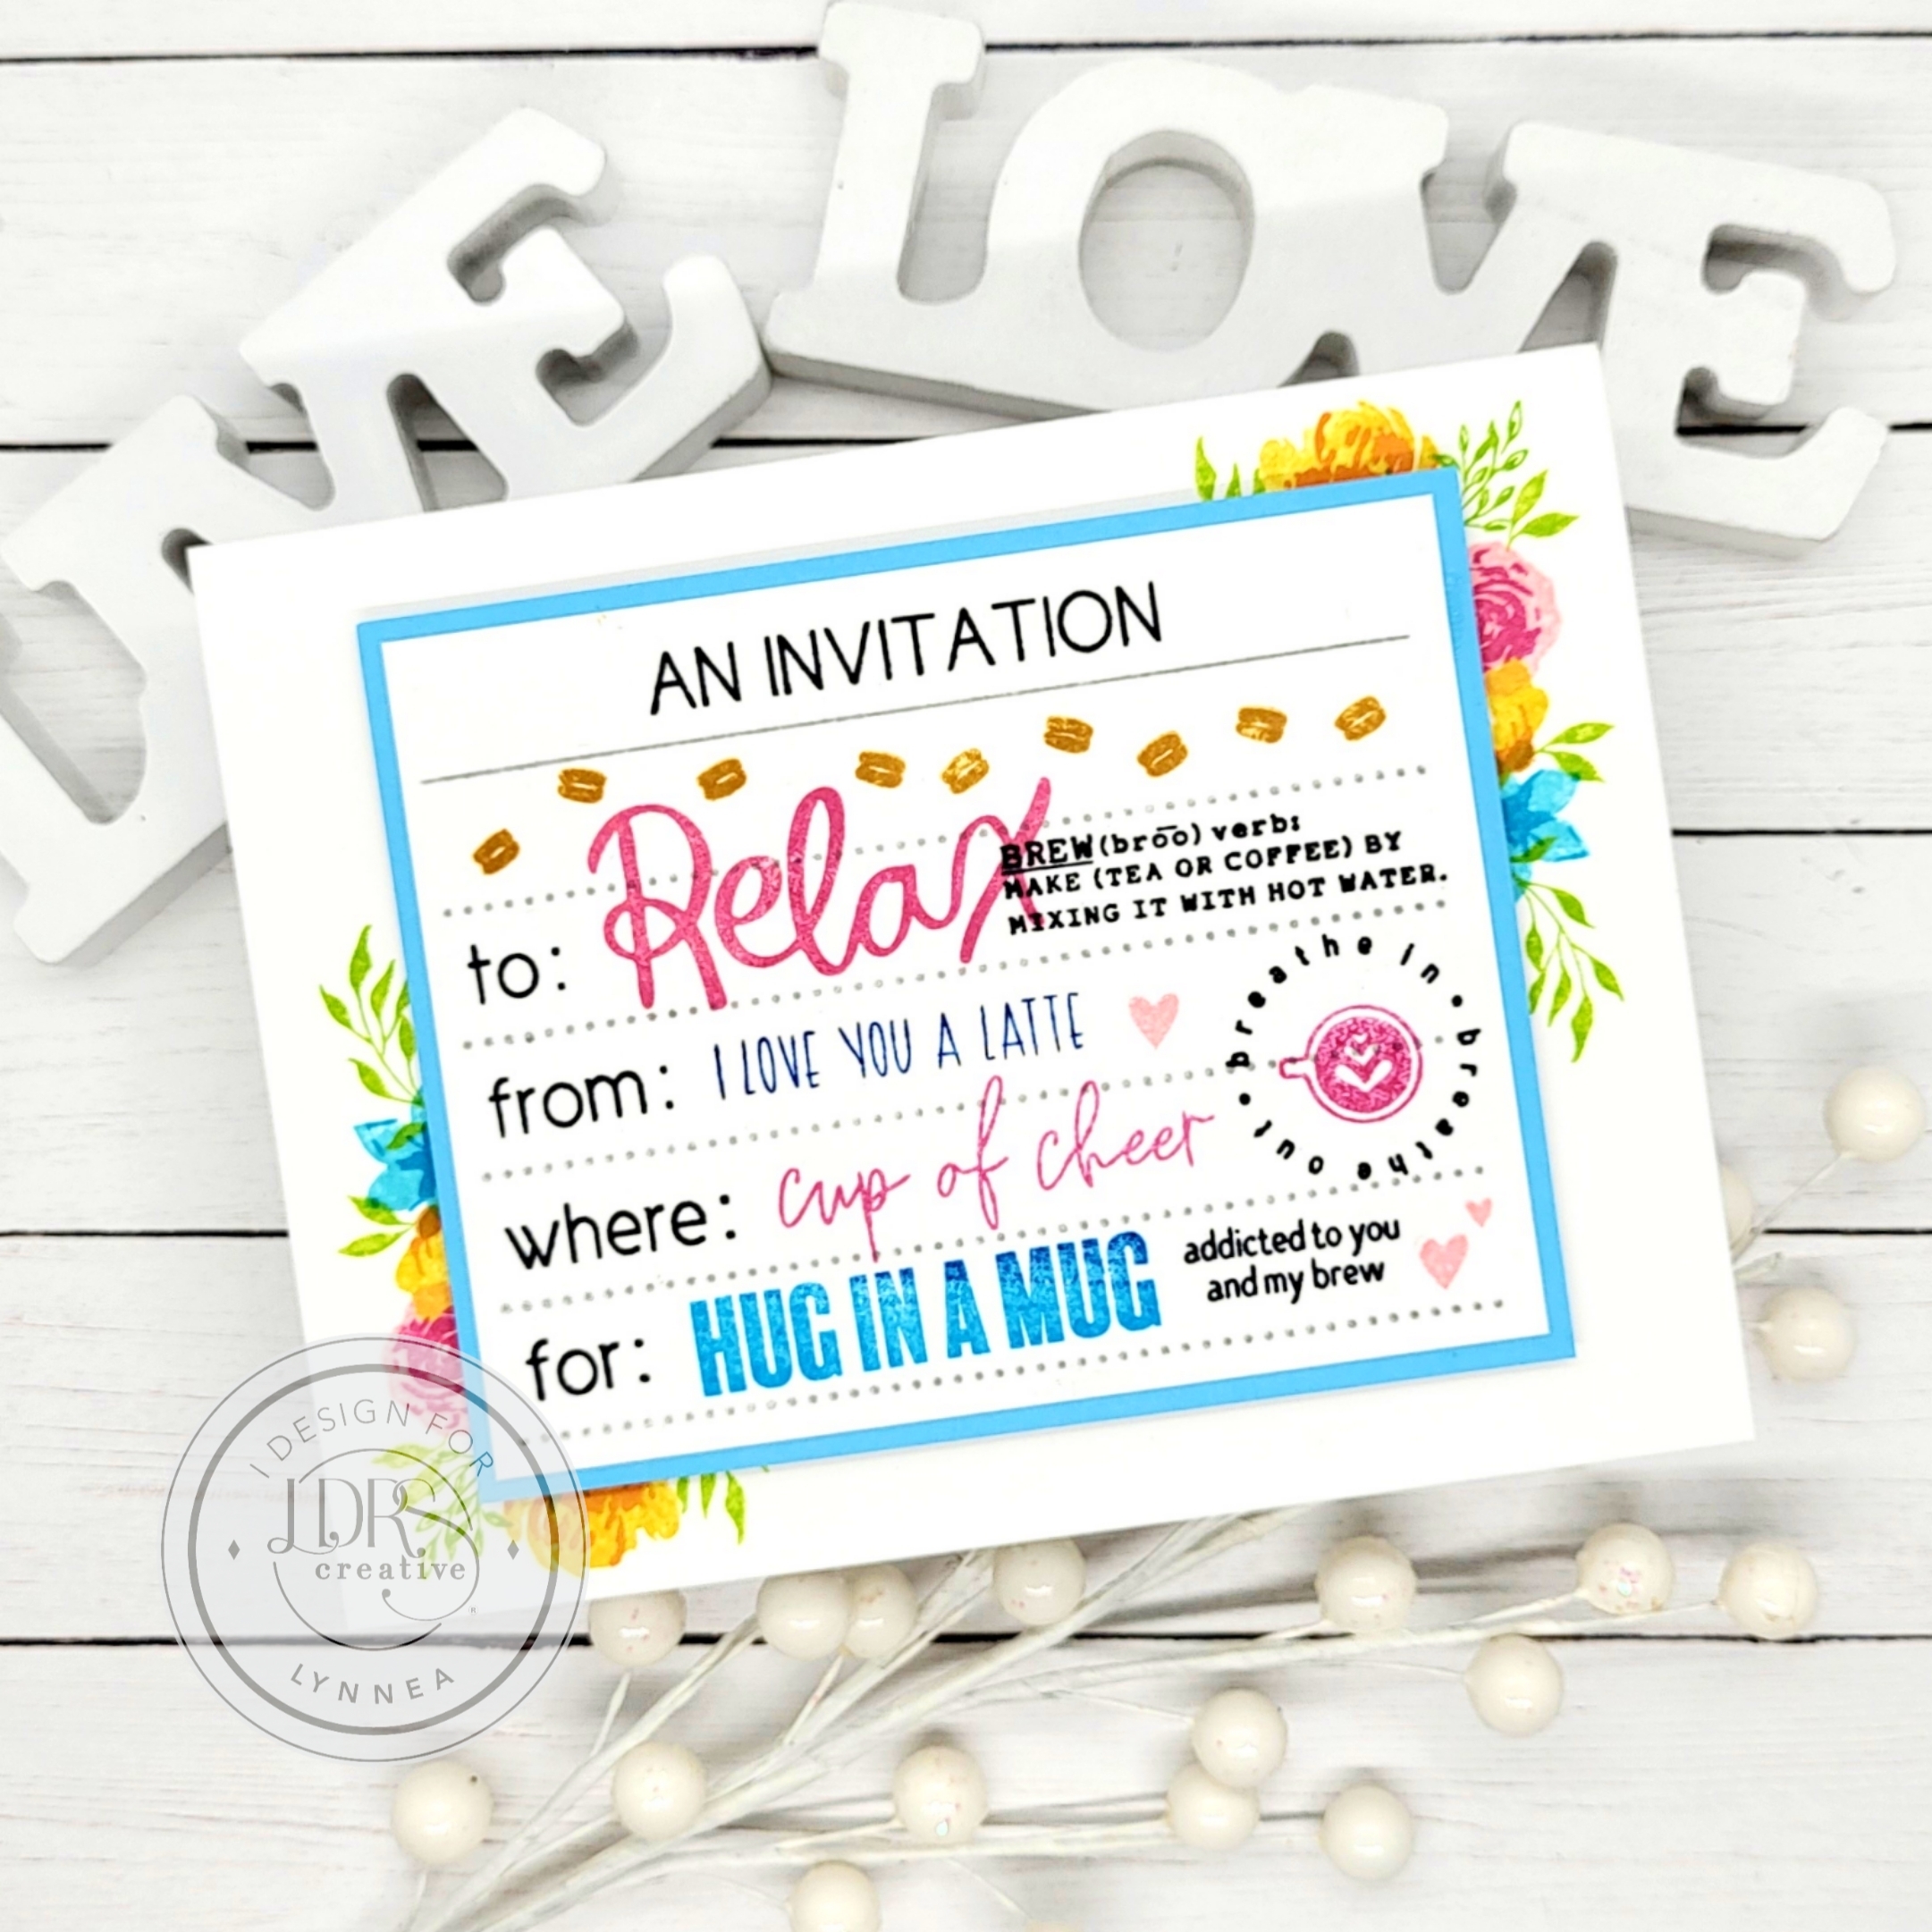
Coffee Themed Stack & Collage Invitation

You're invited for a coffee date! Send a cup of cheer with this Stack & Collage invitation card. Watch the video tutorial to see how easily everything came together!


Products Used - 


I stamped the Invitation 3x4 Stamp with Alloy Hybrid Ink Pad onto a piece of white cardstock and chose a few sentiments from the You're Invited Collage 4x4 Stamps to stamp with Raven Hybrid Ink Pad to build the base of the invitation. I kept a simple color palette for the rest of the coffee themed invitation and stamped sentiments and icons using Tickled Pink Hybrid Ink and Bali Blue Hybrid Ink. Once I was done stamping the invitation portion of my card, I trimmed the panel and added it to a light blue mat and set it aside while I worked on the rest of the card.


I used the Wildflower Layered Botanicals 4x6 Stamps and a few of the flowers onto a white card base to accent the invitation piece. The layered flowers are the perfect frame and help bring some extra color to the card. That's it! Thanks so much for joining me!

Friday, February 2, 2024

Winter Chalet Peek-a-Boo Card

Is it cold where you live? It's been cold and snowy here, so I made a card that embodies all the good witnery things from the coziness of my craft room! 


My card features a fun peek-a-boo panel that flips open to reveal the full scene - HOW FUN! I used the Winter Chalet 4x6 Layering Stamps and a handful of LDRS Creative Hybrid Inks to stamp a scene on an A2 landscape panel of white cardstock. I added a bit of blue ink blending at the top of the panel and gray towards the bottom to mimic the ground and the sky. 


To create that peek-a-boo panel I first cut a piece of 8.5" x 11" cardstock in half and folded it as if I was creating a top folding portrait A2 card. I turned it sideways so that I had a landscape card with the fold on the left hand side. I love that the one die from the Offset Slimline Stackables Dies looks like little mountains - perfect for my card! I opened the card and taped the die in place about 1/3 of the way up from the bottom and ran it through my die cutting machine. REMEMBER!! Make sure your card is open when you die-cut otherwise you'll cut through both the front and the back and that's no good! 


I added some soft blue ink blending to the top of the die-cut edge and then stamped a sentiment from the Bundle Up Collage 4x6 Stamps on the front of the peek-a-boo panel. I glued the scene panel to the inside of the card and just like that .... I have the cutest peek-a-boo card! 

Monday, October 9, 2023

Through the Trees Stamps and Stencils Scene Card

Join Lynnea as she creates a magical winter scene featuring fluffy polar bears and adorable little penguins along with ink blending and stamp layering. You won't want to miss this Christmas Tree Shopping scene card!


This card was so easy to make, but I love how it turned out! I used the Through the Trees Slimline Layering Stencils and started building my background. I blended all three layers using various green LDRS Creative Hybrid Inks. I wanted to fill in the design a bit more, so I took the layers and added more trees here and there to make it look like there was a whole forest of trees in the background. I grabbed my Raven Hybrid Ink Pad and the Through the Trees 4x6 Stamps and added outlines to a few of the trees as well as some stars in the background. 


I stamped some critters from the Christmas Tree Shopping 4x6 Stamps and colored them with alcohol markers. I cut them out with the Christmas Tree Shopping Coordinating Dies and realized I was missing something in the background. I blended a light blue ink to the top of my panel and a mint green ink to the bottom of the panel. That helped ground and set my scene. I added my images with foam tape and stamped a sentiment from The Stockings were Hung 4x6 Stamps to finish the card. That's it! See you soon!


Shop LDRS Creative - https://shrsl.com/1ladp

LDRS Creative Fall, Winter, and Holiday 2023 Collection - https://shrsl.com/47ub8

Through the Trees 4x6 Stamps - https://shrsl.com/47w8x

Through the Trees Slimline Layering Stencils - 3 Pack - https://shrsl.com/47w8y

Through the Trees Stamps and Slimline Layering Stencils Bundle - https://shrsl.com/47w8z

Christmas Tree Shopping 4x6 Stamps - https://shrsl.com/47w8u

Christmas Tree Shopping Coordinating Dies - https://shrsl.com/47w8v

Christmas Tree Shopping Stamps and Dies Bundle - https://shrsl.com/47w8w

The Stockings Were Hung 4x6 Stamps - https://shrsl.com/47w95

LDRS Creative Hybrid Ink Collection - https://shrsl.com/2ds4b

Tuesday, August 29, 2023

Thankful Shaker Card

It's Lynnea! Creating a fall-themed shaker card with stamp layering and die-cutting has never been easier - or cuter! Join me as I take you through my process for creating this easy shaker card!


Let's start with an A2 piece of kraft cardstock. I grabbed the Grateful for You 4x6 Stamps and used various shades of yellow, orange, red, and green LDRS Creative Hybrid Inks to stamp the solid maple and oak leaves all over the panel. I added the acorns with two shades of brown LDRS Creative Hybrid Inks wherever there was empty space in my background. You could leave the background as is, but I decided to add the detail layer for the leaves and acorns. I used Raven Hybrid Ink for the outlines. I wasn't careful about lining the outline up perfectly. Instead, I decided to offset it just a bit. Some gold watercolor spatters finish the background.


I die cut white cardstock using the largest oval from the Delicate Stitches Delicate Oval Dies to use as my shaker frame. I added a piece of acetate to the back and then added double thick foam tape around the back of the frame. I filled it up with a gold, white, and brown shaker mix and added it to the front of my stamped panel. I die cut a sentiment from the All Occasions Sentiment Dies and thought that would finish off my card ... but it was missing something.


In the end - I decided my card needed a little dose of something cute! I used LDRS Creative Hybrid Inks to stamp the squirrel from the Grateful for You 4x6 Stamps, trimmed it out with scissors, and added the image to the front of my card. That's it! Easy peasy and super cute! 

Wednesday, December 21, 2022

LDRS Creative | Spotlight Layered Flowers

I just can't get enough of the new products from LDRS Creative! I've used some of my favorites to create a mask and spotlight some layered flowers!


I temporarily adhered the Circle Spotlight 6x6 Stencil to an A2 card panel, but I shifted the stencil up towards the top so that my spotlight would be more top centered. I blended a light layer of Marina Madness over the stencil and left the stencil in place so that I could do a bit of stamping within the circle. 


I stamped the first layer of the largest flower from the Floral Solid Layering 4x6 Stamps with Pink Tutu and stamped the second layer with Tickled Pink. I stamped the first layer of the medium flower with Dan-D-Lion on the left and right of the center flower being sure that they overlapped the Circle Spotlight 6x6 Stencil just a bit. I added the second layer with In Your Face Orange. The Floral Solid Layering 4x6 Stamps includes two different stems, but I love that you can use the Floral Silhouette 4x6 Stamps to add some contrast! I stamped a few of the flowers over the colored images with Raven Hybrid Ink and removed the stencil and added some black ink spatters. 


I stamped a sentiment from the Floral Solid Layering 4x6 Stamps with Raven Hybrid Ink and fussy cut it and added it to my card with foam tape. I decided to trim the panel down a bit and add it to a black card base for an extra bit of contrast. A scattering of pearls finishes this card! Thanks for joining me!

Monday, November 21, 2022

LDRS Creative | Grateful for You Card

There's no better time to tell someone you're a bit 'nutty' for them! I used the LDRS Creative Grateful for You 4x6 Stamps to make this cute ink layered squirrel card! This set was released as part of a Scrapbook & Cards Today Magazine Kit Exclusive, but there are a few extras, so this set is now available in the LDRS Creative Store


This card was super easy to make and I think it would be great for a bunch of different occasions with a bit of color manipulation. I went with traditional Autumn colors, but how fun would it be with pinks for Mother's Day or blues and greens for Father's Day?!


I stamped the sentiment and the outline of the squirrel from the Grateful for You 4x6 Stamp Set with Raven Hybrid Ink in the center of my card and used Iced Tea and Coffee Bean Hybrid Ink to fill in the squirrel. I stamped the Maple and Oak leaf outlines all over the remainder of my card base and filled them in with Dan-D-Lion, In Your Face Orange, Kiss Me Red, and Olive Branch Hybrid Inks. I spattered some gold watercolor here and there over the background for a finishing touch.


You could leave this as a one layer card, but I wanted to bring in a touch of dimension. I used the 2nd die from the A2 Diagonal Stitched Layered Card Toppers to cut down my stamped background and the largest die to cut a piece of kraft cardstock and added them with foam tape. That's it! See you soon!

Thursday, October 20, 2022

LDRS Creative | Holiday Floral Tree Card

I have been loving adding little pops of black to my Holiday cards! It looks so classy! I used the LDRS Creative Holiday Floral Stamps and Dies to make this cute eclipse card.


I started my card by layering my tree from the Holiday Floral 6x8 Stamps with Raven, Olive Branch, Kiss Me Red, and Scarlet Rose Hybrid Inks. I used the largest die in the Holiday Floral Coordinating Dies to cut out the image as well as the smallest die to cut a triangle from the center of the layered image. I cut a bunch of extra small triangles from black cardstock as well as a large tree from white cardstock. I adhered the largest trees together and then stacked the smaller triangles with liquid adhesive and puzzled them into the center of the tree. This creates an eclipse effect that is easy and super fun!


I stamped the Christmas Sentiment Stack Stamp with black ink and used the Sentiment Stack II Die to cut out all the sentiments into strips. I LOVE the new sentiment stack shadow dies and used the Sentiment Stack Shadow - Straight II Die to cut a bunch of black shadow strips and found the one that fit behind my desired sentiment and layered them together. 

I chose a piece of pink snowflake paper from the MacKenna Christmas 12x12 Paper Pack and cut it to 3 1/2" x 4 1/2". I added a black mat measuring 3 5/8" x 4 5/8" with liquid adhesive and adhered them to an A2 card base.


I added my Holiday Floral stamped tree to the card with foam tape and added my sentiment strip across the center of the tree. That's it! I hope you enjoyed this tutorial! See you soon!

Tuesday, September 20, 2022

LDRS Creative | Holiday Floral Background Card

Today I'm using the LDRS Creative Holiday Floral 6x8 Stamps in a fun way - to create a background! I love the floral tree, but I though the pattern would be pretty as a corner accent! 


I started by lining up the greenery outline image that would create the tree from the Holiday Floral 6x8 Stamps diagonally on the bottom left corner of my card. I stamped it with Fandango Hybrid Ink and then rotated my panel so that I could stamp the same image in the same place on the opposite side of my card. I used Soft Kisses Hybrid Ink for the second layer, Swimming Hole Hybrid Ink for the flower base layer, and Dark Wash Jeans Hybrid Ink for the centers. 


I trimmed my panel down to 3 3/4" x 5" and cut a layer of white cardstock to 4" x 5 1/4", but I didn't like the plain white panel. I used my Soft Kisses Hybrid Ink Pad and swiped the ink pad directly onto the cardstock to create a layer that perfectly matches my stamping. I did the same thing onto a piece of scrap cardstock and cut the Wishing You a Very Merry Christmas Dies from the colored cardstock and the shadow from white. 


I added my layers together with foam tape and popped the sentiment into the center of my card. And that's it! I hope this encourages you to look at your stamps and see what 'out of the box' ways you can use them!

Saturday, January 8, 2022

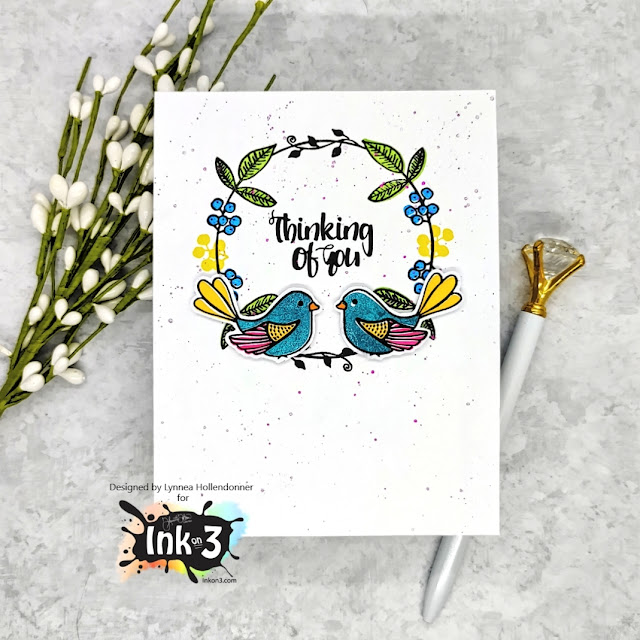
InkOn3 | Holiday Wreath Bird Card

I love versatile stamps! The Holiday Wreath Stamp Set from InkOn3 is great for all kinds of cards and occasions! 


This card is so simple, but I love the colors and how it turned out! I stamped the wreath from the Holiday Wreath with Blackout Hybrid Detail Ink and used the layering stamps to fill in the leaves and berries of the wreath. I used Goddess Green Atelier Ink, Bee Sting Yellow Atelier Ink, and Peacock Blue Atelier Inks to create a spring/summertime wreath. 


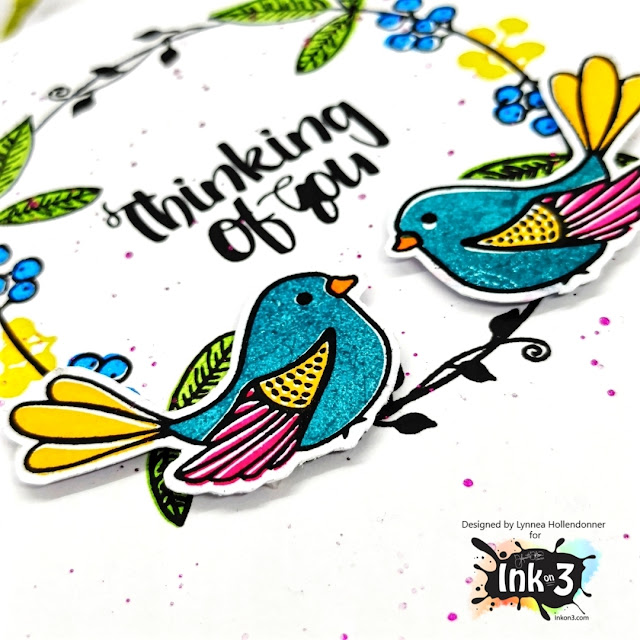
I wanted to keep that springy feel with the Love Birds Stamp Set, so I stamped the outlines with Blackout Hybrid Detail Ink and used the layering images with Trinity Teal, Bee Sting Yellow, and Sweet Petunia Pink Atelier Inks. I love how quick it is to add color to these birds! I added the sentiment to the center of my wreath and spattered some pink shimmer watercolor all over my background for texture. 


I trimmed out my birds and popped them up with foam tape near the bottom of the wreath for some dimension. And that's it! Thanks for joining me! 

Saturday, December 11, 2021

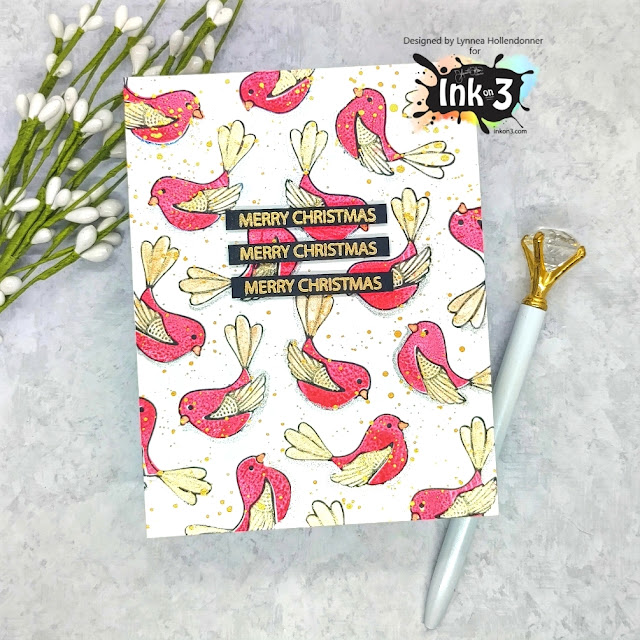
InkOn3 | Shimmery Christmas Card

A little stamp layering with InkOn3 stamps and Atelier Inks and shimmer watercolors make a quick and easy Christmas card! 


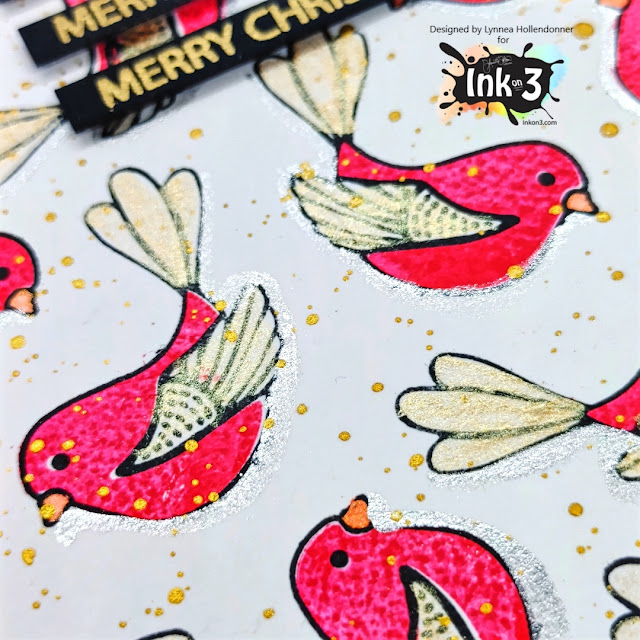
I stamped the outlines of the birds from the Love Birds Stamp Set with Blackout Hybrid Detail Ink repeatedly on my background until my cardstock was full of little birdies. I used the layering images for the birds and stamped them with Marilyn Red Atelier Ink to mimic the look of cardinals. There are layering stamps to fill in the tails and wings as well, but I decided to use some shimmer watercolor for a bit of sparkle. I added some gold watercolor spatters to finish off the background. 


I stamped a greeting from the Holiday Wreath Stamp Set three times with Juicy Watermark Embossing Ink and heat embossed with Gold Rush Fine Detail Embossing Powder. I trimmed each of the sentiments into small strips and popped them up near the top center of my card. 


Thanks so much for joining me! I hope you enjoyed this shimmery Christmas card! 

Friday, November 19, 2021

InkOn3 | New Release Instagram Hop

Today InkOn3 is celebrating THREE new stamp sets and THREE new mini ink cubes! I’m sharing inspiration using some of the newest items!


I used some of the new Atelier Ink Cubes to do some ink blending onto my background panel. I have a secret! I started with yellow cardstock instead of white! This made things easier and slightly altered the color of the inks giving the appearance that I put in more effort than I actually did! 


I used a 3D Embossing Folder to add texture to my background. I am not well practiced with embossing folders .... I embossed the wrong side of my cardstock, so the texture isn't as noticeable as I had hoped, but I like the effect! 


I finished the card with some images and a sentiment from the new Thankful For You Stamp Set. Thanks for joining me! 

Saturday, November 13, 2021

InkOn3 NEW RELEASE! | Faux Watercolor with Atelier Ink Cubes

There's a new release from InkOn3 and I used one of the new stamp sets and some Atelier Ink Cubes to create an Autumn themed faux watercolored card. 


The new Thankful For You Stamp Set has solid and outline leaves that you can use together or separately. I lined up the solid images on my card using my Misti and inked them up with Marilyn Red, Marigold Orange, and Bee Sting Yellow Atelier Ink Cubes. I spritzed them with a bit of water and stamped them onto my card giving me a faux watercolor look. 


I stamped the outlines with Blackout Hybrid Detail Ink but I offset them to add to the whimsy of the background. I added some flicks of gold watercolor to fill in any empty spaces. 


I used Blackout Hybrid Detail Ink to stamp a sentiment from the Thankful For You Stamp Set, cut it into strips, and lined the bottom with red cardstock and popped up the strips with foam tape to finish the card. Thanks for joining me! 

Thursday, September 30, 2021

Trinity Stamps | Thanksgiving Harvest Rainbow Slimline Card

It's finally beginning to feel like fall where I live! The air is crisp and leaves are starting to fall - and I couldn't be happier! It makes me want to use all of the gorgeous Trinity Stamps Autumn goodies!


This card was so simple to make and with a few tweaks it could be easily mass produced for all of your Thanksgiving cards! 


I mixed together the Harvest Rainbow Stamp Set and the Autumn Impressions Stamp Set and I love the result! I paired them with the Dainty Scallop Edge Slimline Die Set for the perfect detailed edging! 


Thanks for joining me! 

Saturday, September 25, 2021

InkOn3 | Atelier Ink Set of Teacher Cards

My son started kindergarten a few weeks ago and I decided to spoil his teacher with a set of cards stamped with InkOn3 Atelier Inks


Teachers work so hard and I wanted to show my son's teacher how much I appreciate her! I thought a long time about what style of card to make, but when I saw these apples I knew they were perfect!


I made one card to give to her and then a set of five cards to give as a gift. I used the Taylored Expressions I Pick You Cling & Clear Combo for all of the cards. This was the perfect set because it gave me an excuse to bust out my Atelier Inks and do some solid stamping! 


I started by stamping the background - the apple outlines - with Blackout Hybrid Detail Ink and then used the coordinating stamp set to fill in the centers of the apples. I love that there are so many different styles of apple "fillings"! I used Marilyn Red, Marigold Orange, Bee Sting Yellow, and Goddess Green Atelier Inks to create my apples. 


Once all of my apples were stamped I used the I Pick You Stencil to add more detail to the backgrounds. This stencil perfectly masks off the apples in the background and creates some fun horizontal stripes. I used Peacock Blue, Paint It Black, and Twiggy Brown Atelier Inks to add ink blending to the backgrounds. 


Even thought all the backgrounds are different I decided to keep things consistent by using the same sentiment on each card. I die cut using the My Favorite Things Sweet Hello Die Set and popped the sentiments up onto my card. I stamped a coordinating sentiment from the I Pick You Stamp Set with Blackout Hybrid Detail Ink to complete the look. 


I hope this project inspires you! Thanks so much for watching! 

Saturday, September 18, 2021

A Pocket Full of Happiness Appreciation Instagram Hop

Myself and a bunch of other creators are hopping on Instagram and showing our appreciation for an AMAZING company - A Pocket Full of Happiness! I created two quick cards and I have a tutorial on YouTube! 


I am in love with how bright these cards turned out! I used the Tie-Dye Stamp Set and created two cards - one simple and one a bit more stepped up. 


I used a few colors of Hybrid Inks and the Tie-Dye Stamp Set right in the center of my card and added some black ink spatters for texture. I stamped some tiny hearts and a sentiment from the Mosaic Circle Builder Stamp Set to finish off the card. 


I used the Tie-Dye Stamp Set to build a full background on my second card and added some ink spatters. This took a bit more time, but SERIOUSLY! I LOVE the background! It's bright and happy and perfect! I have had the When Life Gives You Lemons Stamp Set in my stash for a little bit now and never inked it up (SHOCKING! I know!) - so I knew I needed some happy lemons for this card. I stamped a few lemons in two different colors and placed them in the center of my card. I added a sentiment from the Mosaic Circle Builder Stamp Set and some pearls to finish the card. 


I hope you enjoyed these cards and video tutorial! Don't forget that we are hopping over on Instagram! You'll see lots of inspiration there!