Showing posts with label Metallix. Show all posts

Wednesday, March 18, 2020

Erin Lee Creative // March 2020 Release Blog Hop

Hello, hello! I hope you've had time to check out the new release from Erin Lee Creative! Erin was so super fantastic and released it in the shop a few days early! And today you're going to get a blast of inspiration! Hop along through the release blog hop for your chance to win! Three random winners who leave comments on all blogs through the hop will win a $25 gift card to the shop! Good luck! Winners will be announced March 25th.


I used a few of my favorite new release products on this card - the Scandinavian stencil, Small Script stamp set, and the You Are Enough word die. I sprayed the back of the Scandinavian stencil with Pixie Spray and positioned it on top of a piece of cream colored shimmer cardstock. I used a Stencil Pal to spread some Pure Gold Metallix Gel over the stencil to create my background. I LOVE the way the gold and the shimmer cardstock play together! Just perfect!


I die cut the You Are Enough word die four times from light gray cardstock and stacked them together to form a dimensional die cut embellishment. It didn't stand out enough from the background so I adhered it onto a piece of vellum and trimmed around the outline of the sentiment. The vellum gives the sentiment just enough to make it stand out. I stamped a small coordinating sentiment from the Small Script stamp set onto another strip of gray cardstock and added that at the bottom of my sentiment. And that finishes my card!

Blog Hop 


Lynnea - YOU ARE HERE!


Tuesday, January 28, 2020

Gina K Designs Sweet Stuff Stamp n' Stencil

Hi, there! If you love bright and happy products as much as I do then the new Electro-POP products from Rina K Designs and ThermOWeb are right up your ally! I'm using the Gina K Designs Sweet Stuff Stamp n Stencil along with the new Rina K Designs Glitz Glitter Gels today. Buckle up! It's going to be bright, happy, and glittery!


The Sweet Stuff stamp set is full of so many yummy images - donuts, ice cream, popsicles - oh my! I knew I would be using the Electro-POP inks, so I decided to go with the popsicle images because a bright and happy popsicle makes my heart dance! I stamped out the popsicle images with Potent Purple, Raging Red, Blaring blue, and Screamin' Green Electro-POP inks from Rina K Designs. I cut out each popsicle and sprayed the back of the Sweet Stuff stencil with Pixie Spray so that I could add glittery details to the popsicles. I used the new Rina K Designs Neon Glitz Glitter Gels. They pair so perfectly with her ink line! I used Hello Yellow on the purple popsicle, Screamin' Green on the red popsicle, Orange Glow on the blue popsicle, and Poppin' Pink Glitz Glitter Gel on the green popsicle and set them aside to dry for an hour or so.


I wanted to create a dark background so that the bright colors of the new Glitz Glitter Gels would really pop. I used the Sweet Stuff stencil and some Black Ice Deco Foil Metallix Gel with a Stencil Pal to add some metallic accents to the left half of my card base. I used a bit of Purple Tape to mask off the right side of the stencil so that the Metallix Gel would only be added through the polka dot pattern on the stencil. I stamped a sentiment from the Sweet Stuff stamp set with black ink on the right side of my card.


Once my popsicles were dry I added them to my card using iCraft 3D White Foam Squares and iCraft Ultra Bond Liquid Adhesive. I hope you'll check out the new line of Electro-POP products from ThermOWeb! See you soon!

Tuesday, October 8, 2019

ThermOWeb and The Rabbit Hole Collaboration

Hello! Hooray for another ThermOWeb collaboration! This week we've teamed up with The Rabbit Hole Designs! This company is near and dear to my heart. I was one of girls on their first team of designers and I loved working with them! I used Masking Magic and some Terrific Tape so that I could mix Deco Foil Metallix Gel with some Gold Deco Foil to make a fabulous pumpkin card!


I'm so in love with how this card turned out! I cut a piece of Gina K Designs Masking Magic paper at a diagonal and used it to mask off a portion of my card and added some Black Ice Deco Foil Metallix Gel over the Puzzle Box stencil with the help of some Pixie Spray and my Stencil Pal.


I used two widths of Gina K Designs Terrific Tape to add some Gold Deco Foil stripes above and below the stenciling for additional shine. I colored the pumpkins from the Gourd-geous and Pumpkin Friends stamp sets and added them to my card. So pretty, don't you think?! Thanks for joining me!

Monday, October 7, 2019

Erin Lee Creative New Release Blog Hop

Yay! The time is here! There's a new release available right now from Erin Lee Creative! To celebrate this release we are giving away three $25 gift codes to three lucky winners chosen from comments left across all of the blogs participating in this hop (3 total winners, 3 $25 gift codes). Please leave a comment on any participating blog by October 11, 2019. Three winners will be announced the following week on the Erin Lee Creative Blog. The more you comment, the more chances to win!


There are a whole slew of new products just released from Erin Lee Creative! I am in love with the new Holographic A2 cuts and envelopes! The shine just can't be captured on camera! So fabulous! Check out my video above to see this card in its glory!


I added some Metallix Gel over the Eyelash Stencil and used pink embossing powder over the Big Hello Die from the previous release and finished off the card with a heart from the new Nesting Hearts die set

Monday, September 23, 2019

New Colors of Deco Foil Flock Transfer Sheets from ThermOWeb!

I have waited for new colors of Deco Foil Flock Transfer Sheets from ThermOWeb since I got my hands on the first eight colors - and the time is HERE! Woo hoo! Hooray! Yay! Please welcome SIX new colors to the Deco Foil Flock Transfer Sheets family! Today I picked out three of the new colors to use with the Autumn Wishes Stamp n Stencil system to create two fall themed cards!


You can just picture fall and winter with the six new colors of Deco Foil Flock Transfer Sheets! And they perfectly fill in where there were gaps in the previous color line! I was most excited about the Tuscan Gold! I can't tell you how many times I needed a brown! And it's the perfect light mustardy brown color! Think of all the critters you can flock!


I stamped a bunch of leaves and trees from the Autumn Wishes stamp set and die cut them with the Autumn Wishes dies. I added Deco Foil Transfer Gel to the die cuts with the Autumn Wishes stencil and Stencil Pal. Of course I sprayed the back with my beloved Pixie Spray first! Once the Transfer Gel dried I ran the pieces through my laminator with the new colors of Deco Foil Flock. The three colors I used are the new Tuscan Gold, Teal Waters, and Ruby Red. My favorites!


I used the Autumn Wishes stencil and the Aged Copper Deco Foil Metallix Gel to create a stenciled background for my cards and added the die cut pieces on top. I'm so in love with the fuzzy flocked texture! I hope you enjoyed these cards! See you soon!

Tuesday, August 27, 2019

ThermOWeb and Gracielle Design Collaboration - Foiling Digital Stamps

Hi, everyone! It's Lynnea! Today I'm showing you how to get gorgeous foiled images from digital stamps! I'll admit - I was always afraid of digital stamps. I wasn't sure how to use them! But after this collaboration with ThermOWeb and Gracielle Design I'm head over heels in love! One of my main complaints was that when I would resize images the lines looked fuzzy. The Gracielle Design images are absolutely stunning and super high quality! I experimented a LOT with resizing and no matter how big or small I made the images the printed lines were super crisp! I had my images printed at Staples on their laser printers - a perfect recipe for foiling with Deco Foil Transfer Sheets! Hope you love these fun fall cards!


Here's a quick peek at the three cards I made! Check out my video below for the process tutorial. And if you'd like to read a full written tutorial you can head over to the ThermOWeb blog! I've listed all the products used below and in my YouTube description!


Thanks so much for watching! See you again soon!

Tuesday, August 6, 2019

Cute Potted Succulents

Hey, everyone! I used one of my favorite background techniques to make my projects for Pink & Main today - two for one backgrounds!


I love to create stenciled backgrounds - and then chop them in half to get two cards out of one background. There are so many ways to do this - vertically, horizontally ... but my favorite is at an angle!


I started with a piece of white cardstock and the Herringbone Stencil ( my FAVORITE stencil from Pink & Main! ) and added some copper Metallix through the stencil. Once it dried I used my paper trimmer and just cut my background at an angle. I didn't measure anything - just quickly chopped it in half!


I added my Herringbone Stencil backgrounds to some kraft cardstock and added a thin strip of brown cardstock to finish the edge. My focal images are stamped and colored from the Succulents stamp set. I love the little critters as pots for the succulents! They're so cute! After I colored them I used the coordinating dies to cut them out. The sentiments in the Succulents stamp set are just as amazing as the images themselves! There are large block words with small secondary script words inside. Love it!


I hope you enjoyed these two cards and are inspired to make something beautiful! See you soon!


Monday, June 24, 2019

Glitter Dusted Metallix Gel Patriotic Card

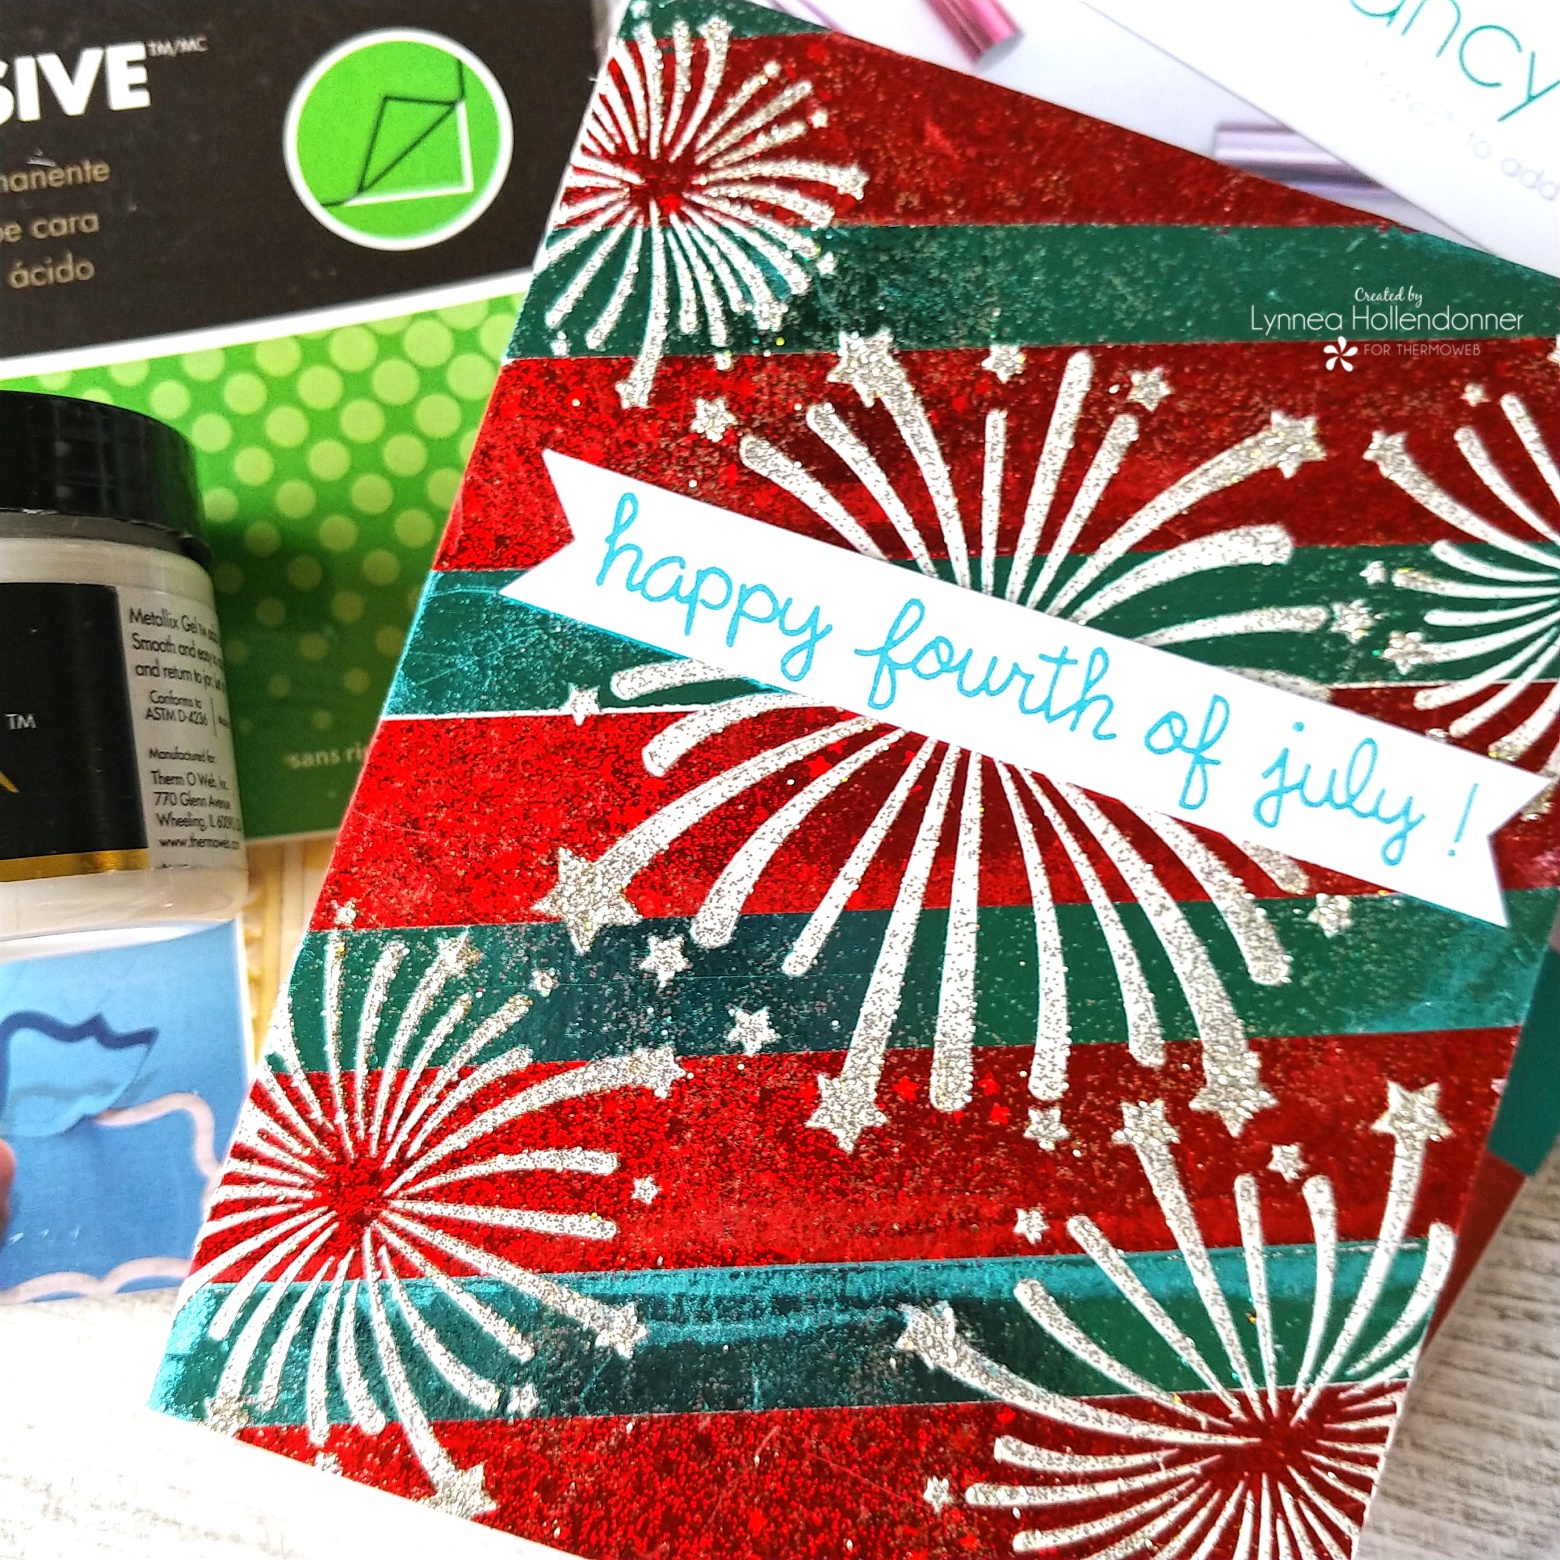
Hey, everyone! It's nearly July - and that calls for all things red, white, and blue! I created a simple card that really wows with all the shimmer and shine! Check out the video below! And you can get all the fun products at the ThermOWeb store!


I used strips of iCraft Easy Cut Adhesive and Aqua Deco Foil Transfer Sheets and Radiant Red Gina K Designs Fancy Foil to create my background. I used a fireworks stencil from The Hedgehog Hollow and sprayed the back with Pixie Spray and used a Stencil Pal to add a thick layer of White Pearl Deco Foil Metallix Gel. Before the Metallix Gel dried I sprinkled on some Distress Glitter at the end of the fireworks. I love how it looks! There's a close up photo below! I stamped a sentiment from Lawn Fawn's Happy Everything stamp set and added it to my card with Gina K Designs White Foam Squares and iCraft Ultra Bond Liquid Adhesive!


Thanks for joining me!


Friday, June 14, 2019

Metallix Stenciled Background with Kindred Stamps Bloom

Hey, there! Today we're doing a little stenciling, a little alcohol marker coloring, and a little watercoloring with Arteza markers, and stamping with the Bloom stamp set from Kindred Stamps! Exciting, right?! Head to my blog for more info!


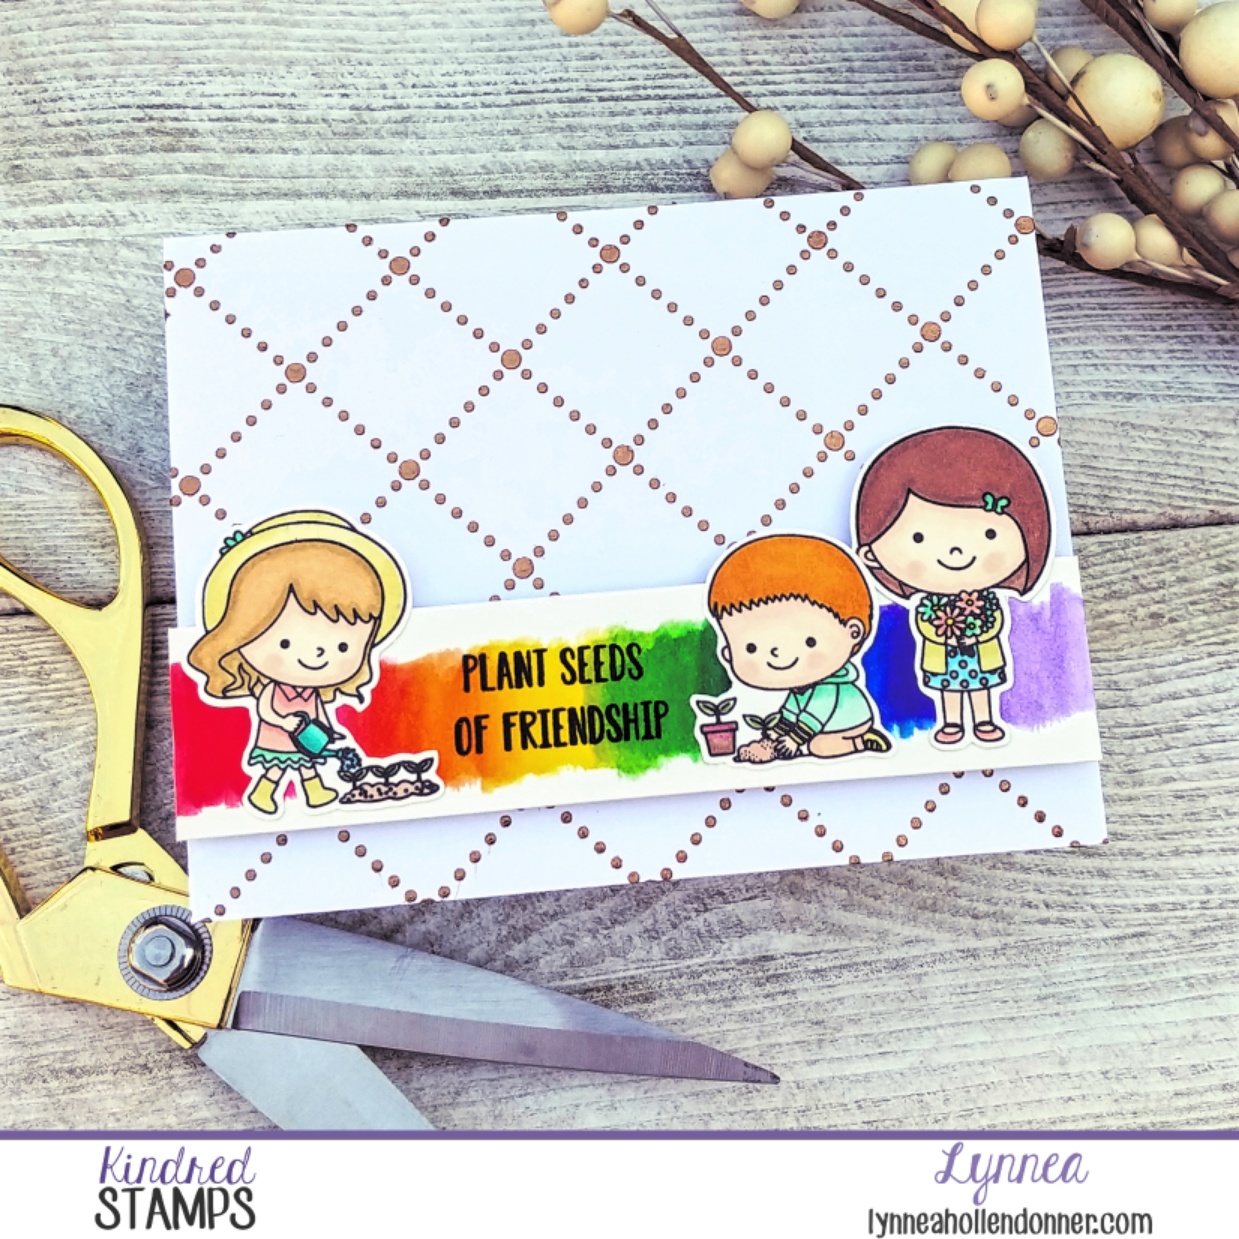
I love the Country Quilt stencil from Kindred Stamps and I wanted to make it shine ... literally! Haha! So I used my Pixie Spray to spray the back of the stencil and my Stencil Pal to add Aged Copper Deco Foil Metallix Gel over the stencil and set my piece aside to dry.


I stamped all three of the little people from the Bloom Stamp set from Kindred Stamps and colored them with my Spectrum Noir Triblend markers. I thought they needed a rainbow background - because everything is better in rainbow! I used my Arteza Real Brush Markers to create a simple rainbow blend across a strip of paper and stamped a sentiment towards the left center with black ink and arranged my little cuties on top.


I wanted to really show how shiny the Metallix gel is, so I took my card out in the sun! The colors for the rest of my card aren't true - they're washed out because of the sun - but you can really see how shiny the Metallix Gel background is in this photo! And you can see it again in my video below!


Thanks so much for watching!


Monday, May 20, 2019

ThermOWeb and The Ink Road Collaboration

One of the GREATEST things about being on the ThermOWeb design team is that ThermOWeb collaborates frequently with other companies! I love when companies work together in this industry! And mixing products and stamps together is so much fun and this week ThermOWeb is working with The Ink Road! One of my favorite companies! I made two videos for today! The cards use similar products, but were just different enough that I felt I needed to use two different videos!


I used the This Stamp is Bananas stamp set from The Ink Road along with some White Pearl Metallix from ThermOWeb. YES! That's White Pearl Metallix! I mixed in some liquid watercolors to create different colors! You can find that in video number one!


I wanted to use the Mouse Floral stencil from Miss Ink Stamps along with the Black Ice Deco Foil Metallix for my second card. I LOVE the yellow and black color combo! The Chin Up Buttercup stamp set is PERFECT for this project! It's my favorite and I love how this card turned out!


If you want more information head over to the ThermOWeb blog! Thanks for joining me today!


Wednesday, April 17, 2019

One Stencil Three Backgrounds with ThermOWeb


Hey, everyone! I'm on the ThermOWeb blog today with a yummy trio of cards featuring three different mediums you can use with stencils! And I have a video, too! I just got the Sweet Stamp Shop Healthy-ish stamp set and it is so cute I had to use it right away! I used the Circle Harlequin stencil from Miss Ink for all three of my backgrounds. The pattern is just amazing!


This one is my favorite! I used the Deco Foil Rainbow Shattered Glass Transfer Sheets with Deco Foil Transfer Gel to create my background.


I mixed together some Gina K Designs Glitz Glitter Gel in Turquoise Sea and Grass Green for my second card. It wasn't the background I intended to make - but I LOVE how it turned out!


I wanted to do a play on a chocolate vanilla swirl ice cream cone for my last card, so I used some Deco Foil White Pearl Metallix on kraft cardstock for my last card! And here's my video!


Thanks so much for stopping by!