Showing posts with label Shimmer Watercolor. Show all posts

Monday, November 14, 2022

LDRS Creative | Christmas Stable Forest Scene Card

Coloring stamps to create my own patterned paper is one of my favorite things to do! I used some Christmas stamps and dies from LDRS Creative to create this super cute Holiday scene!


I'm completely in love with this card! It looks like these reindeer and elves are in the middle of a wintery forest! I started by stamping the three pine trees from the Christmas Stable 4x6 Stamps all over an A2 card panel with Raven Hybrid Ink and coloring them with alcohol markers. Once my background was colored I spattered some gold shimmer watercolor to add some texture and shine.


I think you could leave the background without any focal images and use one of the AMAZING sentiment dies from LDRS Creative and it would be beautiful, but I wanted to add some additional imagery. I stamped a couple of reindeer and the elves from the Reindeer Games 4x6 Stamps and the stable from the Christmas Stable 4x6 Stamps and colored them with markers. I used their coordinating dies to cut them out. I love that the dies even cut out the background of the stable so I can see the forest peeking through! 


I cut out the Christmas Wishes Word Dies from white and gold foil cardstock and added everything onto the front of my card with foam tape. That's it! Thanks so much for joining me!

Friday, September 30, 2022

LDRS Creative September Features Day 2 | More Christmas Inspiration

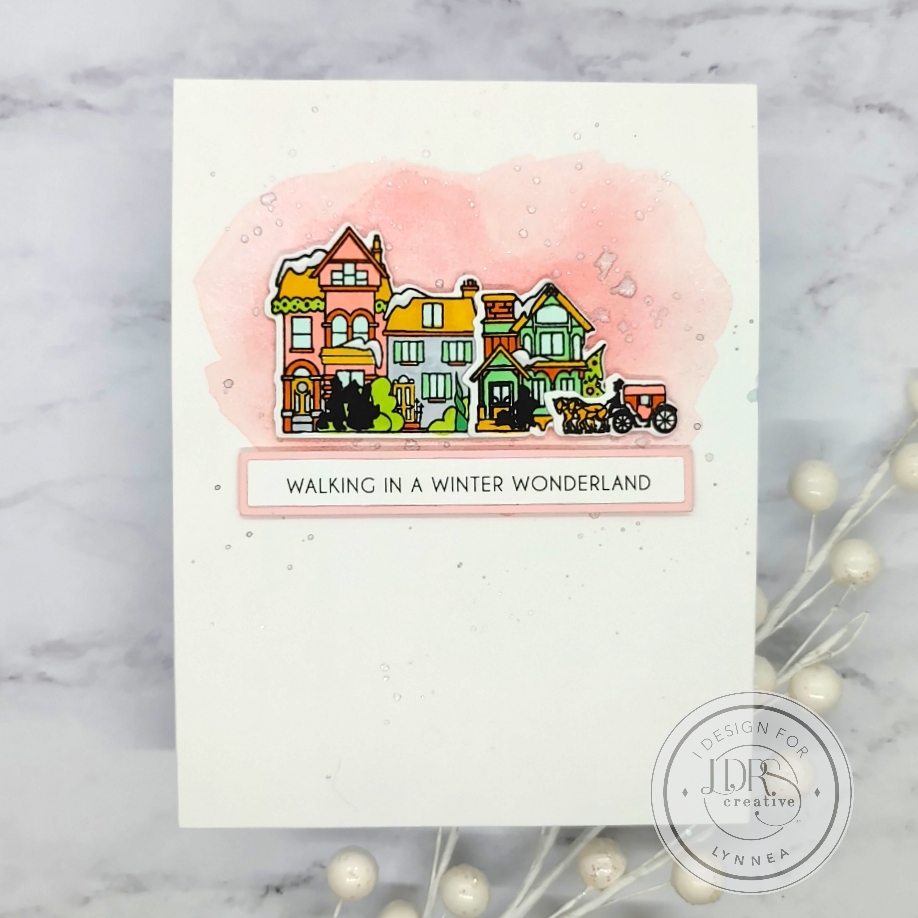
I love seeing pink at Christmastime! I used the LDRS Creative Christmas Village Stamps and made a tiny village scene! 


I started by stamping some images from the Christmas Village Stamps, coloring them with Copic Markers, and cutting them out with the coordinating dies


I used a few shades of pink shimmer watercolors and created a wintery cloud of color to sit behind my village scene. I used a silver shimmer watercolor to add some snow flurries to the background and popped up my images with foam tape. 


I added a sentiment strip from the Christmas Sentiment Stack and that's it! I hope you enjoyed this pink Christmas card!

Monday, September 12, 2022

LDRS Creative | Leaf Outline Stencils Fall Card

Hey, there! I'm back with another easy card using the new LDRS Creative Halloween & Christmas 2022 Collection! I did a bit of layered stenciling and stepped it up with some shimmery gold watercolor. Find the full tutorial on YouTube!


I started my card with the new Leaf Outline Stencils. Layering stencils are such a fabulous way to add multiple colors to your card. I started with the layer that adds the veins of the leaves, but you could start with the outline if you want. I used Scarlet Rose Hybrid Ink and then In Your Face Orange for the leaf out line layer. I love to add a bit of shimmer to my backgrounds and usually that means ink spattering, but I switched things up this time! I used my gold shimmer watercolor to highlight one side of each leaf. I did this randomly, but I love the effect!


All that's left to do is add a sentiment ... or two ... or three! Because that's a style I just can't shake these days! A few people have asked to see the new Sentiment Stack Shadow Die - Wave in action and this card was perfect for it! I stamped the Harvest Wishes Stack Stamp in Coffee Bean Hybrid Ink and die cut it with the Wave Ribbon Stack Coordinating Die. I cut the Sentiment Stack Shadow Die - Wave three times from gold foiled cardstock and added the shadow to three of the sentiments.


I added the three sentiments to the front of my card and that's it! Finished! Super simple, but super shimmery, and it has all kinds of Fall vibes!

Saturday, September 10, 2022

LDRS Creative | Halloween & Christmas 2022 Collection - Halloween Features

It's time to get spooookkyyyyy!!! You all know how I love to create my own patterned papers with small stamps and a bit of ink spattering! I used the LDRS Creative Graveyard Ghouls Pocket Pals for this fun card. Find the tutorial for this card on my YouTube Channel!


I grabbed the four skeletons and two ghosts from the Graveyard Ghouls Pocket Pals 4x6 Stamps and stamped them all over my card front with Raven Hybrid Ink. I used a C1 and W1 marker to add some quick and easy shadows to the images and then spattered the card with black and gold shimmer watercolors


I stamped the Halloween Sentiment Stack Stamp with Raven Hybrid Ink and then cut out all the sentiment strips with the Sentiment Stack Die II. I LOOOOOOVEEE that there are new shadow dies for the sentiment stacks! I cut black cardstock with the Sentiment Stack Shadow Die - Straight II and backed three of the sentiment strips with the black strips. 


I used foam tape to add the three sentiments to the top center of my card and that's it! Easy peasy, spooky and creepy! 

Tuesday, August 30, 2022

LDRS Creative | Adding a Pop of Color with the Ginkgo Leaves Dies

I'm sharing a pretty slimline birthday card using stamps and dies from the new LDRS Creative Summer 2022 Collection


I love a black background with a bold pop of color! I started by covering a couple of pieces of cardstock with shimmer watercolors and then used the Ginkgo Leaves Die to cut out two large sprigs. 


I used the Elegant Stitched Frames Slimline Dies and cut a white card base, a gold and black layer, and then a gold, black, and white layered label shapes. I stamped a sentiment from the Essential Birthday Sentiments 4x6 Stamps onto the white label. I added shimmery white watercolor spatters to the black panel and added the Ginkgo Leaves die-cuts on top and trimmed off the excess. 


I layered all of the various pieces together with a mixture of liquid adhesive and foam tape for dimension. Thanks for joining me!

Monday, August 29, 2022

LDRS Creative | Easy Square Notecard with the Mini Foliage Dies

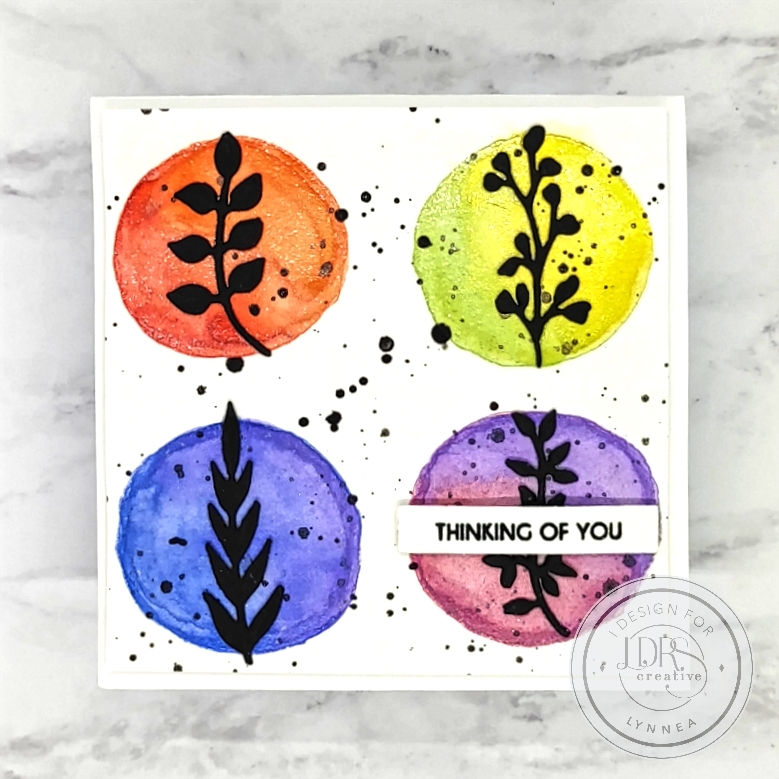
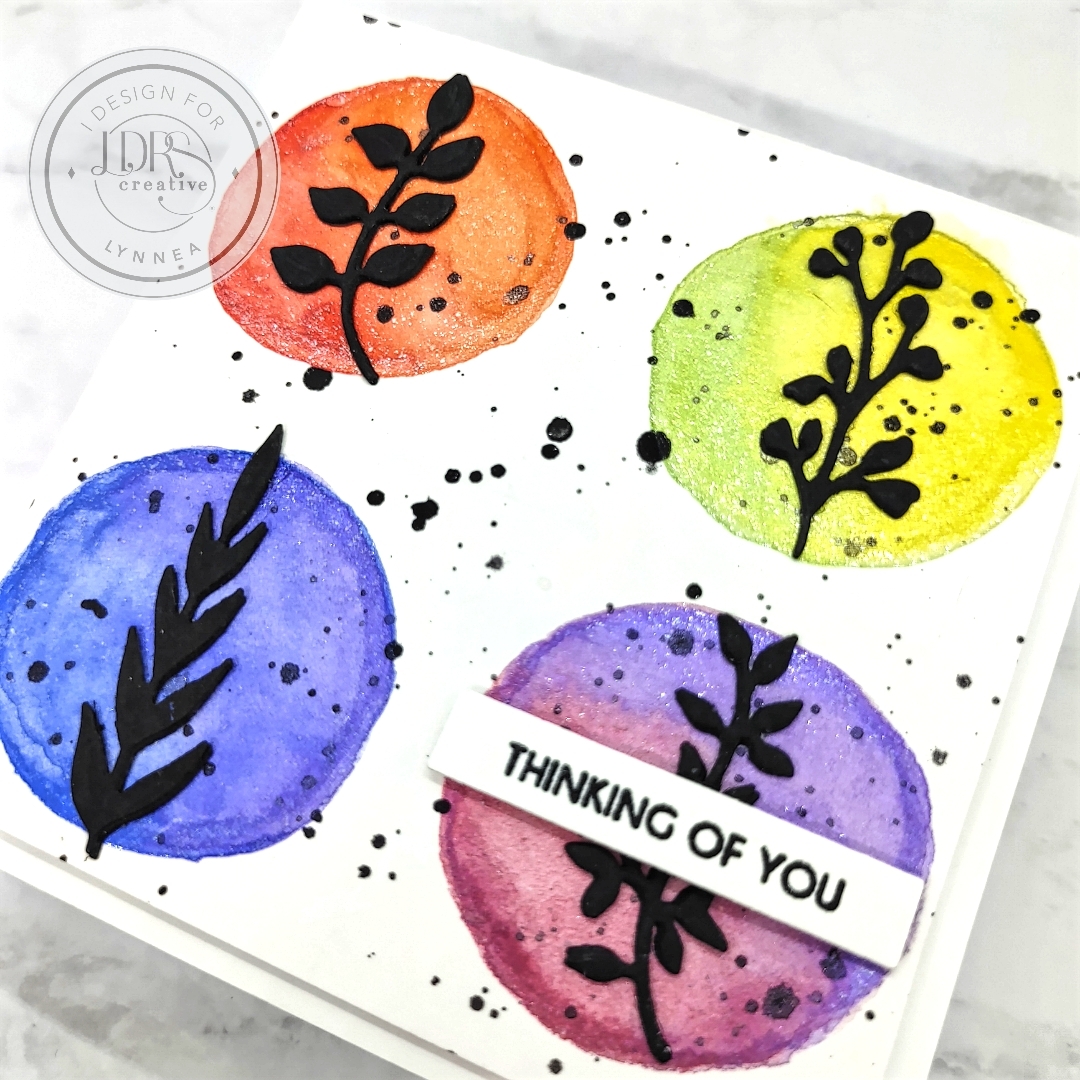
Ready for a card that can be color customized for any season and is easy to mass produce? I used a handful of new products on this watercolored card. Head over to the LDRS Creative Inspiration Blog for more the details!


I love the Mini Foliage Dies! You can use them to build a wreath, create a faux coverplate background, ... the list goes on! I like to use them as little silhouetted springs! I started by cutting a piece of watercolor cardstock to 4" square and used a rainbow of shimmer watercolors to create four watercolored circles. I let two colors blend together on each circle, heat set them, and added some black spatters. 


I used the Mini Foliage Dies and die cut four different sprigs from black cardstock. I cut them each multiple times and stacked three or four of them together for dimension and adhered them to the center of each circle. 


I wanted a simple sentiment that wouldn't take away from the background, so I stamped the Amazing You Sentiment Stack and cut it out with the Sentiment Stack Die II and added a single strip to the bottom right of my card. I used foam tape to add the panel onto a 4" square card. And that's it! 

Tuesday, July 19, 2022

LDRS Creative | Aspen, Ginkgo, and Myrtle Leaves Cards

Adding some shimmer watercolors is such a quick and easy way to step up your die-cuts and create pretty multicolored backgrounds! 


I love that you can add a bunch of color super easily to a large background and then cut it into pieces to add colorful accents to a card. The new Aspen Leaves, Ginkgo Leaves, and Myrtle Leaves Dies are perfect for this! 


I started with a full sized sheet of watercolor cardstock and colored the entire piece with shimmer watercolor powders. These are an inexpensive medium that go a LONG way! Just add a bit of powder, spritz with water, and watch the magic happen! I used yellow, blue, and red so that they would mix to create new colors on the background. 


Once the background was complete I used the Aspen Leaves Die, Ginkgo Leaves Die, and Myrtle Leaves Die to cut the background. I was left with a bunch of multicolored leafy pieces! I completely covered the backgrounds of two cards and used a leftover piece on a third card. 


I stamped the Amazing You Sentiment Stack onto black cardstock with Watermark Embossing Ink and heat embossed with White Embossing Powder. I used the Sentiment Stack II Die to cut out a bunch of sentiment strips and started adding them to my cards with foam tape. 


Since the backgrounds were so simple I added multiple sentiment strips to each card to help fill it out. 


I love how each of these cards were made with the same products and technique, but they all have a different look! I hope you try it out!

Monday, June 6, 2022

Pink & Main | Hoppy Birthday to You!

I'm wishing you a 'hoppy' birthday with the adorable Ribbit Stamps and Dies from Pink & Main!


I love a good pun, don't you? And I love that this card is great for kids or adults! It's quite simple to make and I just used a few supplies. I wanted to create a centered focal point on my card with my stenciling. You could use masking tape, but I'm not very good at keeping things straight, so I find it MUCH easier to use the Pink & Main Mask-It Rectangle Stencil. There are guidelines etched into the stencil so you know right where to line it up on an A2 Card. I first adhered the Garden Gate Stencil to my card and then the Mask-It Rectangle Stencil and used an Ergonomic Blender Brush and two shades of green ink to stencil my background. 


I am a HUGE fan of adding spatters to my background. I think it adds texture and something interesting to a simple background. I used two colors of shimmer watercolor - green and gold - drying in between colors so that they wouldn't mix. I set the panel aside to dry for a bit and worked on the rest of the card. 


I stamped the frog, log, and two fireflies from the Ribbit Stamp Set and colored them with Copic Markers. I used the Ribbit Coordinating Dies to cut out each of the images and started adding them to my card with foam tape. 


I stamped the 'hoppy birthday' sentiment onto a piece of white cardstock and used one of the Large Sentiment Strip Dies to cut it out and added it below my scene. That's it! Thanks for joining me!

Wednesday, March 30, 2022

Miss Ink Stamps | Pretty Birds Card with Shimmer Watercolor Background

This card is amazingly simple to make! I used the Miss Ink Stamps Pretty Birds Stamp Set as the focal point and some of my handmade shimmer watercolors to make a textured background! 


I started by adding some simple textured stripes of watercolor vertically down my card and added some black watercolor ink spatters for extra texture. 


I stamped the branches and a couple of birds from the Pretty Birds Stamp Set and colored them with Copic Markers and cut them out with my scissors. I popped them up with foam tape in the center of my card. I was sure to use bolder colors than my background so that they would stand out. 


I added a sentiment strip below my images and that finishes the card! Thanks for joining me!\

Monday, January 10, 2022

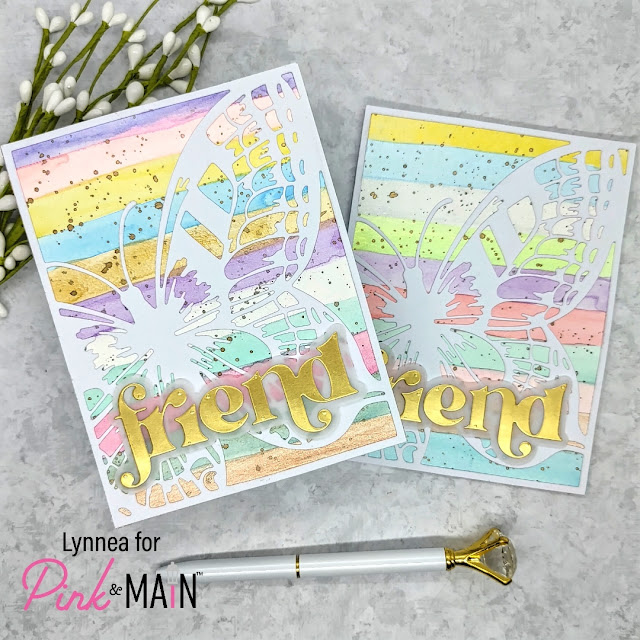
Pink & Main | Mass Produced Butterfly Cards

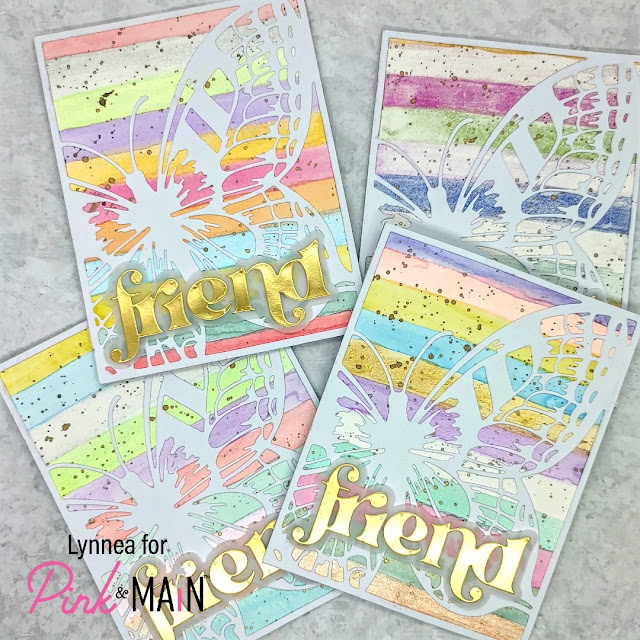
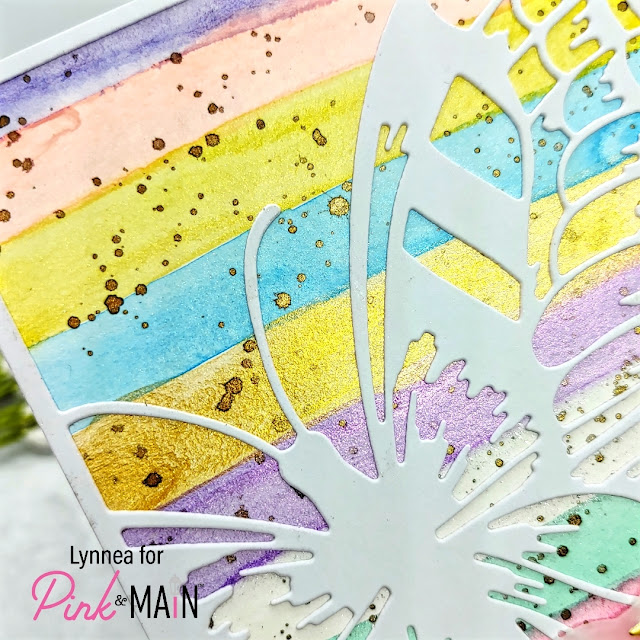
I have been itching to use the Pink & Main Bold Butterfly Panel A Die again! I love how it looks over a simple watercolored background! 


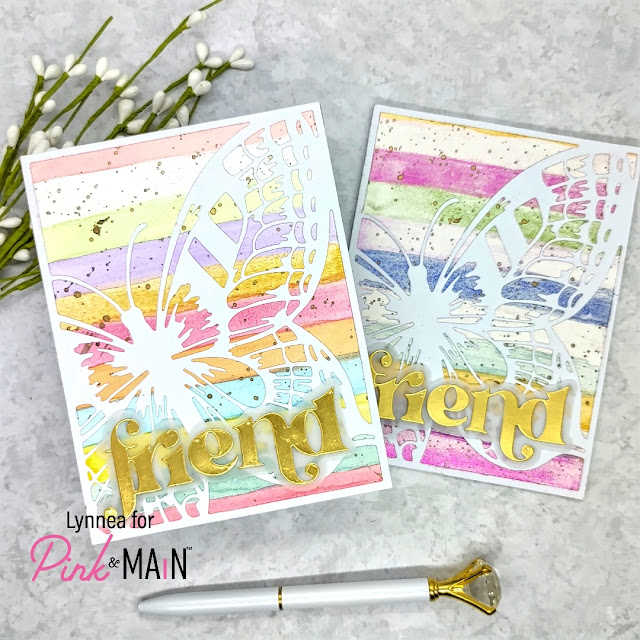
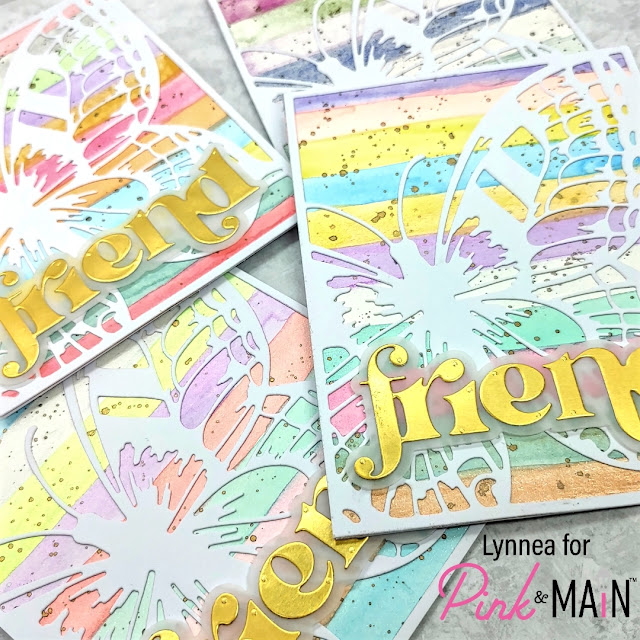
The Bold Butterfly Panel Dies can be used to make a gorgeous layered butterfly, but I decided to overlay only the Bold Butterfly Panel A Die over a watercolored background. This card was so quick to make that I decided to do a whole set. And! You could make this set even quicker if you used one of Pink & Main's gorgeous patterned paper packs!


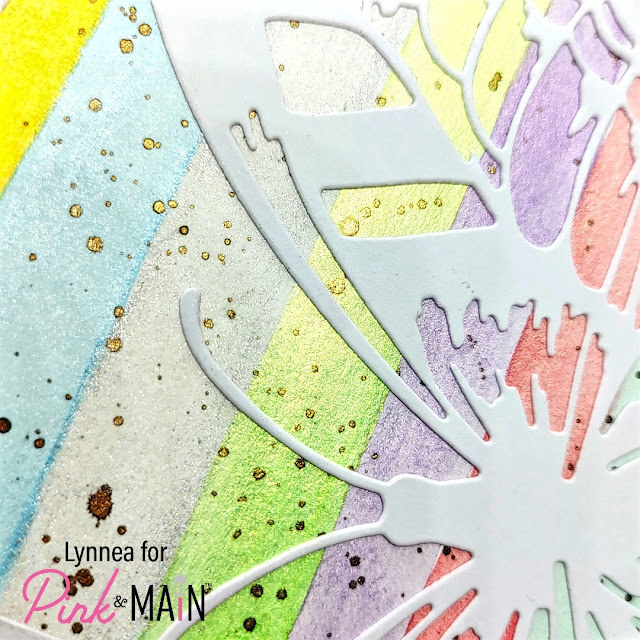
Every now and then I like to pull out my shimmer watercolors and make some backgrounds. For this set I used a bunch of different colors and created some simple striped backgrounds. There's no rhyme or reason to my stripes ... I just followed my heart haha! Then I added some spatters because I love spatters! 


I cut out the Bold Butterfly Panel A Die four times from white cardstock and added one on top of each of my striped backgrounds. I love the simplicity! I didn't want to cover up much of the butterfly, so I decided on a simple die cut sentiment. I used the Rainbow Friend Die and cut the sentiments from Gold Foil Cardstock and the shadow from vellum and added them to the bottom of my cards using thin strips of foam tape. 


Thanks so much for stopping by today! See you soon! 

Saturday, January 8, 2022

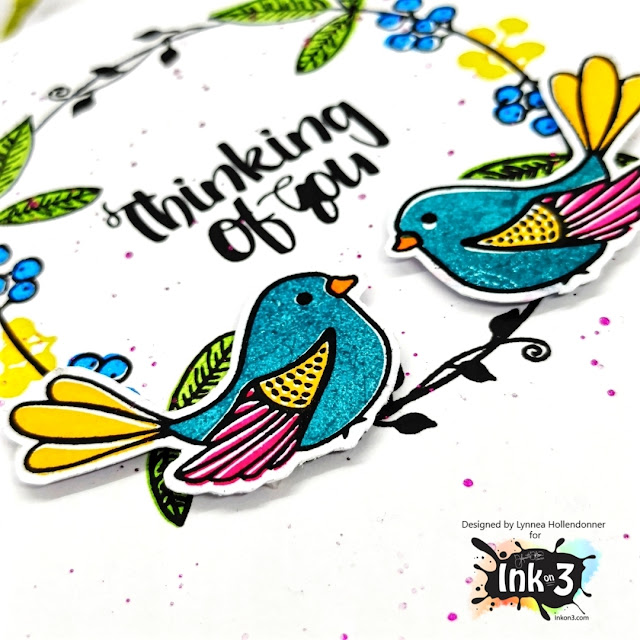
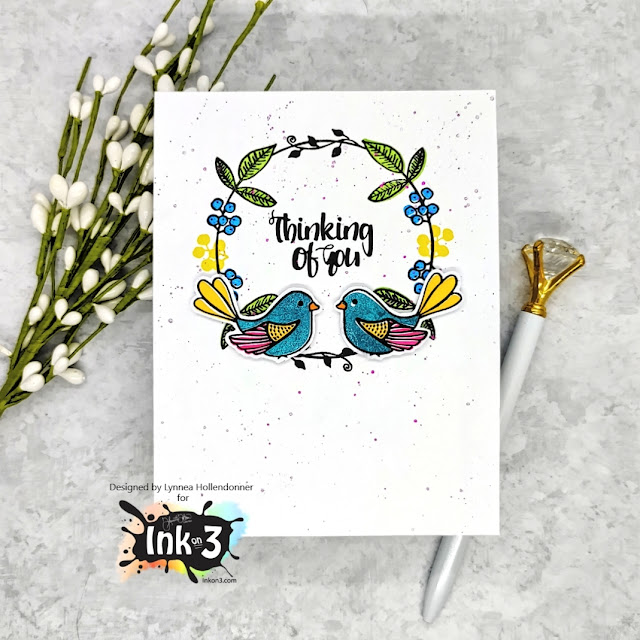
InkOn3 | Holiday Wreath Bird Card

I love versatile stamps! The Holiday Wreath Stamp Set from InkOn3 is great for all kinds of cards and occasions! 


This card is so simple, but I love the colors and how it turned out! I stamped the wreath from the Holiday Wreath with Blackout Hybrid Detail Ink and used the layering stamps to fill in the leaves and berries of the wreath. I used Goddess Green Atelier Ink, Bee Sting Yellow Atelier Ink, and Peacock Blue Atelier Inks to create a spring/summertime wreath. 


I wanted to keep that springy feel with the Love Birds Stamp Set, so I stamped the outlines with Blackout Hybrid Detail Ink and used the layering images with Trinity Teal, Bee Sting Yellow, and Sweet Petunia Pink Atelier Inks. I love how quick it is to add color to these birds! I added the sentiment to the center of my wreath and spattered some pink shimmer watercolor all over my background for texture. 


I trimmed out my birds and popped them up with foam tape near the bottom of the wreath for some dimension. And that's it! Thanks for joining me! 

Monday, December 20, 2021

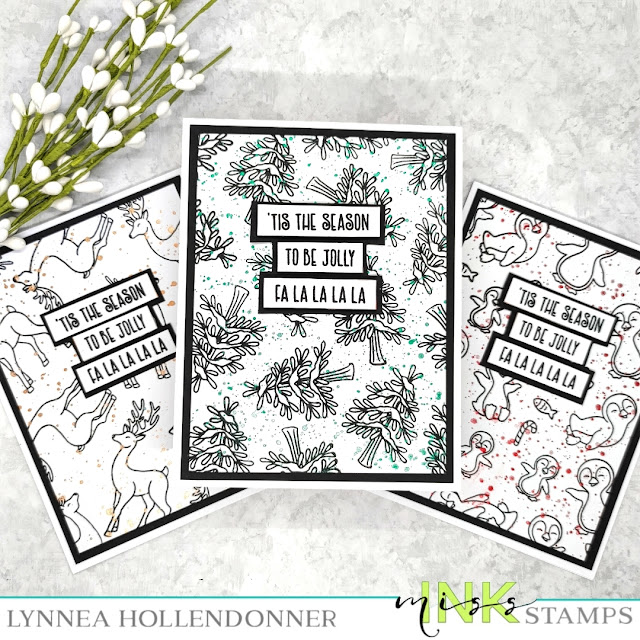
Miss Ink Stamps | Last Minute Holiday Cards

I have another last minute card set to share using a few different stamp sets from Miss Ink Stamps! I am in love with black and white this holiday season - it's just so classy! 


You only need a few supplies for cards like these - making this design perfect for beginners or anyone who just wants a quick set of cards!


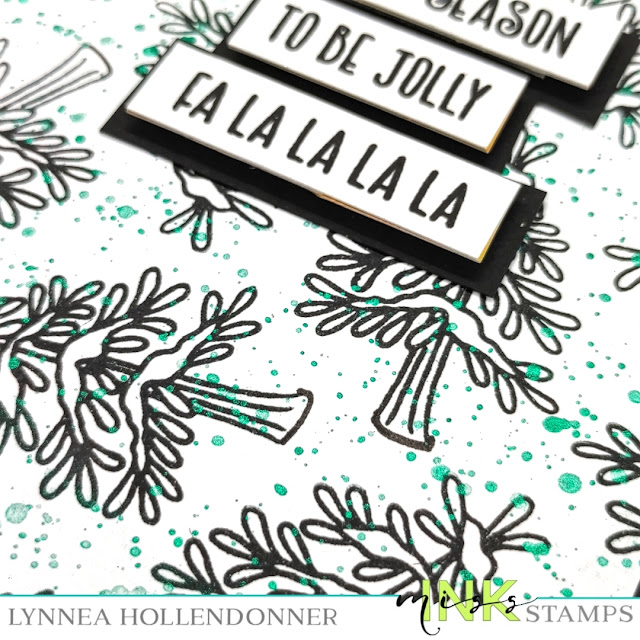
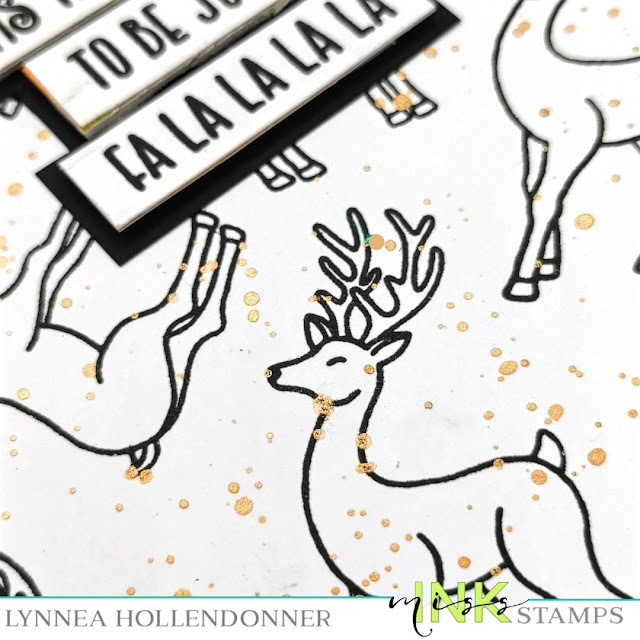
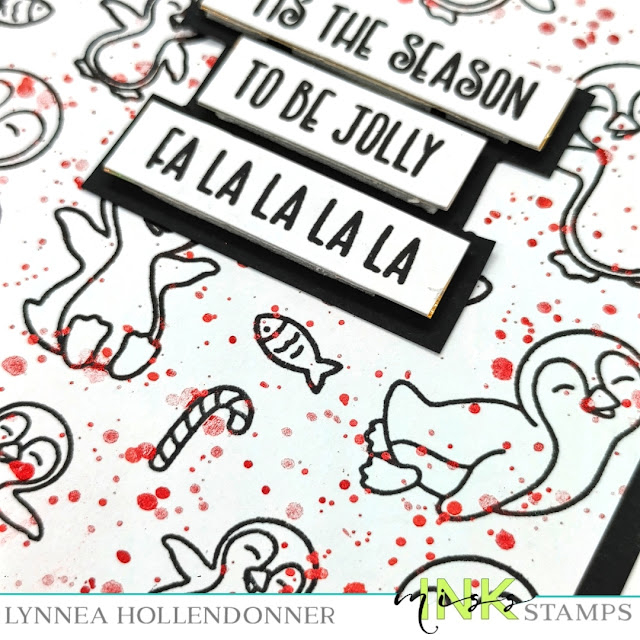
I used a dark black pigment ink to stamp three different backgrounds using the Calm and Bright, Oh Deer!, and Ice Day Stamp Sets. I stamped different images repeatedly across a background turning the images to make them look random. 


I wanted to step up my cards a bit and add a pop of color, so I added some shimmer watercolor spatters to each card. I used different colors, but you could speed up the process by using just one. 


I stamped sentiment strips from the Season's Greetings Stamp Set and foam mounted them onto black cardstock and trimmed around the strips to create a shadow layer. I trimmed down the stamped panels and matted them onto black cardstock and added those to white card bases. I love how everything is black and white with just a bit of color! 


I hope this idea helps you out if you need some last minute Holiday cards! Thanks for joining me! 

Saturday, December 11, 2021

InkOn3 | Shimmery Christmas Card

A little stamp layering with InkOn3 stamps and Atelier Inks and shimmer watercolors make a quick and easy Christmas card! 


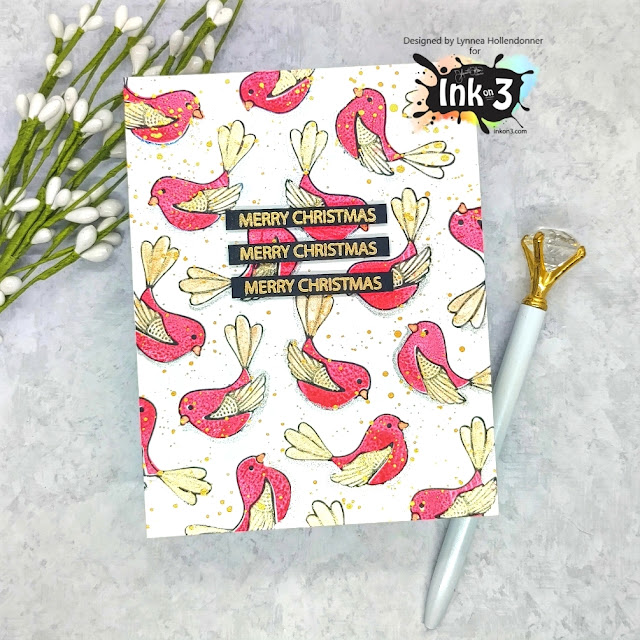
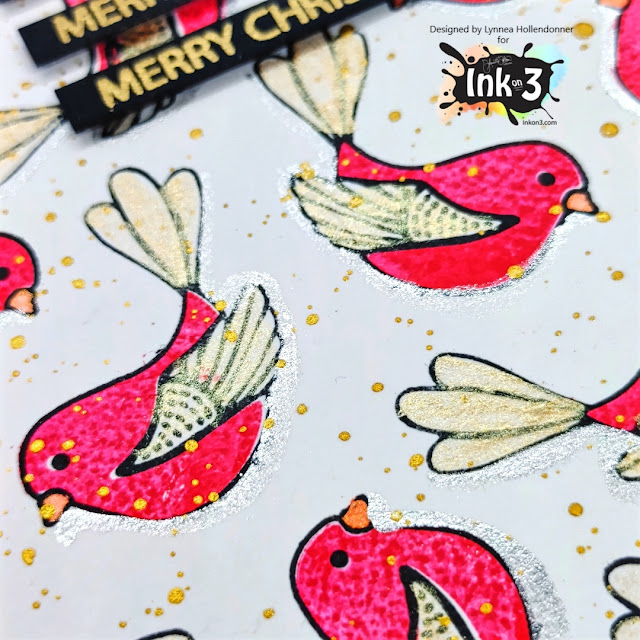
I stamped the outlines of the birds from the Love Birds Stamp Set with Blackout Hybrid Detail Ink repeatedly on my background until my cardstock was full of little birdies. I used the layering images for the birds and stamped them with Marilyn Red Atelier Ink to mimic the look of cardinals. There are layering stamps to fill in the tails and wings as well, but I decided to use some shimmer watercolor for a bit of sparkle. I added some gold watercolor spatters to finish off the background. 


I stamped a greeting from the Holiday Wreath Stamp Set three times with Juicy Watermark Embossing Ink and heat embossed with Gold Rush Fine Detail Embossing Powder. I trimmed each of the sentiments into small strips and popped them up near the top center of my card. 


Thanks so much for joining me! I hope you enjoyed this shimmery Christmas card! 

Thursday, December 9, 2021

Trinity Stamps | Simply Sentimental You Stamps and Dies

Bright and easy backgrounds are my favorite! I used shimmer watercolors and the new Simply Sentimental You stamps and dies from Trinity Stamps for this clean and simple card! 


I watercolored rainbow stripes onto a piece of watercolor cardstock with shimmer watercolors and then stamped the Encouragement Text Background Stamp over the top with black ink. 


I stamped the large "you" from the Simply Sentimental You Stamp Set as well as a coordinating sentiment and die cut them with the Simply Sentimental You Die Set


I popped up my sentiments with foam and then added a bunch of Blacked Eyed Baubles Embellishments to complete the card. Thanks so much for stopping by!