Showing posts with label Clean and Simple. Show all posts

Monday, June 30, 2025

LDRS Creative | Ocean Rainbow Inked Card

Bring a splash of rainbow color to your cards with this ocean-inspired card! Today, I’m using the Coral Reef Stamps and Dies from LDRS Creative to create a bright and cheerful underwater scene that’s perfect for summer. I’ll show you how easy it is to layer rainbow inks to give your coral reef depth and vibrancy, making your card pop with color. Let's get started! 


This card was so easy to make, and the bright colors really bring it to life! I started by stamping the center of the Coral Reef Stamp with Dan-D-Lion Hybrid Ink. You can start anywhere, but I like to start with my yellow ink since it's the center of the rainbow and it will easily overlap with colors on both sides of the color wheel. Then I stamped slightly to the left with In Your Face Orange Hybrid Ink and Tickled Pink Hybrid Ink. I made sure that tapped the excess ink off with my cleaning cloth before stamping onto the paper. This keeps the harsh edges away! The rest of my rainbow was done with Key Lime Pie, Marina Madness, and La La Lavender Hybrid Inks. Once my panel was stamped, I trimmed it down so that it would be slightly smaller than an A2 card. 


I added the panel to an aqua colored card base and added a stamped and die cut sentiment. Just like that, my card is finished! Thanks so much for joining me! 

Monday, June 16, 2025

LDRS Creative | A Rainbow of Summer Scenes - Quick & Colorful Cardmaking!

Looking for a quick and colorful way to bring summer vibes to your cardmaking? This easy stamped card is packed with feel-good sunshine - no coloring required! I used the Vacation Puzzle Scenes from LDRS Creative to create a playful rainbow of stamped images that show all the best parts of summer. Grab your inks and let’s dip our toes in the water with this fun and effortless tutorial!


Products used - 


I stamped the main grid from the Puzzle Frames 6x8 Stamps with Alloy Hybrid Ink and added two half circles to two of the rectangles so that I could use some of the curved scenes on my card. From here it's just about having fun stamping the scenes from the Vacation Puzzle Scenes 6x8 Stamps! I chose to fill the center of the puzzle grid with four images in gray so that the sentiment would stand out. The images around the outer edge however, RAINBOW! I stamped Tickled Pink, In Your Face Orange, Dan-D-Lion, Key Lime Pie, Marina Madness, La La Lavender, and Boysenberry Blast Inks - so pretty! 


I trimmed down the panel and added it onto an aqua card base. My sentiment comes from the Lighthouse 4x6 Stamps and I stamped it onto a small die-cut piece from the Mixed Postage Rectangle Dies. I popped it up in the center of my stamped panel, and that's it! 

Friday, April 4, 2025

*RING RING* - Time to Create an Easy Letterpress Card!

Ring ring! I used the Victorian Phone Impress-ion Press + Foil Plates to create a card with an easy letterpress technique. This card features a cheerful yellow background with gray accents, giving it a modern twist on vintage style. I added the playful “ring ring” sentiment to tie everything together, making it perfect for a fun hello or just-because note. Let's check it out! 


Products used - 


This card was quite simple to make and just required some easy letterpress-ing and die cutting. I started by using my BetterPress Platform and Alloy Hybrid Ink to press the image from the Victorian Phone Impress-ion Press + Foil Plates into an A2 Cotton Watercolor Panel. Then, I used the Victorian Phone Coordinating Dies to cut out the image. I cut some pale yellow cardstock using the largest die from the Pinpoint Rectangle Dies as well as the third largest die from the Mixed Postage Rectangle Dies. I also used my paper trimmer to cut a piece of white cardstock to layer between the two yellow panels to create easy dimension. 


I wanted a quick, easy, but super cute sentiment, so I letterpressed "ring ring" from the Victorian Phone Impress-ion Press + Foil Plates into the smaller yellow die-cut panel with Raven Hybrid Ink. I grabbed a white A2 card base and layered all of the die-cut pieces onto the card with a mixture of liquid adhesive and foam tape. And that's it! 

Sunday, December 3, 2023

Cupid's Arrow Impress-ion Letterpress Dies

Just look at this little cutie! The Cupid's Arrow Impress-ion Letterpress Dies are just what you need for your Valentine's Day projects. Join me on the LDRS Creative YouTube Channel for the full video tutorial!


I'm loving Impress-ion Letterpress Dies! They're easy to use and the dimension they give is amazing! I pressed the Cupid's Arrow Impress-ion Letterpress Dies into a piece of watercolor cardstock with Fandango Hybrid Ink and then used the coordinating wafer thin die to cut it out. 


I grabbed one of the Flourishes Impress-ion Letterpress Dies and pressed it into the bottom of a piece of watercolor cardstock and added a sentiment from the Love & Friendship Sentiments Impress-ion Letterpress Dies above the flourish. I cut down the panel with one of the A2 Diagonal Stitched Layered Card Toppers so that it would layer onto an A2 card.


I popped up my Cupid image and added some pink baubles here and there to finish the card!

Friday, December 1, 2023

Flaurs Petite - Daisies and Elegant Rectangle Frame Impress-ion Letterpress Dies

A focal point doesn't always have to be big and bold. Sometimes petite is the way to go! I mixed together some new products from the LDRS Creative With Affection Collection to make this clean and simple card.


This card is so simple and would be a fabulous option for mass production! I started by pressing the Elegant Rectangle Frame Impress-ion Letterpress Die into LDRS Creative Watercolor Cardstock with Fandango Hybrid Ink. Isn't the pink frame so pretty! I added a sentiment towards the bottom with the Love & Friendship Sentiments Impress-ion Letterpress Dies with Raven Hybrid Ink


I knew that I wanted to use Copic markers to color my image, so instead of using watercolor paper as I usually would, I grabbed a piece of Neenah heavy weight cardstock and used Raven Hybrid Ink to press the Fleurs Petite - Daisies Impress-ion Letterpress Die image into the cardstock. I used the coordinating wafer thin die to cut out the image and quickly colored it with Copic markers. 


I added my floral bouquet to the top center of the frame with foam tape and that's it! How easy is that?! 

Friday, May 26, 2023

LDRS Creative | Be Happy

Be happy! I have another quick and easy card to share with you today using the Favorite Things Paper Collection from LDRS Creative


This card is so incredibly easy to make - it takes only minutes to put it together! I chose the pinky/red checkered patterned paper from the Favorite Things 6x6 Paper Pack and cut it down to fit an A2 card. I dumped out the Favorite Things Ephemera Pieces and found some sweet treats and added them across the center of my card with some foam tape. All I need is a sentiment! The Favorite Things Puffy Stickers have some super cute sayings, so I chose one that fit with my design and added it below the ephemera pieces.


That's it! Seriously! So easy and so cute! You could even switch up the sentiment and you'd have the perfect birthday card!

Friday, September 9, 2022

LDRS Creative | Halloween & Christmas 2022 Collection - Christmas Features

It's tiiiimmmeeeee!!! The new collection from LDRS Creative is available now! I have an easy to mass produce Christmas card on my YouTube Channel using a couple of the new items!


I cut a piece of blue cardstock to 4"x5.25" and temporarily adhered the Damask Stencil over the top and added some chunky iridescent glitter gel. I set the piece aside to dry.


I cut the Christmas Wishes Word Dies from the same color blue cardstock and the shadow from white cardstock. I glued the pieces together and added some clear glitter to the blue sentiment. I used foam to pop up the sentiment onto the background and added it to a white card base. 


That's it! You could easily switch up the sentiment or the color to fit your style and mass produce this design this Holiday season! I'll see you tomorrow with another card using products from the LDRS Creative Halloween & Christmas 2022 Collection!

Monday, August 8, 2022

LDRS Creative | Easy Doodle Borders Card

Hi, everyone! It's Lynnea and I'm sharing an easy to mass produce card featuring the LDRS Creative Doodle Borders II Stamp Set. This row of flowers is just the cutest!


This card is truly a clean and simple, 5 minute card! It's a great design to mass produce and give as a gift. School is starting soon and I plan to make a set of 10 to give to my son's teacher. Let's jump in to the making of the card. I took the flower border stamp from the Doodle Borders II Stamp Set and lined it up in my stamping platform so that I could create a border stretching across the top center of my card. I stamped the image with Raven Hybrid Ink onto an A2 card and then flipped the card 180 degrees and stamped again.


I used a few alcohol markers to color in my images - a light and dark shade of pink, aqua, and yellow - as well as a green marker for the leaves. I wanted to add a finished border, so I used a T-square ruler and a black felt tipped pen to add a single line under each of the flower borders. 

I stamped the Amazing You Sentiment Stack with Raven Hybrid Ink and cut out the sentiment strips with the Sentiment Stack Die II and added one of the sentiment strips to the center of my card. 


I finished off my card by embellishing with a few pearls. That's it! Thanks for joining me!]

Tuesday, May 10, 2022

LDRS Creative | Easy Ink Blended Sunshiny Day Card

The Sunshiny Day Stamp Set from LDRS Creative is one of my favorites! The detailed image makes it great for easy coloring or to create an easy background. I used an emboss resist technique to create this card in no time! 


One of the great things about working with Raven Hybrid Ink is that it's really the only black ink I need! You can even heat emboss with it! I positioned the large image from the Sunshiny Day Stamp Set hanging off the top right of a piece of A2 cardstock and stamped it with Raven Hybrid Ink. I turned my cardstock and repositioned the stamp on the opposite side and stamped again then I heat embossed both images with clear embossing powder. 


I used LDRS Creative Blender Brushes with Dan-D-Lion and Four Leaf Hybrid Inks to add quick color to the heat embossed images. I tried to keep the color in their correct areas as much as possible, but I wasn't concerned about having a 'messy' look on the edges. I used Marina Madness Hybrid Ink in the white space to create a faux sky. I added some gold shimmer watercolor spatters for extra texture. Bonus! Ink spatters help to cover up any mistakes I may have made during the ink blending process!


I finished the card by die cutting a sentiment from the Everyday Sayings 4x9 Toner Sentiments Paper Pack with the Everyday Sayings Coordinating Dies and popping it up in the center of my card. I embellished with a few gold baubles and that's it! 

Monday, April 25, 2022

Pink & Main | Black and White Heat Embossed Floral Card

Black and white cards are so classy, don't you think?! I used new stamps and embossing powders from Pink & Main to make this card! 


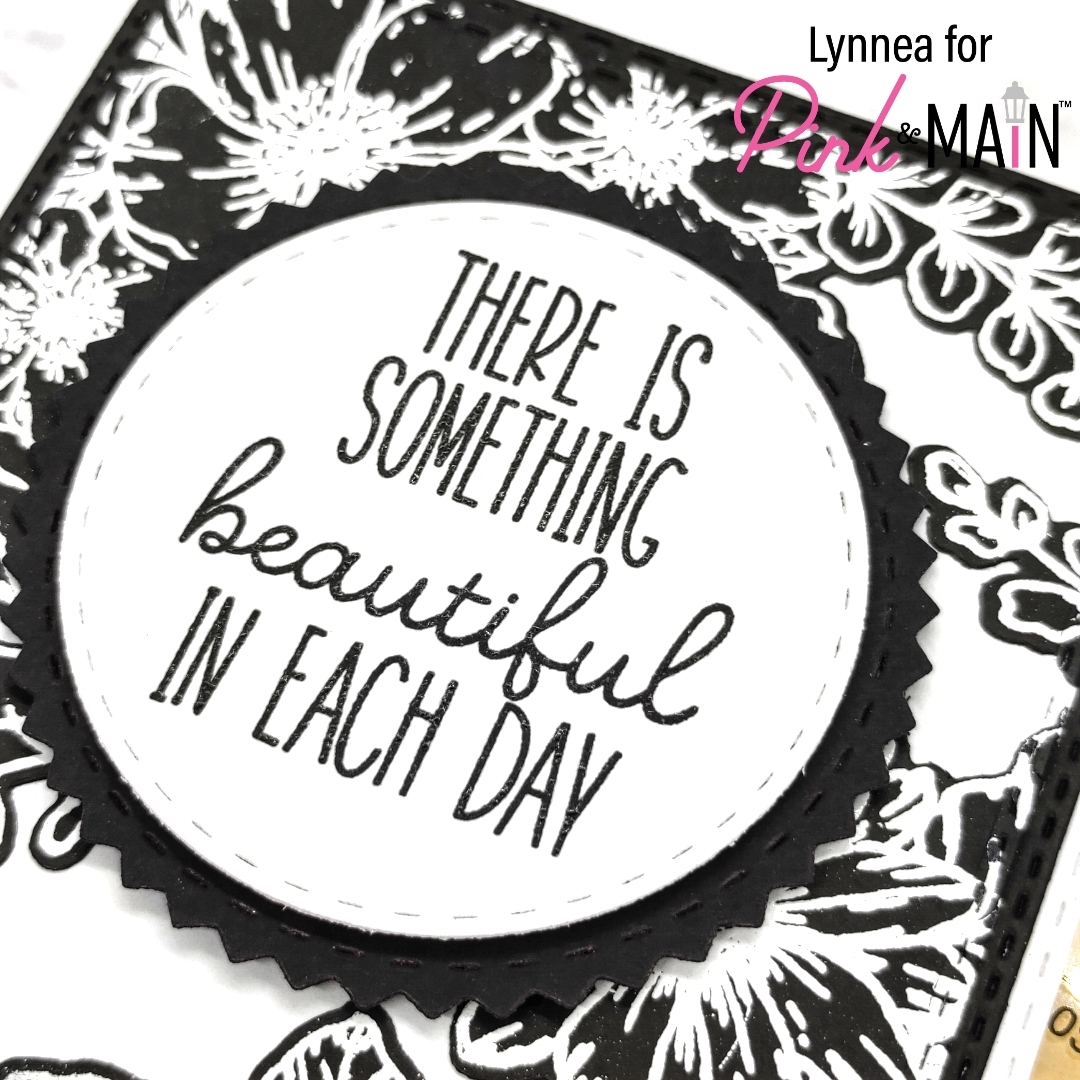
I have to start by saying I am in LOVE with the new Pink & Main Magic Anti-Static Brush (available soon)! It is easy to use and doesn't crush the bristles like other tools. The powder isn't bright white, so it's perfect for dark cardstock! I used the Magic Anti-Static Brush on black cardstock and then stamped the two images from the Floral Sprays Stamp Set with the Pink & Main Embossing & Watermark Ink Pad and embossed the images with Frosting Embossing Powder and cut out the images with the Floral Sprays Dies


I arranged the die-cuts on a piece of white cardstock and then used the second largest die from the Stitched Rectangles 1 Die Set to cut out the panel. I created frames by cutting a piece of black cardstock with the largest die from the Stitched Rectangles 2 Die Set and a piece of white cardstock with the largest die from the Stitched Rectangles 1 Die Set. I love how these sets work together to create layers! 


I used the Magic Anti-Static Brush on a piece of white cardstock and stamped a sentiment from the Here for You Stamp Set with Pink & Main Embossing & Watermark Ink and embossed the image with Licorice Embossing Powder. I die cut the sentiment with one of the dies in the Stitched Circles Die Set and backed it with a black piece cut with a Zig Zag Circles Die. I added them with foam tape to the center of the card and that's it! Thanks for joining me!

Tuesday, February 22, 2022

LDRS Creative | Floral Toner Toppers Card

Nothing beats the magic of foiling! I used a bold pattern from the new LDRS Creative Floral Toner Toppers Paper Pack and created a clean and simple card with a pop of foiled flair! 


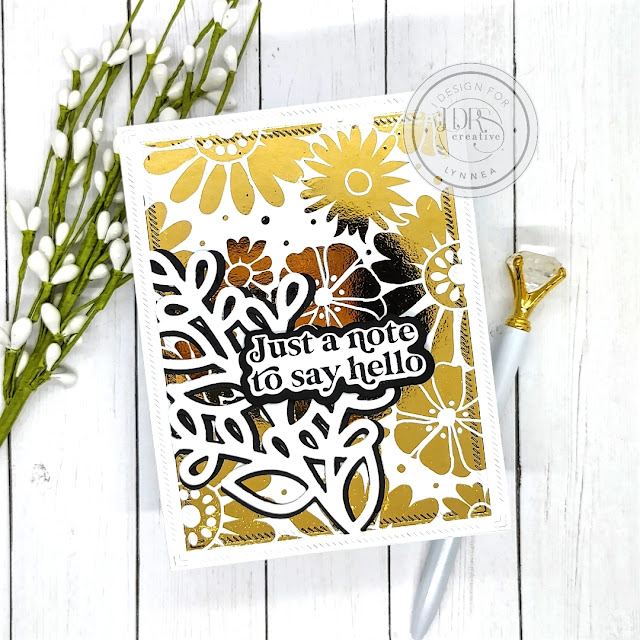
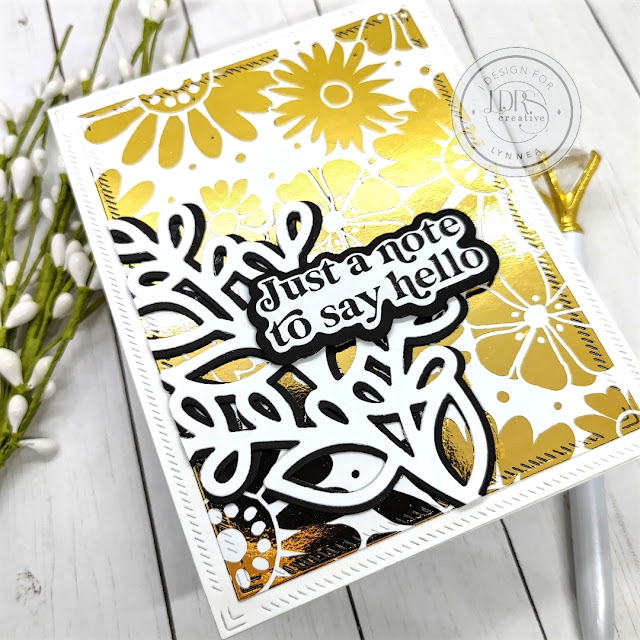
If you've never tried foiling now's your chance! There are new Toner Toppers Paper Packs from LDRS Creative in both 6x6 and 4x9 size with gorgeous, easy to foil patterns! I am head over heels for the Floral Toner Toppers - especially this bold pattern! All you need to add foiled goodness to the Toner Toppers is a toner reactive foil. You can find a whole RAINBOW of colors, but I decided to go with gold and keep to a more neutral color palette. I cut my paper from the Floral Toner Toppers 6x6 Paper Pack with the second die in the A2 Diagonal Stitched Layered Card Toppers Die Set and then used my scissors to trim a piece of gold foil slightly larger than my background panel. I placed the foil pretty side up (silver side against the toner printed design) over the background and ran it through my laminator with a parchment paper carrier sheet. 


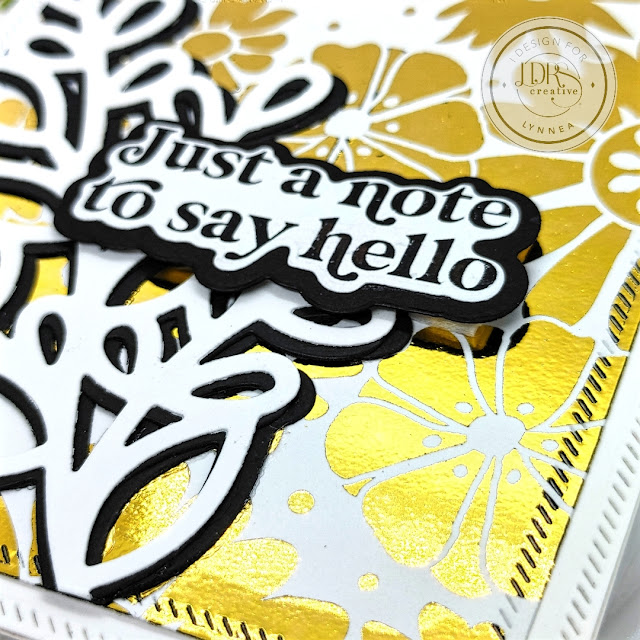
I wanted to keep the elements on the front of my card simple since I had such a gorgeous, bold background. The Lovely Wildflower Cluster Die Set was just the thing I needed! I mentioned before that I wanted to keep to a neutral color palette, so I thought I would add a pop of black, but the die just wasn't standing out. I tried white and that was worse than just the black, so I decided to go back to an old trick and create a faux background for my die-cut. I cut the vine piece from the Lovely Wildflower Cluster Die Set once from white and twice from black and adhered the black pieces behind the white pieces and slightly offset them - one slightly left and one slightly right. This gives me a shadowed look without any fussy cutting! I adhered it to my background panel hanging off the right side and trimmed off the excess with my scissors. 


I stamped a sentiment from the new Everyday Sayings Stamp Set with Raven Hybrid Ink and used the Everyday Sayings Coordinating Die Set to cut out the sentiment. The die set has two dies for each sentiment so that you can cut close to the sentiment and cut a shadow as well - LOVE THAT! I cut a shadow from black cardstock and added the sentiment with foam tape. I cut a panel of white cardstock with the largest die from the A2 Diagonal Stitched Layered Card Toppers Die Set and adhered all of the pieces to a card base. And that's it! Be sure to watch my video above for lots of foiling tips and tricks. I'll see you soon! 

Monday, February 21, 2022

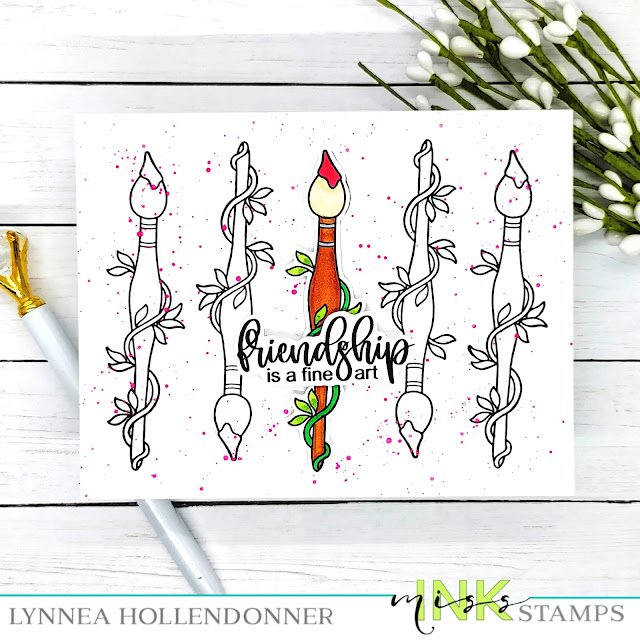
Miss Ink Stamps | Blooming Brushes Repeat Stamping

I haven't reached for the Miss Ink Stamps Blooming Brushes Stamp Set in quite some time and that just feels like a crime! I made a clean and simple card with some repeat stamping and simple Copic coloring. 


I stamped the paintbrush from the Blooming Brushes Stamp Set five times across a piece of cardstock and added some neon pink paint spatters to the background. 


I stamped the brush again on a separate piece of cardstock and colored it with Copic Markers. I also stamped a sentiment and trimmed out both pieces with my scissors and popped them up onto my card with foam tape. 


Thanks so much for joining me!

Saturday, January 29, 2022

Miss Ink Stamps | Easy Sympathy Card

Unfortunately I once again find myself needing a sympathy card and I needed it quite quickly. I used Miss Ink Stamps stencils and stamps to pull together this card. 


I created a double stencil look by adding pink, orange, and yellow inks through the base layer of the In & Outs: Mediterranean Stencil and then placed the Floral Stained Glass over the top and added the same inks again. This gives me a subtle masked pattern. 


I stamped the Gardenia Stamp right in the center of my masked design with black ink letting some of the image hang off the side for a spotlight effect. I stamped a sentiment from the Magnolia Sympathy Stamp Set onto a strip and popped it up near the bottom of my flower. 


I added a few pearls around the sentiment and that finishes the card!

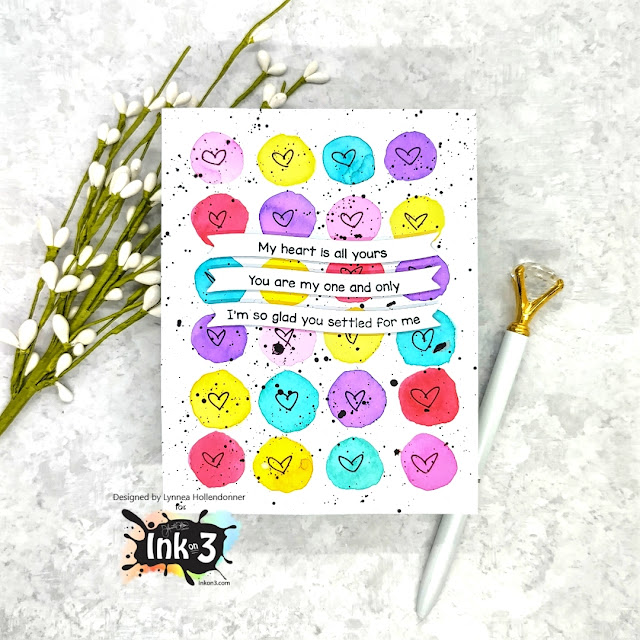
InkOn3 | Easy Atelier Ink Watercolor Background

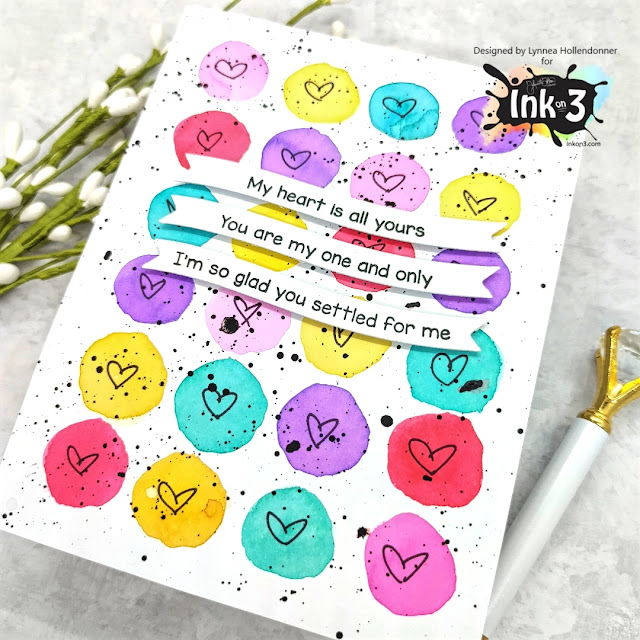
Easy peasy, lemon squeezy! Here's a simple Atelier Ink watercolored background for you! 


I started by smooshing a few different colors of Atelier Ink onto my glass work surface and then watercolored small hearts all over my background. I kept the circles loose and easy without any real shading. Just a simple and colorful background! 


I used a fine tip Sharpie and drew small hearts into each circle and then spattered the background with black watercolor. 


I finished the card by adding a few sentiment strips from the LDRS Creative Love Wave Stack with Blackout Hybrid Detail Ink!

Sunday, January 9, 2022

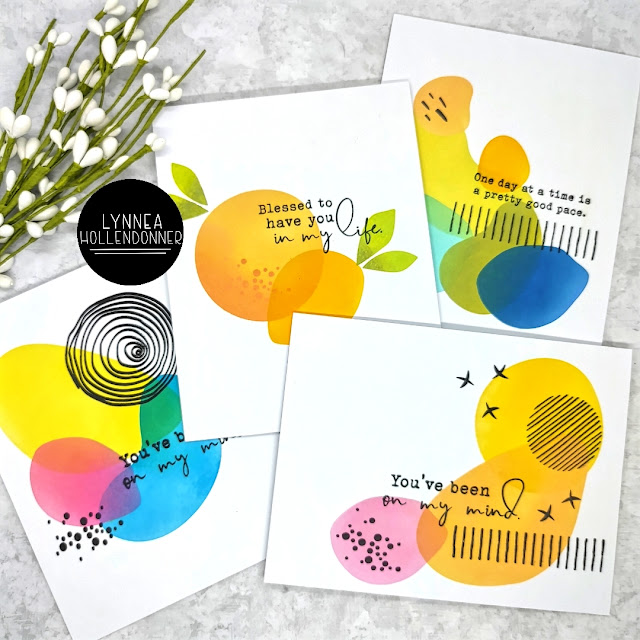
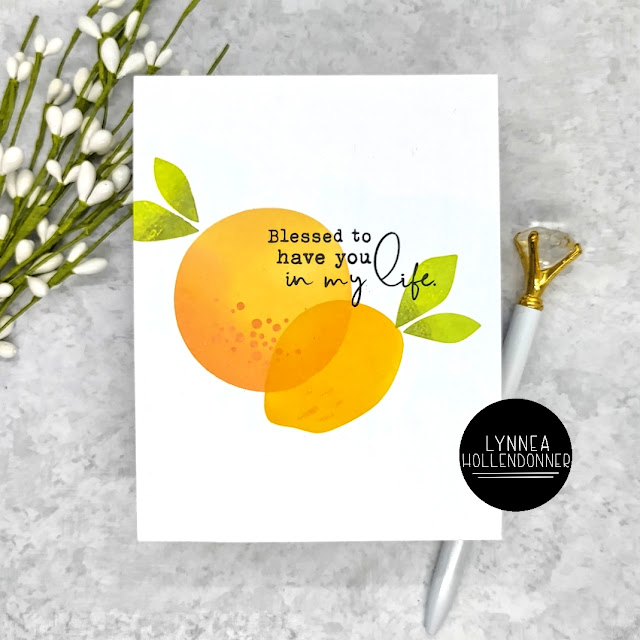
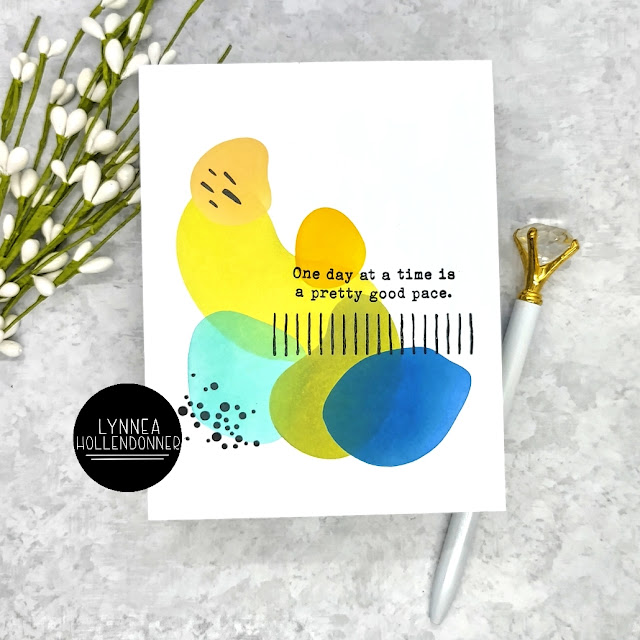
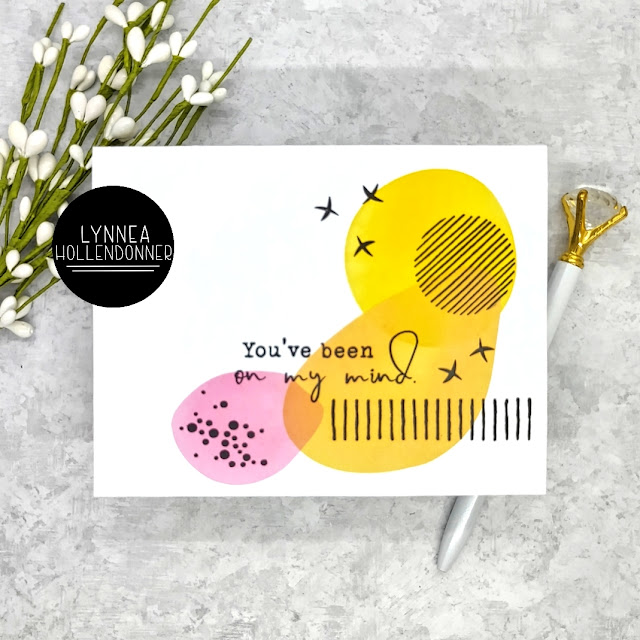
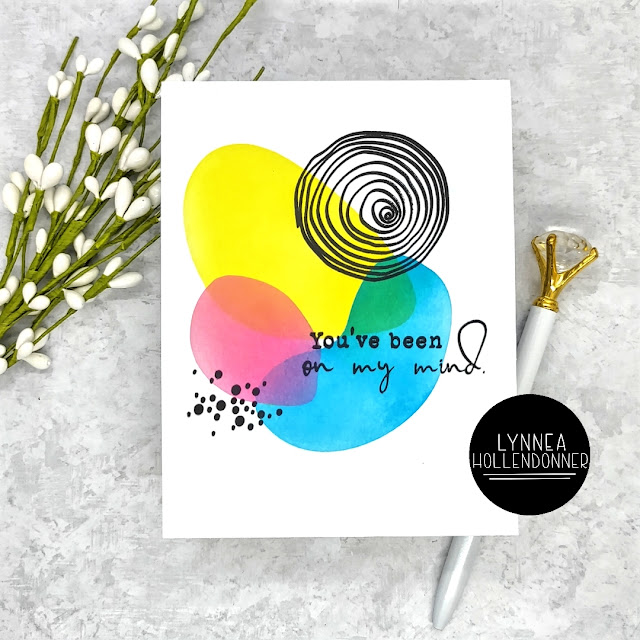
Taylored Expressions | 4 Cards with the Abstract Accents Stencils

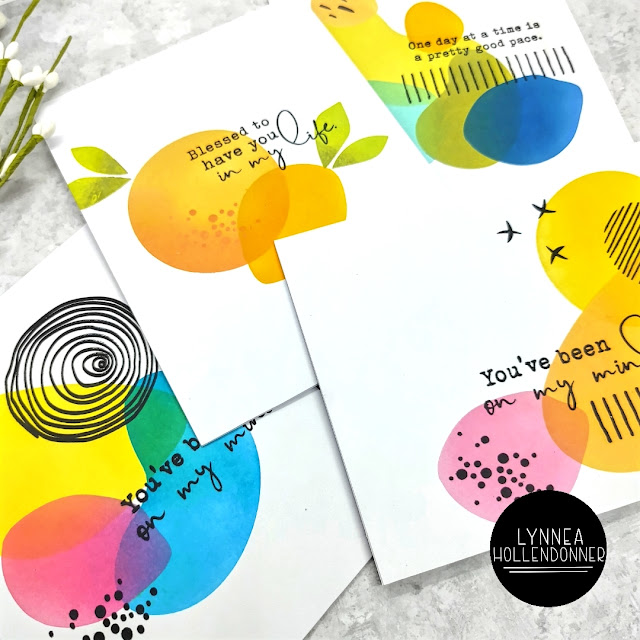
I love splashes of random color with lots of white space, so the Taylored Expressions Abstract Accents Stencils are perfect for me! I made four cards and they took me less than an hour to make! 


I actually made all four of these cards on the go! I packed up by stencils, some masking tape, blending brushes, and Distress Oxide Inks and my son and I went to the play yard! 


Let's start with my FAVORITE! I started with this first one and just wanted to play around with some basic fruit shapes. It took about 5 minutes and I love it! 


Then I decided to go big and use a bunch of shapes! I did a more muted color palette with masculine colors. 


Here's another of my favorites! Just a few shapes, a scattering of stamped accents, and a sentiment! 


I couldn't leave this set behind without creating a rainbow! I made sure to overlap the stencils to create the secondary colors and then added my sentiment and some shapes to balance out the design. 


I completed all of these cards in less than an hour. That's super awesome in my book! Thanks for stopping by! 

Thursday, December 23, 2021

LDRS Creative December Features Day 1

It's time for the LDRS Creative December Features! We're showing off our favorite products from 2021 and one of mine is the Garden's Edge Stamp Set


I created a quick set of 4 cards using just the Garden's Edge Slimline Stamp Set and some black ink. I stamped the large floral cluster off the bottom of an A2 card and then rotated the card 180 degrees and stamped off the top. 


The Garden's Edge Slimline Stamp Set has so many great sentiments, so I picked four of my favorites and stamped them near the bottom right corner of my floral design. 


And just like that this card set is finished! 

Monday, December 20, 2021

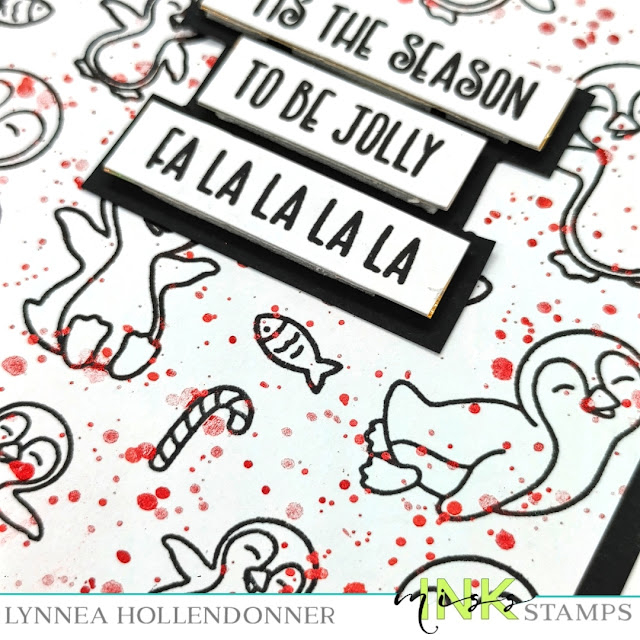
Miss Ink Stamps | Last Minute Holiday Cards

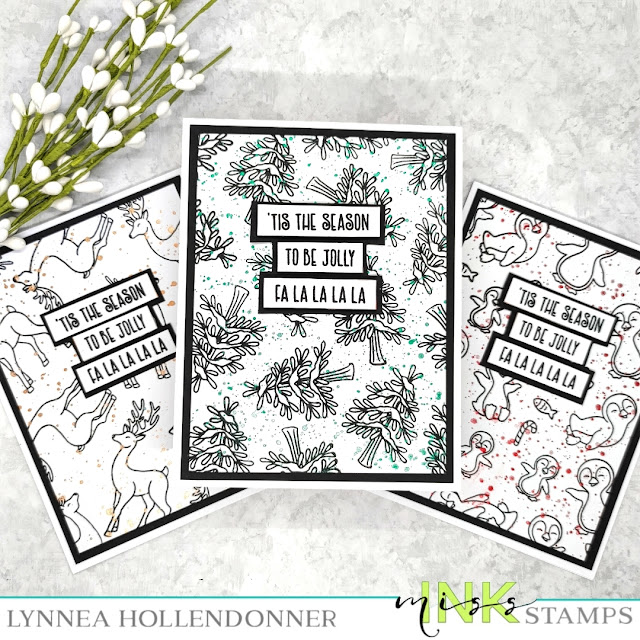
I have another last minute card set to share using a few different stamp sets from Miss Ink Stamps! I am in love with black and white this holiday season - it's just so classy! 


You only need a few supplies for cards like these - making this design perfect for beginners or anyone who just wants a quick set of cards!


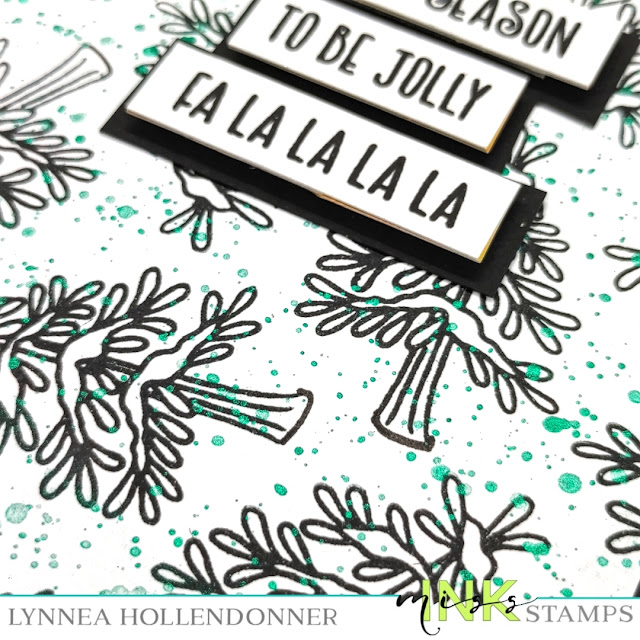
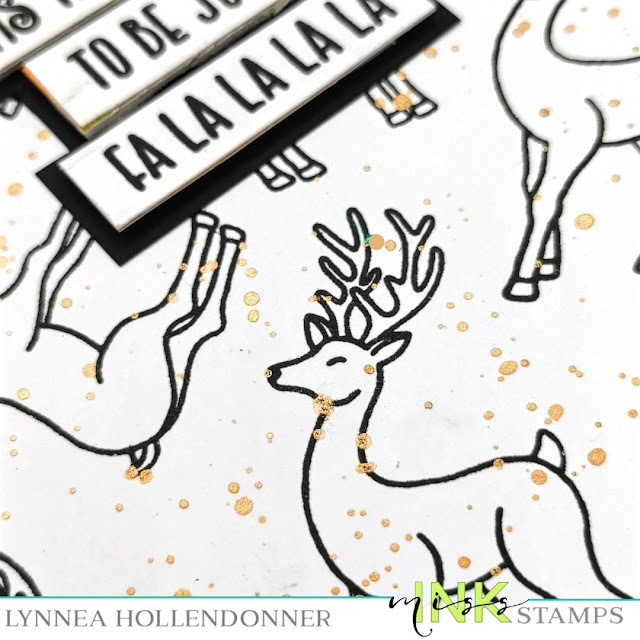
I used a dark black pigment ink to stamp three different backgrounds using the Calm and Bright, Oh Deer!, and Ice Day Stamp Sets. I stamped different images repeatedly across a background turning the images to make them look random. 


I wanted to step up my cards a bit and add a pop of color, so I added some shimmer watercolor spatters to each card. I used different colors, but you could speed up the process by using just one. 


I stamped sentiment strips from the Season's Greetings Stamp Set and foam mounted them onto black cardstock and trimmed around the strips to create a shadow layer. I trimmed down the stamped panels and matted them onto black cardstock and added those to white card bases. I love how everything is black and white with just a bit of color! 


I hope this idea helps you out if you need some last minute Holiday cards! Thanks for joining me!