Autumn is finally here! I thought I would celebrate the season by showing you a different way to use your stack and collage stamps. Many of the stamps in these sets are small images - making them perfect to use with the Pirouette Pattern Templates!
I know a lot of you have been wanting new Pirouette stamps, but I wanted to show you how you can use ANY small stamp in your stash to make a pirouette design! Be sure to watch my video above to see how easy it is to create a spiral pirouette on an A2 card.
I saw some butterflies flitting around my garden the other day and made a card inspired by them! This pirouette of butterflies is the perfect depiction of the fluttering fun they were having!
I cut a piece of cardstock to 4.25" x 5x5" and lined it up with the 4.25" marks on the base piece of the Pirouette Pattern Templates. I placed the circular acetate template on top and lined up the butterfly from the Tulip 4x6 Stamps into one of the quadrants and stamped it with Raven Hybrid Ink. I turned the template and stamped again and repeated the process twice more to make four butterflies in a circle. I removed the butterfly and lined up the sprig of greenery and stamped it four times forming a circle around the butterflies.
I stamped the 'beautiful' word as well as a coordinating sentiment onto white cardstock and cut them out with scissors. I cut down the stamped panel with the second largest die from the A2 Stitched Layered Card Toppers Die Set and a second panel with the largest die from the same set. I layered them together with foam tape and popped up the sentiments in the center of the fluttering butterflies.
I finished off the card with a scattering of yellow baubles. And that's it! Thanks for joining me. I'll see you again soon!
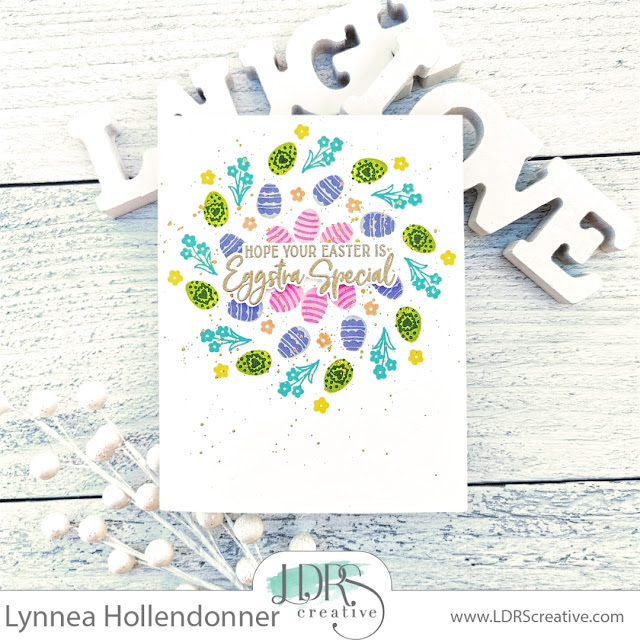
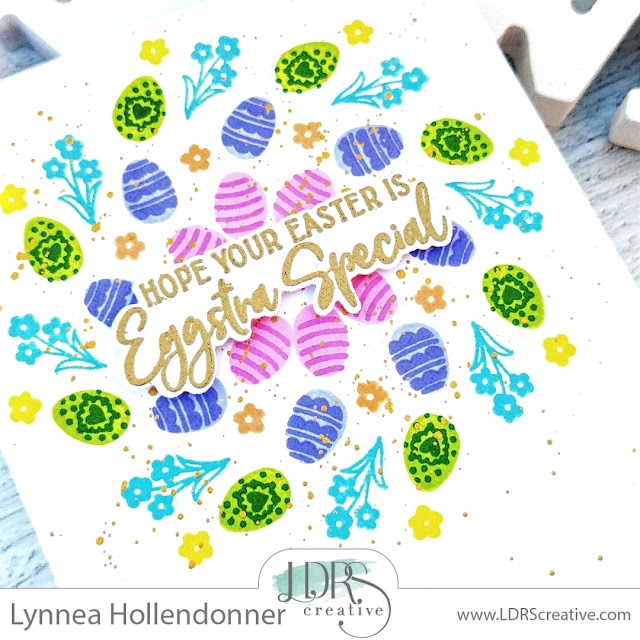
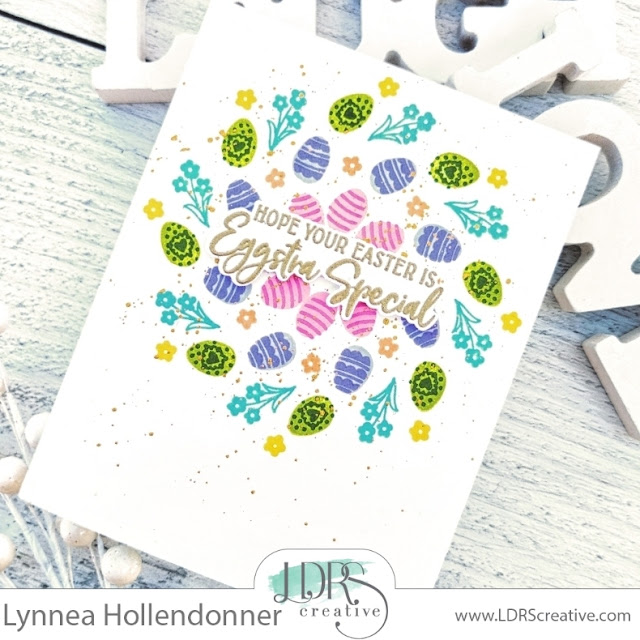
It's been a while since I used the Pirouette Pattern Templates to make a spiral pattern, so I decided to use the three small Easter eggs in the Easter Pirouette Stamp Set and make a bright and happy Easter card! I made a video showing my process, so be sure to watch that for step by step instructions. I cut a piece of 4 1/4" x 5 1/2" piece of cardstock and I started with the base template from the Pirouette Pattern Templates. I adhered the piece of cardstock to the template lining up the top two corners with the markers on the template and lined up the spiral template on top. I added an egg from the Easter Pirouette Stamp Set near the center of the spiral and stamped it in a circle by turning the template with Pink Tutu Hybrid Ink. I added the layer with Fandango Hybrid Ink.
I love creating Pirouette backgrounds, but I'm always looking for ways to turn the products I have in my stash into something new. I have to confess - I'm not a super creative stamper, but I had an idea and I couldn't let it go! I wanted to create a "reverse" pirouette. I wanted the pattern to come in from the outside instead of starting at the center and branching out. After a while of sitting at my desk trying to think of a creative way to accomplish my idea I got frustrated and walked away. Then it hit me! I would create a traditional pirouette and then cut it up and piece together my background!
I started my card just like I would to create a traditional circular pirouette. I cut a piece of cardstock to 4.25" square and placed it onto my Pirouette Pattern Template and stamped multiple images from the Trick or Treat Pirouette Stamp Set using Raven, Plum Crazy, Tropical Sea, In Your Face Orange, Dan-D-Lion, and Alloy Hybrid Inks. The process of stamping and turning and stamping and turning is quite easy and builds beautiful backgrounds! You can watch the process in my video above. Once my background pattern was complete I cut my paper in half at 2 1/8" and then in half again so that I had four 2 1/8" squares. I placed them on my desk the way they were originally meant to line up and turned each of them twice so that the inside portion was now facing towards the corners. VOILA! It's perfect!
I stamped a spider web, some ghosts, and a sentiment from the Trick or Treat Pirouette Stamp Set and added them to my background with foam tape. I cut a piece of patterned paper from the Haunted Halloween 6x6 Paper Pack to 4 3/4" square and mounted all of my pieces onto a 5" square card. That's it! It's so easy and I LOVE the way it turned out!
I used a stamp that's intended to be cut out and used as a focal point piece for my background. And I varied the colors of Hybrid Inks that I used to make it even more interesting! I filled in the card with jack-o-lanterns, ghosts, and spiders from the Trick or Treat Pirouette Stamp Set.
I stamped and die cut a spider web and sentiment to sit in the center of my card and popped them up with foam tape.
Creating my own backgrounds is probably my favorite part of card making. Whether it's stamping, watercoloring, ink blending, etc - I just love it! I have been using the Pirouette Pattern Templates so often because they're great for building backgrounds. I've created video tutorials showing the circular patterns, so this time I thought I would use the bonus template and create a full background pattern!
I used greenery stamps from the Peace & Joy Pirouette Stamp Set and four colors of green ink - Olive Branch, Four Leaf, Evergreen, and Pistachios-a-Plenty. In my video above I show you just how to create this background - it really is simple! I filled in the little squares in each quadrant, stamped and turned four times, and then repeated the process with a new color of ink and new stamps for each quadrant.
The new Layered Poinsettia Die Set is simply gorgeous! I die cut the layered flower pieces from red cardstock, the leaves from three colors of green cardstock, and the centers from brown cardstock. The die-cuts are easy to align, but if you need a bit of help I always find it helpful to look at the back of the packaging.
I die cut my background panels using dies from the A2 Stitched Layered Card Toppers Die Set and added them to a card base. I created a sentiment strip by stamping a sentiment from the Potted Poinsettia Stamp Set with Olive Branch Ink and finished the card by scattering some pearls around the card. That's it! I hope you enjoyed this tutorial!
I have been loving the Pirouette Pattern Templates! So much fun to be had! Backgrounds have always been my favorite part of the card - that's why I start with the background and work around that. Very rarely do I have a complete picture of the card in my head when I sit down to create. I work on the background and let the background carry the card and I think that's why I love the Pirouette Pattern Templates so much. I am able to stamp and customize my backgrounds with the images and colors I want.
I cut a piece of spider web patterned paper from the Trick or Treat 6x6 Paper Pack to 4.75" square and then matted everything onto a 5x5" square card. Thanks for joining me for this spooky card!
The seasons are changing and the new release from LDRS Creative is here to celebrate the cooler temperatures!
The new Pirouette Pattern Templates are so fun and easy to use! You can create circle pirouettes, spiral pirouettes, and full patterned backgrounds all with one template system! I used the Trick or Treat Pirouette Stamp Set to create an Autumn themed card. Be sure to check out the video above so you can see just how to line up each stamp and turn your pirouette to create a gorgeous pattern. I stamped my images using Coffee Bean, Dan-D-Lion, Iced Tea, Scarlet Rose, and In Your Face Orange Hybrid Inks. These colors just scream fall to me!