Showing posts with label Background Stamp. Show all posts

Thursday, December 4, 2025

LDRS Creative | 2 Easy Birthday Cards with Bold Color

Need a birthday card in a hurry? 🎉 Watch me create two vibrant, colorful cards using the Floral Reverse Background and Winding Celebrations Stamps from LDRS Creative’s Untamed & Unfiltered Collection. These cards are quick, easy, and full of bold color, with a touch of black spatters to add contrast and pop!


I stamped the Floral Reverse Background 6x6 Stamp onto the bottom of a panel of cardstock, keeping about an inch and a half of white space at the top. This is a pretty solid stamp, so you may need to stamp a few times to get a better impression. I love to add dimension with ink spatters - if you know me, then you know that's no surprise! I went with black spatters this time and accented the panel with a slim strip of black cardstock.


I finished off the cards with a sentiment from the Winding Celebrations 5x7 Stamps I stamped onto white cardstock cut with one of the Pinpoint Circles Dies. I added a layer of black cardstock with the Hand Torn Circles Dies and that's it! Thanks for joining me! 

Tuesday, September 2, 2025

LDRS Creative | Country Road Postcard Scene

Grab your stamps and let’s head off on a snowy adventure! ❄️ In this tutorial, I’ll show you how to turn a simple postcard design into a frosty winter wonderland that’s perfect for the holidays using a bunch of LDRS Creative stamps. It’s quick, cozy, and so much fun to recreate - you’ll want to make a whole stack for your Christmas cards this year!


Products used - 


I'm already dreaming of snow! I know, I know ... But, I'm one of those crazy people that would live in winter year round! I love the Country Road 5x7 Stamps because it reminds me of home. I grew up on a back country road that didn't get plowed and there were always tire tracks in the snow. I decided to make this quaint scene into a postcard! 


With a bit of resizing, this could be mailed as an actual postcard instead of an A2 card. I just love that! Happy crafting!  

Monday, July 31, 2023

LDRS Creative | Hello Lovely Poppy Posy Card

I am honestly in LOVE with these ink blended poppy posies from LDRS Creative! I can't get enough of them! I did something a bit different for today's card. Instead of using the bouquet as one image - I cut it up and used it in various places on my card. It's a great way to stretch your supplies! 


Let's jump in! I started by stamping the floral image from the Poppy Posy 4x6 Stamps onto a piece of white cardstock with Raven Hybrid Ink. Then it was time for some ink blended fun! I used the Poppy Posy Layering Stencils and blended Lantern Yellow, Banana Cream Pie, Key Lime Pie, and Four Leaf Hybrid Inks over the stencils to color the image. I used the Poppy Posy Coordinating Dies to cut out the image. The die left a slight white border, but I wanted to step my card up a bit, so I reached for the Poppy Posy Impression Dies. I cut one of the shadow pieces from white cardstock and layered the colored image on top of the shadow with foam tape. Now the image has a fun double white border.


I trimmed a piece of white cardstock to 4" x 5.25" and stamped the Old Brick Wall 6x6 Stamp onto it with Alloy Hybrid Ink. Then I started playing with flower placement. I started by hanging a little bit off the bottom right corner. I popped it up with foam tape and trimmed away the excess. Then I added some to the top left corner. I had one more piece left, so I placed it in the top right corner. Just like that I had a visual triangle of images created from one bouquet of flowers!


I stamped a sentiment from the Poppy Posy 4x6 Stamps with Raven Hybrid Ink and cut it out with the Poppy Posy Coordinating Dies. I added it to the card with foam tape for some dimension and scattered some black glossy dots around the sentiment. I added the panel to a black card base and that's it!

Wednesday, August 31, 2022

LDRS Creative | Cave Kiddos Slimline Card

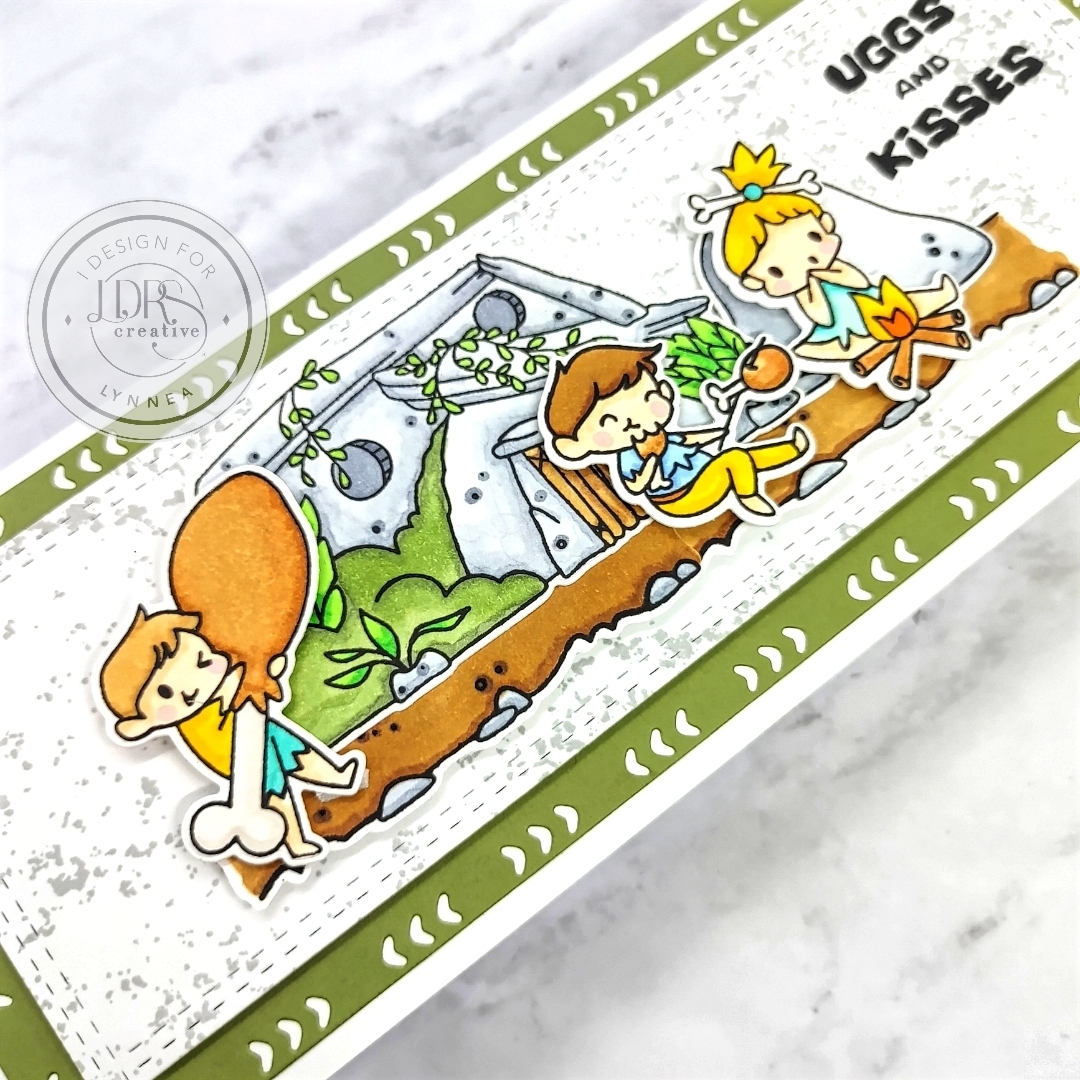
I have the CUTEST slimline scene card to share with you using some LDRS Creative stamps and dies! 


I started by stamping the stone house and path from the Cave Dwellings Stamps and the kids from the Cave Kiddos Stamps with Raven Hybrid Ink. I colored them with alcohol markers and cut them out with the Cave Dwellings Coordinating Dies and the Cave Kiddos Coordinating Dies.


I cut a slimline card base that measured 3.5" x 8.5" and used the Pretty Patterns Slimline Dies to cut a decorative layer from green cardstock and a stitched layer from white cardstock. I used Alloy Hybrid Ink and stamped the Natural Granite 6x6 Stamp twice so that I could stretch it across the long white layer. I used Raven Hybrid Ink to stamp a sentiment from the Cave Kiddos Stamps near the upper right corner.


I put the slimline layers together with liquid adhesive and added all of my colored images with foam tape. And that's it! See you again soon!

Wednesday, August 17, 2022

LDRS Creative | Colorful Birthday Bash Card

I'm sharing a fun and colorful birthday card using a handful of products from the LDRS Creative Summer 2022 Collection


I love the versatility of the Natural Granite 6x6 Stamp! I've used it to add texture to an outdoors themed card, to mimic ink spatter, and now to create faux confetti for a birthday card! I stamped the Natural Granite 6x6 Stamp onto a piece of A2 sized cardstock with Dan-D-Lion, Fandango, and Tropical Sea Hybrid Inks. I made sure the inks overlapped a bit to create a rainbow background. I used the small 'hooray' sentiment stamp from the Birthday Bash 4x6 Stamps and stamped 'hooray' all over the background.


I stamped the monkey and flamingo from the Birthday Bash 4x6 Stamps with Raven Hybrid Inks and colored them with glitter gel pens. This coloring medium is so easy to work with and adds a LOT of shimmer without any extra work. I cut them out with the Birthday Bash Coordinating Dies. I used the largest die from the Scalloped Circle Frames Dies to cut out a circle and stamped a sentiment from the Essential Birthday Sentiments 4x6 Stamps near the bottom and added the critters to the top with foam tape. 


I added the scalloped circle die-cut to the top of my card with foam tape and that's it! I'll see you soon!

Monday, July 25, 2022

LDRS Creative | Layered Dahlia Dimensional Card

Layering dies are a fabulous and EASY way to bring stunning dimension to a card! You can find the full tutorial for this card on the LDRS Creative YouTube Channel!


I pulled together a few of my favorite products from the Summer 2022 Collection for this card. I have been LOVING the Natural Granite 6x6 Stamp. It gives the perfect amount of texture to backgrounds. I love adding spatters to my backgrounds, but this stamp does all of the work for me! I stamped the Natural Granite 6x6 Stamp with Raven Hybrid Ink onto a standard A2 card base and set it aside.


Next I grabbed the Dahlia Layering Dies and started cutting! I cut every other layer of the dahlia with dark pink cardstock and the others with light pink cardstock. I did the same with the stem and leaves - a light green and a dark green. If you have enough colors of cardstock you could cut each layer out of a different color. Ink blending over white cardstock is an option as well! I put foam tape between every layer for LOTS of dimension and covered it with liquid glitter. 


I wanted to keep the sentiment simple, so I stamped the Amazing You Sentiment Stack onto black cardstock with Watermark Embossing Ink and heat embossed it with White Embossing Powder. I used the Sentiment Stack Die II to cut out all of the sentiments and chose two for my card. I arranged everything onto my stamped background and that's it! Thanks for joining me!

Friday, April 22, 2022

LDRS Creative | Wood Grain Heat Embossed Card

Heat embossing is an easy and simple way to step up your backgrounds! I used the LDRS Creative Wood Grain Stamp and added a touch of gold for something special! 


This card has lots of spring-time vibes, but it's an easy layout that you can use for almost any occasion! I started with the Wood Grain 6x6 Stamp and stamped it with LDRS Creative Watermark Ink onto white cardstock and heat embossed it with gold powder. It's so shiny!! I wanted to add a few layers to my card, so I used the second largest die in the A2 Stitched Layered Card Toppers Die Set to cut the wood grain panel and the largest die to cut a piece of white cardstock. 


I stamped the wreath from the Finest Blooms Pirouette Stamp Set with Prickly Pear Perfection Hybrid Ink. Then I stamped the bunnies from the Finest Blooms Pirouette Stamp Set and the strawberries from the Easter Pirouette Stamp Set with Raven Hybrid Ink and colored them with alcohol markers. I used the Finest Blooms Pirouette Coordinating Dies and the Easter Pirouette Coordinating Dies to cut out my images and started arranging them on the front of my card.


I finished off my card with a gold heat embossed sentiment strip made with the Happy Me, Happy You Sentiment Stack and cut with the Sentiment Stack II Die. That's it! Thanks for joining me!

Tuesday, January 25, 2022

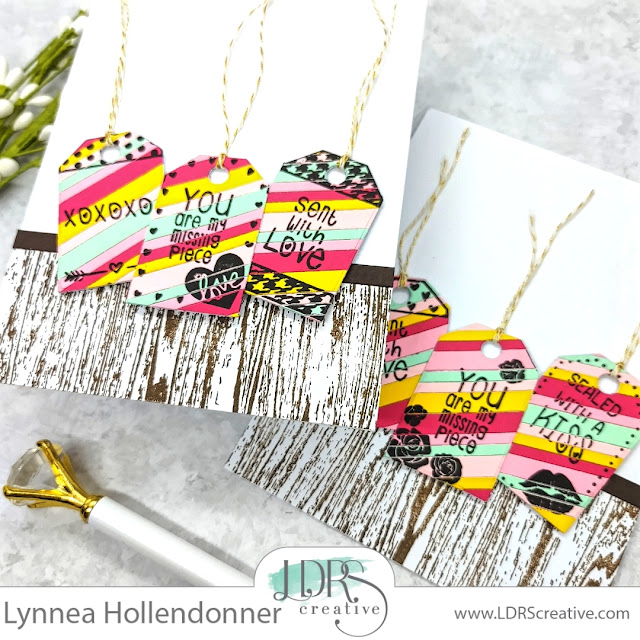
LDRS Creative | Paper Strip Gift Tag Cards

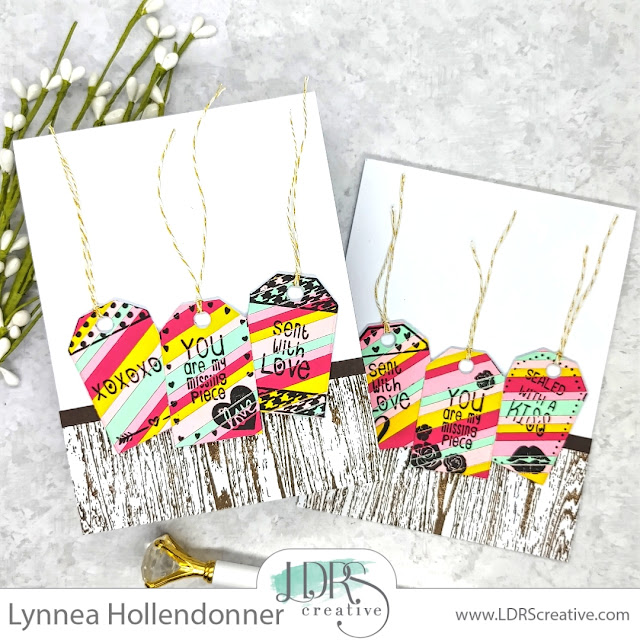
The new release from LDRS Creative is here! I pulled together a few items from the latest collection and made a pair of Valentine's Day tag cards. 


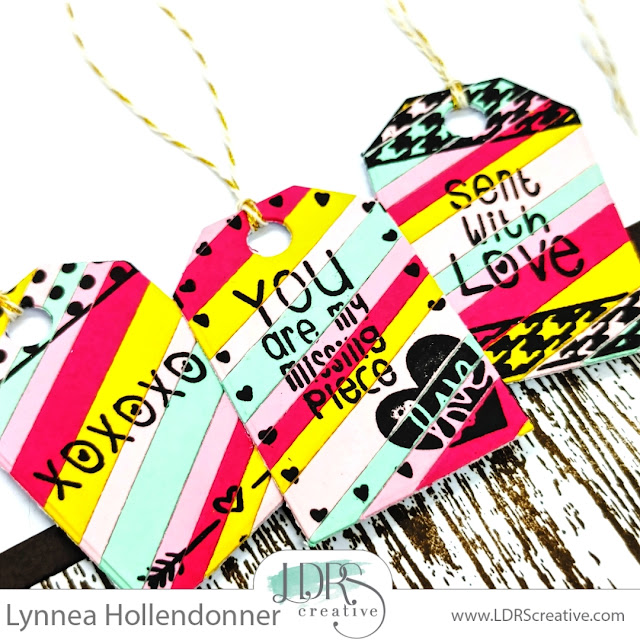
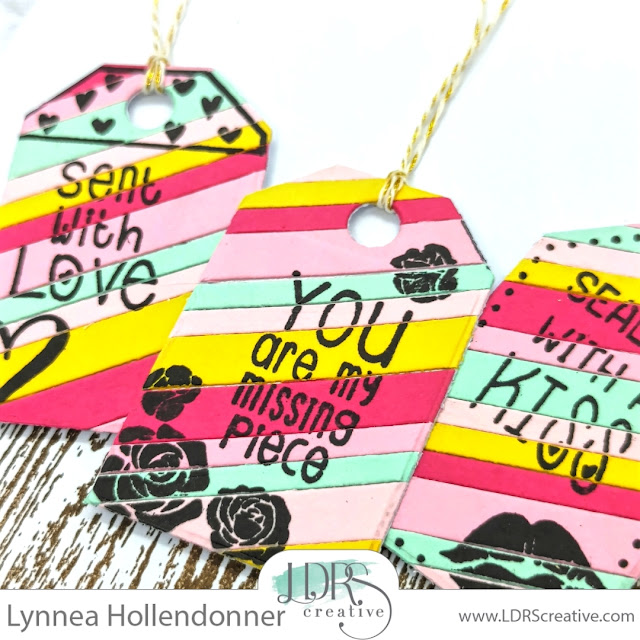
I'm SO excited about the new Background Strip Dies! AHHHHH!! I've wanted something like this in my craft room for a very long time! They come in both A2 and slimline size and in a variety of widths, so my every paper strip dream is covered. YAY! I used the 1/8" A2 Background Strip Die and the 1/4" Background Strip Die to cut some yellow, mint, and two shades of pink cardstock and covered a piece of 4.25" square cardstock with the strips. I varied the colors and widths to create a random striped background pattern and I fell in love with it! 


I stamped the Love Tag Stack Stamp with Raven Hybrid Ink over the striped background and added a few different sentiments from the same stamp set. Then I cut out the tags all at once with the Gift Tag Stack Die and added a bit of twine through the top of each of the tags.


I stamped the new Wood Grain 6x6 Stamp with Coffee Bean Hybrid Ink onto white cardstock and cut the background down to cover about a third of the bottom of my card. Here's another way to use those background strips! I used the 1/4" A2 Background Strips Die to cut some brown cardstock and used it to create a border between the white portion of my card and the woodgrain. 


I added three tags to each of my cards with foam tape and that's it! I hope you enjoyed this peek at some of the products from the latest collection. Everything is available now in the LDRS Creative store

Monday, December 20, 2021

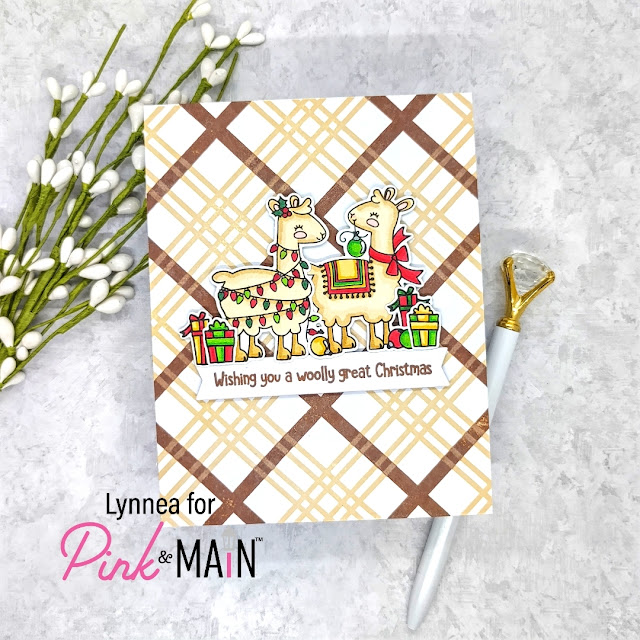
Pink & Main | Wooly Great Christmas

We're under a week to Christmas, so here's some more cute critter Holiday inspiration using Pink & Main stamps


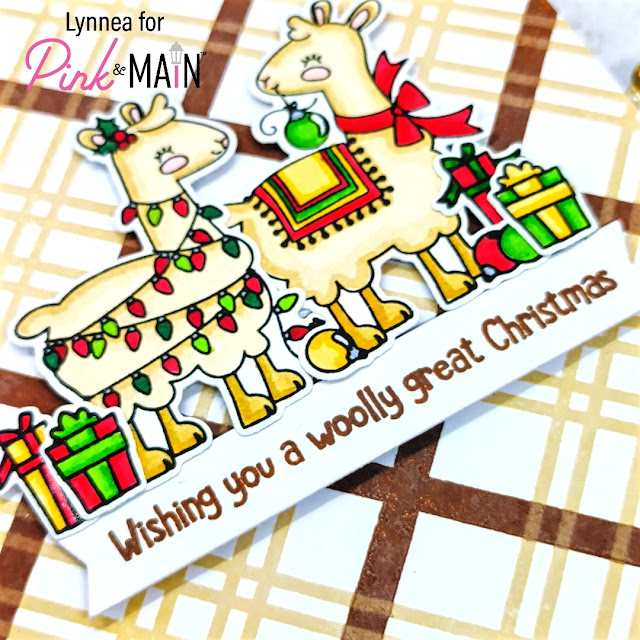
I combined some of my favorite Pink & Main products from previous releases for this card. Let's start with the background! I stamped the Plaid 1 Background Stamp with a chocolate brown ink onto a piece of white cardstock and then stamped the Plaid 3 Background Stamp on top with a tan/brown ink. I love how the inks overlap and create a third brown color! 


I stamped two llamas and a few presents from the Fa La Llama Stamp Set and colored them with traditional colored Copic Markers. I used the coordinating Fa La Llama Die Set to cut out the images. I stamped a sentiment while I had my stamp set on my desk with brown ink  and used a die from the Large Sentiment Strip Die Set to trim out the sentiment. 


I arranged my wooly llamas and presents across the center of my card and tucked the sentiment right underneath the images and popped everything up with foam tape. Thanks so much for joining me! 

Thursday, December 9, 2021

Trinity Stamps | Simply Sentimental You Stamps and Dies

Bright and easy backgrounds are my favorite! I used shimmer watercolors and the new Simply Sentimental You stamps and dies from Trinity Stamps for this clean and simple card! 


I watercolored rainbow stripes onto a piece of watercolor cardstock with shimmer watercolors and then stamped the Encouragement Text Background Stamp over the top with black ink. 


I stamped the large "you" from the Simply Sentimental You Stamp Set as well as a coordinating sentiment and die cut them with the Simply Sentimental You Die Set


I popped up my sentiments with foam and then added a bunch of Blacked Eyed Baubles Embellishments to complete the card. Thanks so much for stopping by! 

Thursday, October 14, 2021

LDRS Creative | Easy Masking and Stamping

I love large, open stamps because you can put whatever you want inside of them with just a bit of masking! The Cozy Cuppa Stamp Set from LDRS Creative is perfect for this technique! 


I saw another design team member make the Cozy Cuppa into a Halloween style mug and it made me wonder what else I could put inside! I stamped the mug with Raven Hybrid Ink onto white cardstock and then onto a piece of masking paper. I cut out the center of the mug from the masking paper and placed the mask around the outside edge of the mug. I stamped one of the floral arrangements from the Peace & Joy Stamp Set over the mug and when I removed the mask I had a perfect floral mug! I colored the image with alcohol markers and used the Cozy Cuppa Coordinating Dies to cut out the image. 


The Poinsettia Background Stamp was one of my favorite products from last year's Christmas release. I stamped it onto a piece of white cardstock with Iced Tea Ink and then used the smallest die from the A2 Stitched Layered Card Toppers Die Set to cut out my background. I used the medium and largest dies from the same die set to cut pieces of red and green cardstock and adhered all the pieces onto an A2 card base. 


I added my mug and a stamped image onto my card with foam tape and finished the card with some pearls. Thanks for stopping by! I'll see you soon! 

Wednesday, July 7, 2021

Simon Hurley create. | Sketched Bouquet Card

I am using my FAVORITE stamp set from Simon Hurley create. on today's card! I feel like I have a "comfort zone" in crafting and it's definitely the Sentimental Flowers Stamp Set!


I stamped the Sketched Bouquet Background Stamp with Woof! Dye Ink onto Stark White Cardstock to create an easy background. 


I stamped some flowers and leaves the Sentimental Flowers Stamp Set and colored them with Copic Markers and cut them out with scissors. I arranged them onto my background with foam tape. 


Thanks for joining me!

Wednesday, June 23, 2021

Simon Hurley create. | Ink Swipe Technique

I love quick and easy birthday cards! I grabbed a few Simon Hurley create. stamps and inks and created a card in no time at all! 


I stamped the Painted Lines Background Stamp diagonally on each side of a piece of cardstock and then swiped Simon Hurley create. Dye Inks in between the lines to add quick color. 


I stamped the bear and cupcake images from the Cake Walk Stamp Set and colored them with Copic Markers then trimmed them out with scissors and added them with foam tape to the card. 


I added a simple 'yay' die cut to the card and that's it! Thanks for stopping by! 

Wednesday, May 19, 2021

Simon Hurley create. | From Puddles to Galaxies

I love showing different ways to use products! When I saw the Splish Splash Background Stamp from Simon Hurley create. I saw a starry skies instead of puddles! 


I stamped the Splish Splash Background Stamp onto navy cardstock with black ink and added spatters of gold shimmer, silver shimmer, and white watercolor paint. 


I didn't think there were enough stars, so I grabbed my white gel pen and added a few more! I stamped sentiments from the Flower Picking Friends Stamp Set and trimmed around them and added them to the card with foam tape. 


I hope this inspires you to look at your stamps in a new way! 

Friday, April 30, 2021

LDRS Creative Spring Features Day 2 | Black and White with a Pop of Red

I have another black and white card with a pop of color to share with you using new LDRS Creative stamps! This is one of my go to color combos! It's so striking! 


The Impatiens 6x6 Background Stamp is so fun to color ... but it looks great in black and white, too! I stamped it with Raven Hybrid Ink and added some black dot details for something extra, but you definitely don't have to! 


I stamped and colored the flower from the Magnolia Stamp Set in a bright red so that it would really pop against the background. That gorgeous "hello" is from the Snapdragon Stamp Set and is just PERFECT! 


I hope you enjoyed this project! I'll see you soon! 

Wednesday, March 10, 2021

Simon Hurley create. | Multi Colored Easter Egg Background

I love a bright and happy background! I took advantage of the Simon Hurley create. Egg Hunt Peel-Apart Background Stamp and used two colors of ink on each egg to build my colorful background! 


You guys .... I seriously can't tell you how much I LOVE this card! I took each of the individual eggs off of the Egg Hunt Peel-Apart Background Stamp so that I could create my own custom background. I inked up each egg with two colors of Simon Hurley create. Dye Inks and blended the colors together in the middle with a blending brush and stamped all over my background. I made sure to keep both the colors and the patterns varied as I stamped. 


I stamped and colored the bunny and basket from the Hoppy Easter Stamp Set and added them to the front of the card with foam tape as well as a coordinating sentiment. 


I hope you'll try this fun and colorful background technique! See you soon!