It's time for the Trinity Stamps Sweet Shop release! I'm joining in the video hop as a guest designer, so head over to YouTube for a fun hop and some prizes!
I am in love with the new Sunsational Stamp Set! It's so happy! I colored it with Copic Markers and then used my scissors to trim out the image.
I popped up my image with foam tape onto the front of my card and that's it! Remember to head to YouTube for all the video hop information and you can shop the NEW release from Trinity Stamps NOW!
I always get asked how I use left over Deco Foil and I'm going live on the ThermOWeb YouTube Channel on Wednesday the 26th at 11am CT/ 12pm ET to show you how to easily get two cards with one piece of foil and a Toner Card Front!
Deco Foil Toner Card Fronts are the easiest way that I know of to make two for one backgrounds! I was able to make two cards with one Toner Card Front and one piece of Deco Foil - and they look completely different!
I never like to waste pretty things and the Gold Glitter Foil is my favorite! I grabbed a solid Deco Foil Toner Sheet and foiled the left over pattern from my Toner Card Front and now I have the reverse pattern with some black peeking through! You could foil the panel again with another color, but I really loved the black and gold.
I finished off the cards with a simple die cut sentiment. I hope you'll join me LIVE on the ThermOWeb YouTube Channel for the full step by step tutorial!
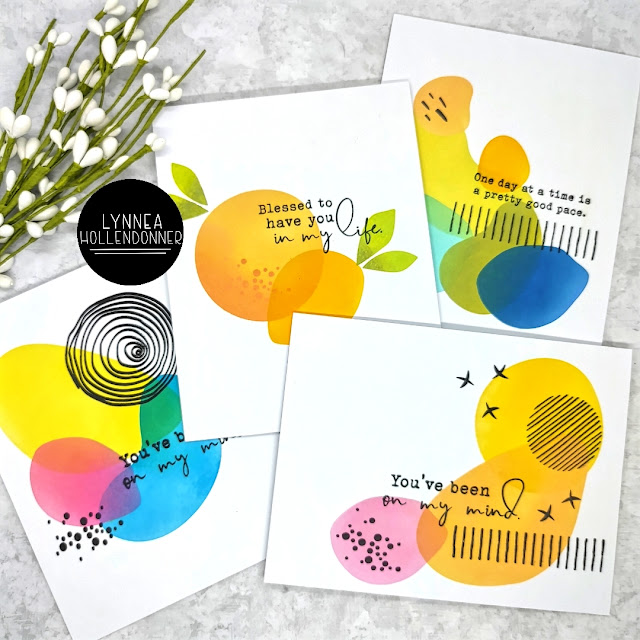
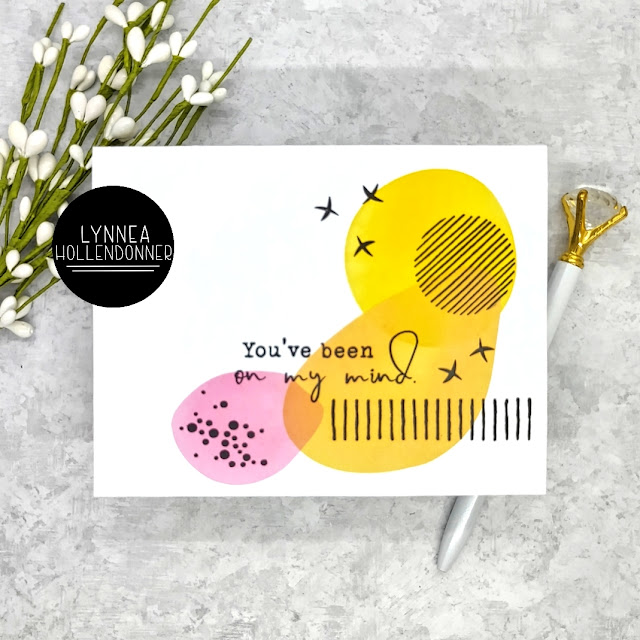
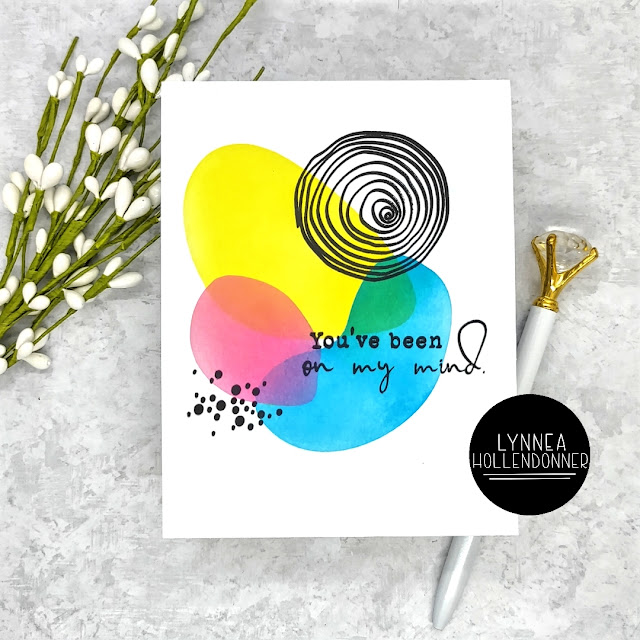
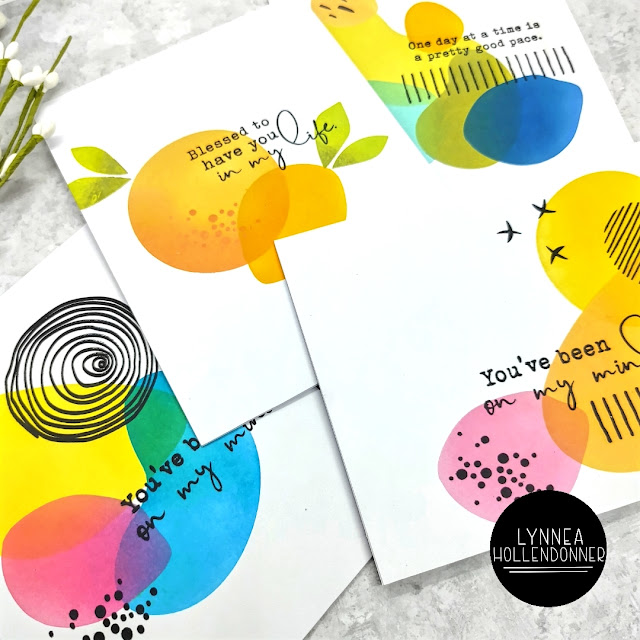
I love splashes of random color with lots of white space, so the Taylored Expressions Abstract Accents Stencils are perfect for me! I made four cards and they took me less than an hour to make!
I actually made all four of these cards on the go! I packed up by stencils, some masking tape, blending brushes, and Distress Oxide Inks and my son and I went to the play yard!
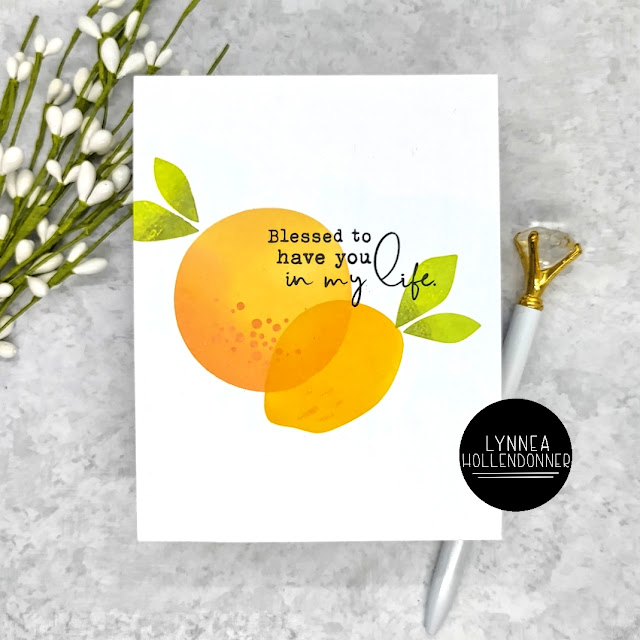
Let's start with my FAVORITE! I started with this first one and just wanted to play around with some basic fruit shapes. It took about 5 minutes and I love it!
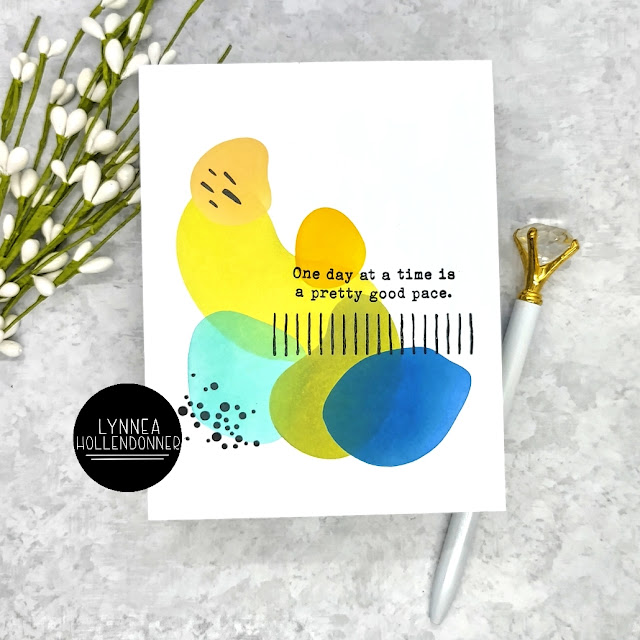
Then I decided to go big and use a bunch of shapes! I did a more muted color palette with masculine colors.
Here's another of my favorites! Just a few shapes, a scattering of stamped accents, and a sentiment!
I couldn't leave this set behind without creating a rainbow! I made sure to overlap the stencils to create the secondary colors and then added my sentiment and some shapes to balance out the design.
I completed all of these cards in less than an hour. That's super awesome in my book! Thanks for stopping by!
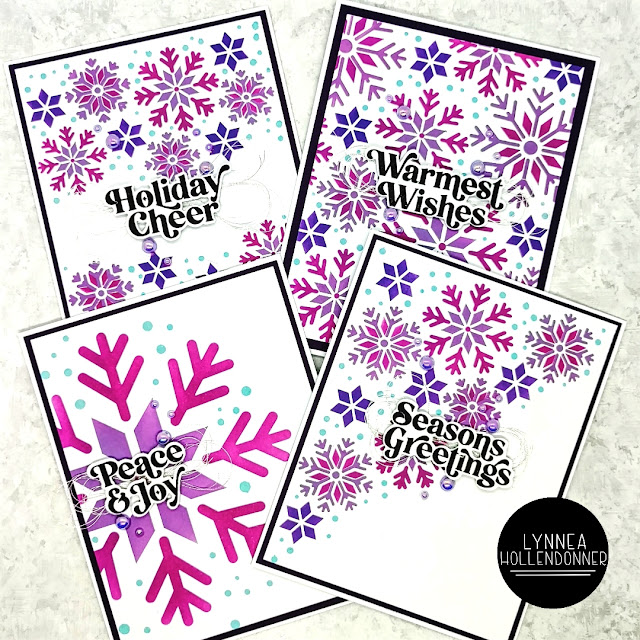
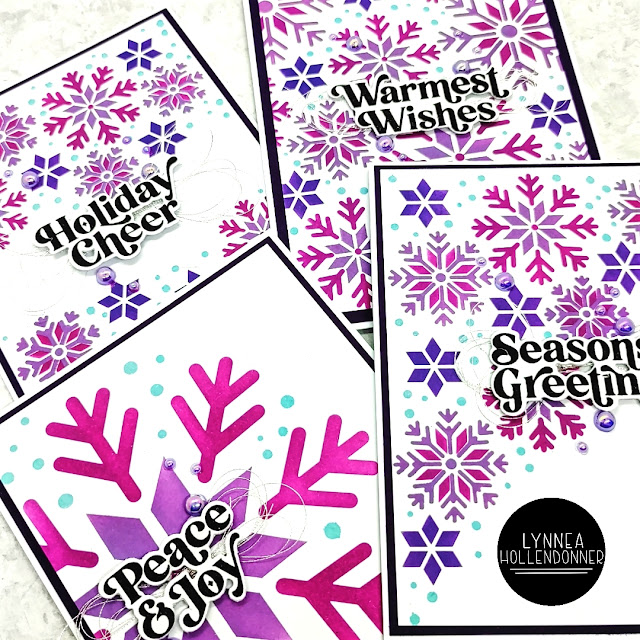
I needed a few last minute Holiday cards before Christmas and the Create in Quads Snowflake Stencils came in handy!
I used a few colors of Distress Oxide Inks and blended four cards at once and finished them off with some purple gems, silver thread, and some Holiday sentiments from my stash.
I am in LOVE with the Create in Quads concept! It makes it so easy to create multiple cards at once!
Stamping with dies is such an easy way to stretch your supplies! Join me live on the Trinity Stamps Facebook Page at 12pm CT / 1pm ET for a one layer Happy Dance card!
I'll see you this afternoon for this happy card that takes just minutes to create!
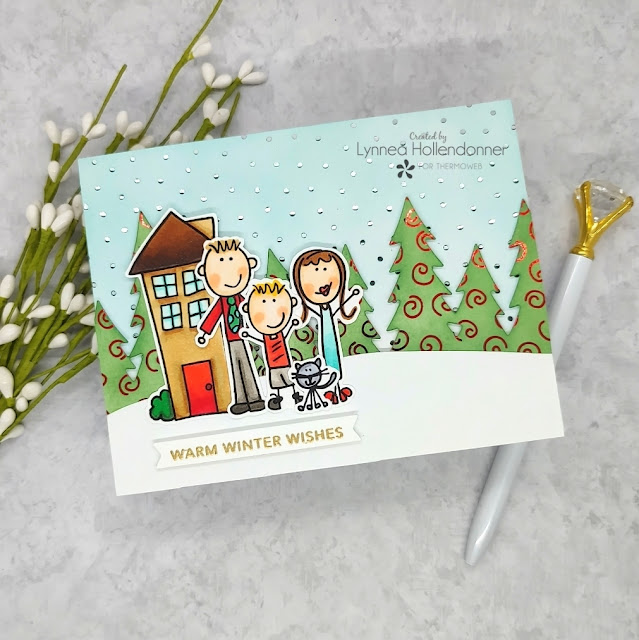
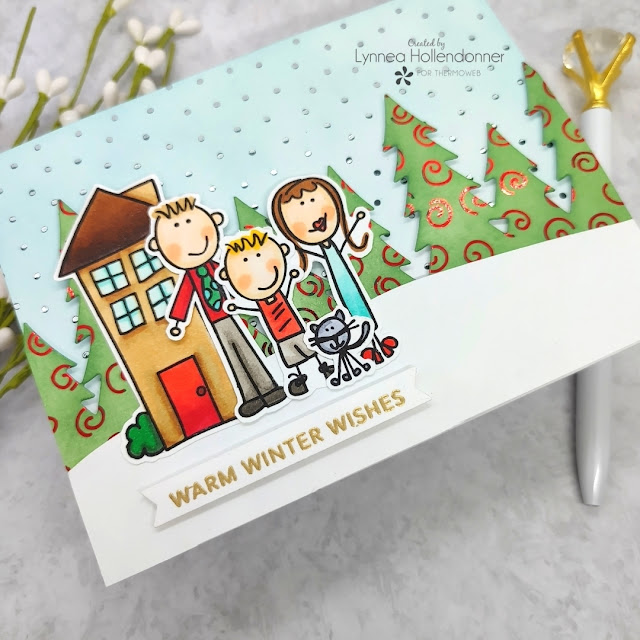
Ready for the cutest representation of our family?! ThermOWeb and Laura Kelly goodies make this wintery card too cute for words!
I love the whimsiness of the Laura Kelly line! I mixed some Transfer Foils, Toner Sheets, and the Me & My Peeps Stamp Set and created our little family on a Holiday card! I transferred Magic Wand Silver Foil onto a Baby Swiss Toner Sheet and Wagon Red Foil onto a Sweet Swirls Toner Sheet. Toner sheets are so versatile because you can do almost anything with them! I trimmed down the Baby Swiss background to the size of an A2 card front and blended on blue ink to create a snowy sky. I used a die from Trinity Stamps to die cut the Sweet Swirls background and create a line of trees. I blended green ink over the die-cut and magically created a row of trees with swirly foiled baubles!
I stamped out the characters that would make up our family from the Me & My Peeps Stamp Set and colored them with Copic Markers. I love this stamp set! It can be used to create just about any family for just about any occasion! Our family is just me, my husband, our son, and our (FIVE!) kitties!
I cut a white snow bank and adhered it to the line of trees and popped them up with iCraft 1/16" 3D Foam Tape onto the snowy background. I adhered our little family to the left side of the card with an iCraft Ultra Bond Liquid Adhesive Pen and added a heat embossed sentiment strip from my stash beneath the colored images. And that's it! This card was quick and easy to create and I hope it inspires you to put your family on a card this Holiday season!
The Thanksgiving Holiday weekend is almost here and Miss Ink Stamps is celebrating with a winter release! I'm sneaking the Ice Day Stamp Set with this fun slider card!
There will be FOUR new stamp sets released on Small Business Saturday - November 27th! They are perfect for all of your wintery cards!
As soon as I saw the little penguin on his belly in the Ice Day Stamp Set (releasing on the 27th!) I knew that I wanted to make a slider card with him sliding down the iceburg! I stamped three of the penguins, some Santa hats, and the iceburg and colored them with Copics and cut them out with scissors.
Once I had my images and background ready to go I created a simple slider card. Check out my video above to see how the interactive portion of the card came together!
I hope you've enjoyed this sneak peek of the Ice Day Stamp Set! This stamp set and the rest of the release will be available on Small Business Saturday - November 27th! Keep your eye on the Miss Ink social media channels for more sneaks and special sales announcements!
Welcome to the Holiday Lights Hop! Today, I’m sharing a fun, interactive card that really lights up! Don’t worry, it wasn’t hard to make. I’ll show you how. And then, when you hop along with us, you’ll see more beautiful light-up cards, all featuring lights from Pear Blossom Press. Get ready for lots of inspiration, and be sure to comment on my video as well as the rest as you hop, for your chance to win a $50 store credit! Your next stop is Alberto Gava!
I can't get over how easy it is to make a light up card with Pear Blossom Press EZ Lights! You'll see how quickly this interactive card came together in my video above.
This slimline scene is the cutest! All the winter and Christmas vibes are in one place! I pulled out a bunch of Lawn Fawn Stamp Sets and combined them on this card. They're all listed and linked in my video description as well as at the end of this blog post.
There are a lot of things I could have chosen to light up on this card - the windows, the car headlight, etc ... but my husband loves street lights, so I decided to add three streetlights to my winter scene and have them be my light up elements.
I added an ink blended background with Distress Oxide Inks and this merry and bright light up scene is everything you could ever wish for! This project is part of a hop, so be sure to hop along to the next stop - the amazing Alberto Gava!
Products Used
Pear Blossom Press EZ Lights - https://pearblossompress.com/ez-light/?wpam_id=6
Lawn Fawn Stitched Hillside Borders Dies - https://shrsl.com/1gk94
Lawn Fawn Winter Village Stamp Set - https://shrsl.com/38tyv
Lawn Fawn Winter Village Die Set - https://shrsl.com/38tyw
Lawn Fawn Tiny Winter Friends Stamp Set - https://shrsl.com/38tyy
Lawn Fawn Tiny Winter Friends Die Set - https://shrsl.com/38tyz
Lawn Fawn Tiny Christmas Stamp Set - https://shrsl.com/38tz1
Lawn Fawn Tiny Christmas Die Set - https://shrsl.com/38tz2
Lawn Fawn Home for the Holidays Stamp Set - https://shrsl.com/38tz5
Lawn Fawn Home for the Holidays Die Set - https://www.lawnfawn.com/products/home-for-the-holidays-lawn-cuts
Lawn Fawn Merry Mice Stamp Set - https://shrsl.com/38tz9
Pink & Main Stitched Slimline Die Set - https://shrsl.com/2lb60
Pink & Main Layered Circles Die Set - https://shrsl.com/2cy4u
Prize Ribbon Distress Oxide Ink Pad - https://shrsl.com/36hnn
Villainous Potion Distress Oxide Ink Pad - https://shrsl.com/38tyt
Black Soot Distress Oxide Ink Pad - https://shrsl.com/38tys
iCraft Ultra Bond Liquid Adhesive Pen - https://shrsl.com/2ze45
iCraft 1/8" White Jumbo Foam Tape Roll - https://shrsl.com/2ze4j
The new release from Trinity Stamps just hit the shop and we are celebrating with TWO hops - one on Instagram and one on YouTube! Be sure to head there for fabulous giveaways!
One of my favorite ways to use cover dies is to die cut it and then temporarily adhere the panel to a second piece of cardstock and use it as a stencil. Then you're left with two backgrounds - the original die cut piece with ink on it as well as the "stenciled" panel!
I kept the focus of these cards on the gorgeous background and stamped three "thanks" sentiments from the Simply Sentimental Thanks Stamp Set and die cut them with the coordinating dies. I stacked them down the center with foam tape. I kept one light and airy with a white background and one bold with a black background. Which is your favorite?
Remember that this video and project is part of the new release hop from Trinity Stamps, so head to YouTube and Instagram for the hops!
I stamped the fall foliage image from the Pumpkin Spice Gnomes Stamp Set, colored it with Copics, and cut it out with my scissors. I also stamped a sentiment from the Autumn Thanks Stamp Set and bubble cut around the sentiment.
I added the image and the sentiment to my card with foam tape and that finishes the card! See you soon!
Beth from Sassy & Crafty is a good friend of mine and she recently had to close the doors to her crafty company. A few of us have come together to show love and support for our friend with a video hop!
I love the cute kitties in the Love Your Look Stamp Set! They're super cute! I couldn't decide which pair to use, so I blended three circles onto my card using the Comic Book Circles Stencil Set and then layered Black Glitz Glitter Gel over the top and added some black watercolor spatters to the background.
I stamped and colored the pairs of kitties from the Love Your Look Stamp Set with Copic Markers and trimmed them out with scissors.
I finished the card by adding everything with foam tape and trimming the panel down and adding it to a black card base. Thanks for joining me!
I had a bunch of you asking me to show you how I made this card, so I'll be going live today on the Trinity StampsFacebook Page showing you how easy it is to make! I'll see you at 12pm CT / 1pm ET!