Is it cold where you live? It's been cold and snowy here, so I made a card that embodies all the good witnery things from the coziness of my craft room!
My card features a fun peek-a-boo panel that flips open to reveal the full scene - HOW FUN! I used the Winter Chalet 4x6 Layering Stamps and a handful of LDRS Creative Hybrid Inks to stamp a scene on an A2 landscape panel of white cardstock. I added a bit of blue ink blending at the top of the panel and gray towards the bottom to mimic the ground and the sky.
To create that peek-a-boo panel I first cut a piece of 8.5" x 11" cardstock in half and folded it as if I was creating a top folding portrait A2 card. I turned it sideways so that I had a landscape card with the fold on the left hand side. I love that the one die from the Offset Slimline Stackables Dies looks like little mountains - perfect for my card! I opened the card and taped the die in place about 1/3 of the way up from the bottom and ran it through my die cutting machine. REMEMBER!! Make sure your card is open when you die-cut otherwise you'll cut through both the front and the back and that's no good!
I added some soft blue ink blending to the top of the die-cut edge and then stamped a sentiment from the Bundle Up Collage 4x6 Stamps on the front of the peek-a-boo panel. I glued the scene panel to the inside of the card and just like that .... I have the cutest peek-a-boo card!
*Links to products in the Fall, Winter, and Holiday 2023 Collection will be live Monday, September 11th at 8am ET*
I don't think I could find words to properly tell you how much I LOVE these new pocket pals! I'm a mom and have a son in elementary school. I'm planning on using these new stamps and dies to make cards for teachers and staff as well as little notes for my son's lunchbox. It's so EASY and FUN to create simple, interactive cards! Let's get started!
I set the images aside and started working on the background for my scene. I cut a circle from a piece of white cardstock and blended a sky on one side with Marina Madness Hybrid Ink and grass on the other side with Four Leaf Hybrid Ink. I die cut the largest die from the Delicate Stitches Scalloped Circle Dies and layered it on top of the ink blended circle. I took a piece of yellow cardstock and darkened the edges with Dan-D-Lion Hybrid Ink and added the circle towards the top center of the card.
I adhered some of my critters so that they would be peeking out of the windows of the school bus. I added foam tape behind the bus - careful not to add adhesive behind the door and added it near the center of the circle. I finished off the card by adding the bear and the sentiment to the scene. That's it! Come back throughout the weekend to see more peeks of the new Fall, Winter, and Holiday 2023 Collection!
It's Lynnea! Creating a fall-themed shaker card with stamp layering and die-cutting has never been easier - or cuter! Join me as I take you through my process for creating this easy shaker card!
Let's start with an A2 piece of kraft cardstock. I grabbed the Grateful for You 4x6 Stamps and used various shades of yellow, orange, red, and green LDRS Creative Hybrid Inks to stamp the solid maple and oak leaves all over the panel. I added the acorns with two shades of brown LDRS Creative Hybrid Inks wherever there was empty space in my background. You could leave the background as is, but I decided to add the detail layer for the leaves and acorns. I used Raven Hybrid Ink for the outlines. I wasn't careful about lining the outline up perfectly. Instead, I decided to offset it just a bit. Some gold watercolor spatters finish the background.
I die cut white cardstock using the largest oval from the Delicate Stitches Delicate Oval Dies to use as my shaker frame. I added a piece of acetate to the back and then added double thick foam tape around the back of the frame. I filled it up with a gold, white, and brown shaker mix and added it to the front of my stamped panel. I die cut a sentiment from the All Occasions Sentiment Dies and thought that would finish off my card ... but it was missing something.
In the end - I decided my card needed a little dose of something cute! I used LDRS Creative Hybrid Inks to stamp the squirrel from the Grateful for You 4x6 Stamps, trimmed it out with scissors, and added the image to the front of my card. That's it! Easy peasy and super cute!
It's time to get down on the farm with a Barnyard Friends easel card! Easel cards are such a fun and EASY way to create an interactive card. Watch my quick video tutorial on the LDRS Creative YouTube Channel!
I used Alloy Hybrid Ink to stamp the Old Brick Wall 6x6 Stamp onto a standard landscape A2 card and then blended a bit of the same ink around the edges for extra definition. Now let's make this standard card into a fun fold card. All we need is one extra score. I opened the card and scored just the front panel in half at 2 1/8". Now it forms an easel! I stamped a sentiment from the Down on the Farm 4x6 Stamps with Raven Hybrid Ink and trimmed it into a strip and added it to the inside of the card with foam tape. That provides a ledge for the easel to catch so that it stands up and displays easily.
I added the oval scene to the front of my card - being careful to only add foam tape on the bottom half of the oval and adhering it below the score line. If you add your tape or glue above the score line the scene will make it so that you can't fold the card in half, so be careful! That's it! See you again soon!
Are you ready for the cutest scene you've ever laid eyes on?! I used the LDRS Creative Soda Shop and Greasers Pocket Pals Stamps and Dies and made an adorable interactive card!
I stamped the main image from the Soda Shop 4x6 Stamps as well as a bunch of coordinating images from the Greasers 4x6 Stamps and colored them with my markers. I love to color Pocket Pals images because they don't require much blending. The images are small and great for beginners! Even the larger soda shop building was easy to color!
I used the Soda Shop Coordinating Dies and the Greasers Coordinating Dies to cut out the images. Remember that the Soda Shop Dies not only cut out the soda shop building, but they make an interactive piece! The doors and windows will open!
I used hybrid inks to blend a sidewalk as well as a blue sky and added my images to my card with foam tape. I made sure to put some of the images behind the windows and doors of the interactive building. I added a sentiment and that's it!
Hey, there! I'm sharing the EASIEST way to create a shaped card with any die in your stash on the LDRS Creative YouTube Channel. It's super quick and a fun way to send a little surprise!
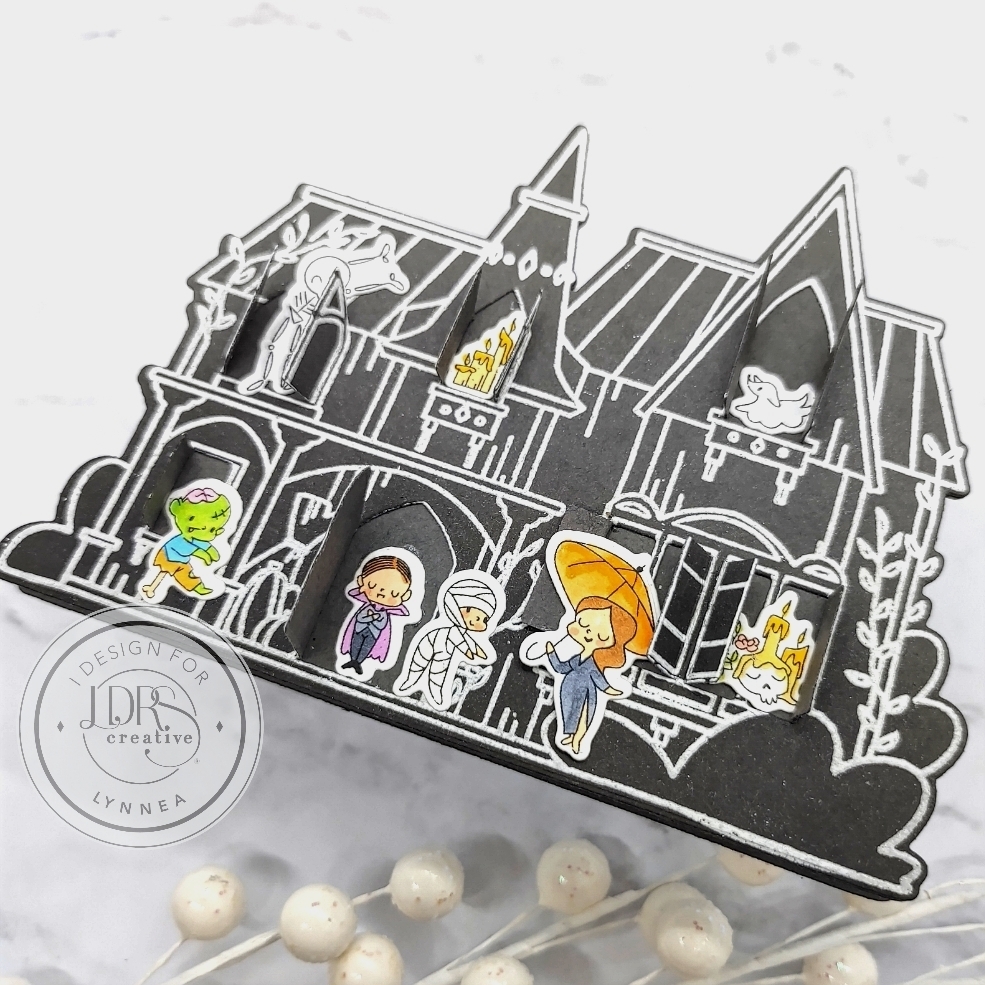
There are multiple ways to make a shaped card, but I'm sharing what I think is the easiest way. I started by stamping the main image from the Haunted Mansion Pocket Pals 4x6 Stamps with Watermark Embossing ink and embossing it with white powder. You could stamp onto white cardstock and color the house, but I wanted to keep the color focus on my little peek-a-boo images. Once my image was embossed I blended some Raven Hybrid Ink onto the bottom portion of my image for a bit of shading and used a microfiber cloth to buff the excess ink off the embossing powder.
I lined up the Haunted Mansion Pocket Pals Coordinating Dies over the image and cut out the outline as well as the inner pieces to pop open the door and windows. While I had my dies out I cut two more mansion outlines (without using the inner dies) and set them aside. I stamped and colored a bunch of images from the Graveyard Ghouls Pocket Pals 4x6 Stamps and cut them out with the Graveyard Ghouls Coordinating Dies. I glued my heat embossed image to one of the extra mansion pieces and started placing and adhering my images.
Now it's time to make the shaped card! I took the other extra mansion die-cut and added a score line below the top peaks of the mansion, added adhesive above the score line, and glued my heat embossed mansion to the background piece. THAT'S IT! Seriously! It couldn't be easier! If you use this method you can make a shaped card from any die in your stash!
I hope you enjoyed this fun tutorial! See you soon!
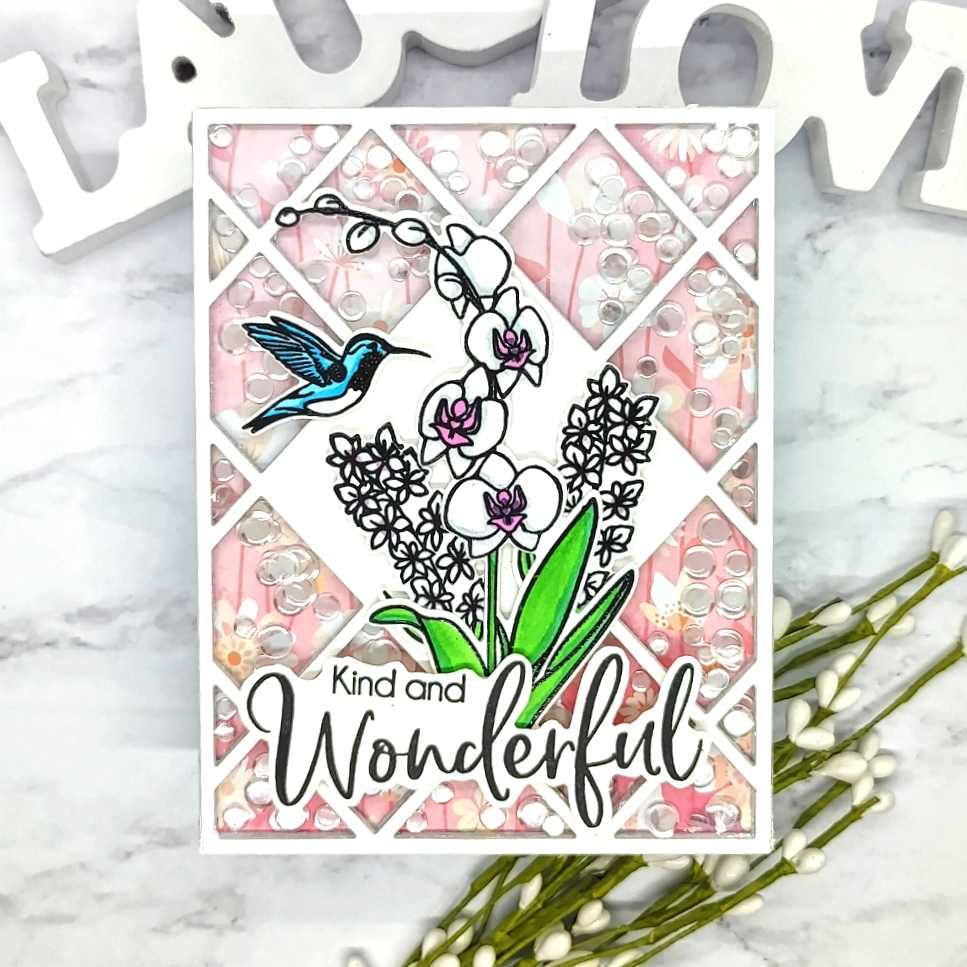
Let's start with the shaker! Each of those diamond "wells" hold sequins to make sure that sequins can be seen all over the card. Trust me - it's easier to do than it sounds! I have a handy trick! I started by using the Diamonds A2 Coverplate to cut 6 pieces of heavy weight white cardstock. I used liquid adhesive and glued all but one of the die-cut panels together to create one thick piece similar to a chipboard background. I added a piece of acetate on top of the panels and glued my remaining diamonds die-cut piece on top. I flipped the piece over and added confetti sequins to each of the "wells". Now I need something to seal up my shaker. You could use anything - colored cardstock, your card base, or patterned paper. I chose one of the patterns from the One Fine Day 6x6 Paper Pack, cut it to size, and adhered it to the back of my shaker panel. Now I have confetti floating around each of those diamond shapes instead of falling all the way to the bottom!
I used Raven Hybrid Ink to stamp the hummingbird, large orchid, smaller flowers, as well as a sentiment from the Orchid Stamp Set. I colored the images with alcohol markers and cut them out with the Orchid Coordinating Dies and added everything to the front of my shaker. That's it! So fun and so easy!
This card has something unexpected - you can see through those lovely wildflowers! It's such an easy trick to add to a simple card!
I like to make cards that are simple and easy to make, but add something fun! Sometimes that's a bit of shimmer, a pop of color, or a die-cutting trick. Watch my video to see how easy it is to add a see-through element to your card!
I chose a bold rainbow pattern from the One Fine Day 6x6 Paper Pack and added it to a standard A2 card base. I used the Lovely Wildflower Cluster Die to cut through the front of my card leaving a floral shaped hole in my card. I added a piece of acetate to the inside of my card to form a 'bridge' and added the bottom piece of my card to the acetate. I cut multiple pieces of white cardstock with the Lovely Wildflower Cluster Die and stacked them between the two patterned paper pieces for dimension. I have tricks in my video for making the inside of the card look pretty and finished!
I wanted the focus of my card to be on the see-through element, so I reached for my favorite simple sentiment set - the Everyday Sayings Stamp Set. I stamped my sentiment with Raven Hybrid Ink and cut it out with the Everyday Sayings Coordinating Dies and cut an additional shadow as well. I popped them up on my card and that's it! I have a simple card with something special!
An easy way to step up a simple card is to create a full panel shaker! I used a bright patterned paper, cute Pink & Main images, and some sequins to make this flat shaker!
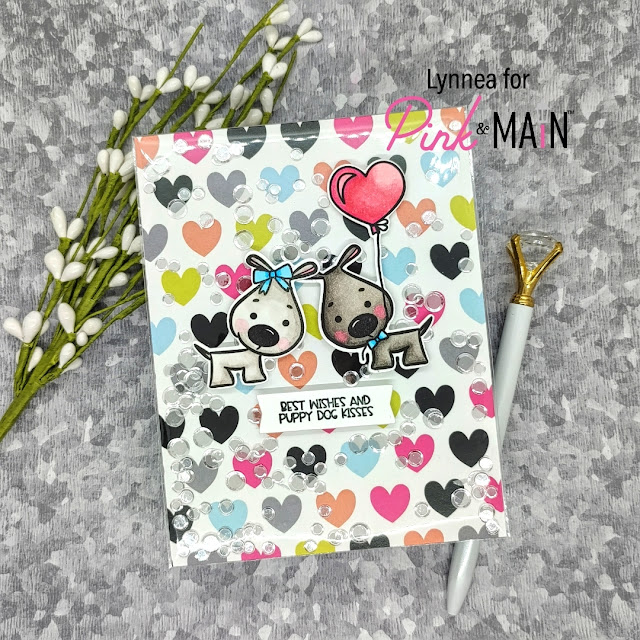
It's so easy to create a full panel shaker card! I used a stamp storage pocket, but you could use cellophane or thin plastic packaging. I trimmed a piece of patterned paper from the Best Friends 6x6 Paper Pack to 4.25 x 5.5 inches and slid it into the stamp storage pocket. It fits perfectly when I put it in sideways. I trimmed off the excess plastic from the top - leaving about an inch at the top. I used some clear flat confetti pieces from my stash and added them into the pocket then folded over the extra inch of plastic and adhered it to the back of the patterned paper. I added the shaker pocket to the front of an A2 card and just like that I have a full panel shaker card!
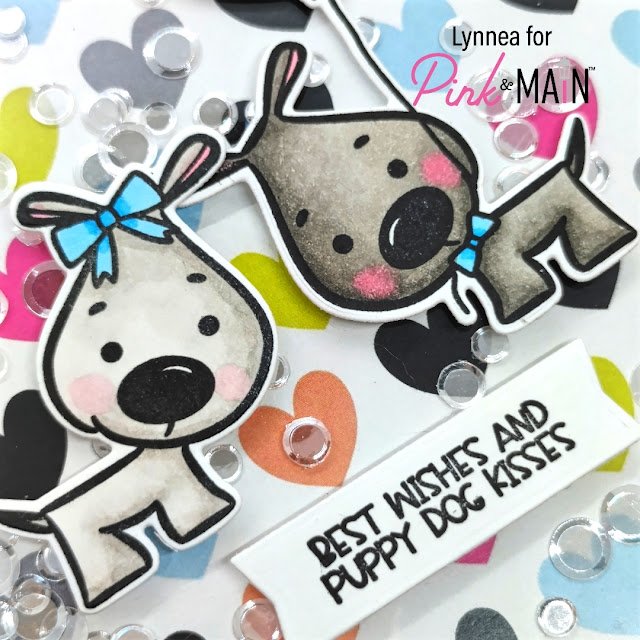
Once the shaker panel is done all you need to do is add an image or two on top to complete the card! I used the Puppy Love Stamp and Die of the Month for December and colored up two adorable puppies with Copic Markers and cut them out with the coordinating dies. I also stamped a sentiment and used a die from the Large Sentiment Strip Die Set to cut it out. I think this was my most used die set of the year!
The shaker panel is flat, so you could adhere the images onto the card with liquid adhesive and keep this card completely flat, but I've never had any problems with cards going through the mail with a bit of dimension, so I decided to pop them up on foam tape. Thanks so much for joining me!
The Thanksgiving Holiday weekend is almost here and Miss Ink Stamps is celebrating with a winter release! I'm sneaking the Ice Day Stamp Set with this fun slider card!
There will be FOUR new stamp sets released on Small Business Saturday - November 27th! They are perfect for all of your wintery cards!
As soon as I saw the little penguin on his belly in the Ice Day Stamp Set (releasing on the 27th!) I knew that I wanted to make a slider card with him sliding down the iceburg! I stamped three of the penguins, some Santa hats, and the iceburg and colored them with Copics and cut them out with scissors.
Once I had my images and background ready to go I created a simple slider card. Check out my video above to see how the interactive portion of the card came together!
I hope you've enjoyed this sneak peek of the Ice Day Stamp Set! This stamp set and the rest of the release will be available on Small Business Saturday - November 27th! Keep your eye on the Miss Ink social media channels for more sneaks and special sales announcements!
Welcome to the Holiday Lights Hop! Today, I’m sharing a fun, interactive card that really lights up! Don’t worry, it wasn’t hard to make. I’ll show you how. And then, when you hop along with us, you’ll see more beautiful light-up cards, all featuring lights from Pear Blossom Press. Get ready for lots of inspiration, and be sure to comment on my video as well as the rest as you hop, for your chance to win a $50 store credit! Your next stop is Alberto Gava!
I can't get over how easy it is to make a light up card with Pear Blossom Press EZ Lights! You'll see how quickly this interactive card came together in my video above.
This slimline scene is the cutest! All the winter and Christmas vibes are in one place! I pulled out a bunch of Lawn Fawn Stamp Sets and combined them on this card. They're all listed and linked in my video description as well as at the end of this blog post.
There are a lot of things I could have chosen to light up on this card - the windows, the car headlight, etc ... but my husband loves street lights, so I decided to add three streetlights to my winter scene and have them be my light up elements.
I added an ink blended background with Distress Oxide Inks and this merry and bright light up scene is everything you could ever wish for! This project is part of a hop, so be sure to hop along to the next stop - the amazing Alberto Gava!
Products Used
Pear Blossom Press EZ Lights - https://pearblossompress.com/ez-light/?wpam_id=6
Lawn Fawn Stitched Hillside Borders Dies - https://shrsl.com/1gk94
Lawn Fawn Winter Village Stamp Set - https://shrsl.com/38tyv
Lawn Fawn Winter Village Die Set - https://shrsl.com/38tyw
Lawn Fawn Tiny Winter Friends Stamp Set - https://shrsl.com/38tyy
Lawn Fawn Tiny Winter Friends Die Set - https://shrsl.com/38tyz
Lawn Fawn Tiny Christmas Stamp Set - https://shrsl.com/38tz1
Lawn Fawn Tiny Christmas Die Set - https://shrsl.com/38tz2
Lawn Fawn Home for the Holidays Stamp Set - https://shrsl.com/38tz5
Lawn Fawn Home for the Holidays Die Set - https://www.lawnfawn.com/products/home-for-the-holidays-lawn-cuts
Lawn Fawn Merry Mice Stamp Set - https://shrsl.com/38tz9
Pink & Main Stitched Slimline Die Set - https://shrsl.com/2lb60
Pink & Main Layered Circles Die Set - https://shrsl.com/2cy4u
Prize Ribbon Distress Oxide Ink Pad - https://shrsl.com/36hnn
Villainous Potion Distress Oxide Ink Pad - https://shrsl.com/38tyt
Black Soot Distress Oxide Ink Pad - https://shrsl.com/38tys
iCraft Ultra Bond Liquid Adhesive Pen - https://shrsl.com/2ze45
iCraft 1/8" White Jumbo Foam Tape Roll - https://shrsl.com/2ze4j
It's beginning to look a lot like Christmas in my craft room! I created a glittery snow globe scene using Pink & Main stamps and dies!
This card is really quite simple to make, but I love how there are so many little details that bring the card to life! Let's start with that snow globe shaker. I stamped the globe from the Empty Snow Globe Stamp Set and the adorable wintery scene from the Winter Snow Globe Scenes Stamp Set and colored them with Copic Markers. The coordinating dies for the Empty Snow Globe Stamp Set will cut out around the image, but there is a second die that will cut out the center of the snow globe allowing you to create a shaker! And the Winter Snow Globe Scenes Die Set perfectly cuts out that scene so that you can put that right at the bottom of your snow globe.
I added acetate to the back of my snow globe and created a simple shaker well using small strips of foam tape and added some Ice Rink Super Fine Glitter along with some clear confetti and sealed up the shaker with a piece of patterned paper from the Homespun Christmas 6x6 Patterned Paper Pack. I used the outer die from the Empty Snow Globe Die Set so that it would perfectly line up with my shaker. I love how the glitter makes everything look wintery and shimmery!
I wanted to keep the focus on the snow globe shaker, but still have a cute background, so I picked some patterns from the Homespun Christmas 6x6 Paper Pack and cut them with the Stitched Rectangles 1 Die Set. I used the largest for the green plaid and used the third largest die to cut the red and cream colors. I cut the cream paper with my paper trimmer and added it to the bottom of the red paper to create a grounding element for my snow globe. And that's it! Thanks so much for joining me!
The September release from Pink & Main is here and it includes the FABULOUS Homespun Christmas Kit! I made a 5 cards 1 kit video to show off the amazingness of this kit!
I'm in love with the Homespun Christmas Kit! Perfect for both traditional and non traditional Holiday projects. This kit is not part of the regular Crafty Courtyard subscription and WILL need to be purchased separately. Grab it up quick! There are limited quantities and it's a fabulous kit! There is so much packed into this kit - a large 6x8 stamp set WITH coordinating dies, a full patterned paper pack as well as a pack of foiled cardstock, a stencil, and MORE!
I went classic and simple with my first card. I used the Pink & Main Stitched Rectangles 1 Die Set to cut out various patterned papers from the Homespun Christmas Kit and stacked them together. I added a bit of baker's twine from my stash for a small detailed accent and added the mason jar of poinsettias in the center of my card. This image is gorgeous! You can color the poinsettias traditionally as I have or color them with teals for a non traditional look.
I can't create with a card kit without creating a shaker card! I decided to mix traditional and non traditional colors on my card. I used the Reverse Scalloped Rectangle Dies to cut out a frame from a piece of patterned paper and used acetate and foam tape to create a shaker well. I filled it with sequins from the kit and backed it with a cream colored paper. I colored the bells and stamped a sentiment and added them to the center of the shaker.
My third project is a tag - I thought it would be cute to have something a bit different! I used the stencil included in the Homespun Christmas Kit and stenciled some light brown ink onto white cardstock and used the Fancy Tag Die Set to cut my tag shapes. I accented with some of the gold foil cardstock in the kit and added a sentiment strip and the candy cane image.
I liked the stencil so much that I decided to use it again and stretch it across a slimline card! I ink blended with a light blue ink and then shifted the stencil to the right and blended ink over the rest of the panel. I used the frame die from the Blessings Slimline Die Set to create a nice scalloped edge and added the lantern and a sentiment.
I went with non traditional colors for my last card - lime green and pink! And I colored the stocking with some aqua markers, too! I used the Concave Rectangles Die Set and hung the die-cut piece off the edge of the card for some interest. The patterned papers in the Homespun Christmas Kit are stunning!
I am over the moon in love with the Homespun Christmas Kit! Remember that it's a limited edition kit and not part of the regular Crafty Courtyard subscription, so hurry over to the Pink & Main Store and grab yours!
Here's an easy way to step up a shaker card! Using your coordinating dies to create a set back shaker is easy and fun and I have a tutorial on YouTube!
Blog Post - https://www.lynneahollendonner.com/2021/09/ldrs-creative-die-cut-set-back-shaker.html
Potted Poinsettia Stamp Set - https://shrsl.com/35n78
Potted Poinsettia Die Set - https://shrsl.com/35n79
Peace & Joy 6x6 Paper Pack - https://shrsl.com/35n7a

.jpg)
.jpg)


.jpg)