


Let’s “Perk Up and Start the New Year” with our January Flavor of the Month kit. I have a little story to tell…I never drank coffee until I retired about 6 years ago from teaching school…cause who wants a cold cup of what is supposed to be hot coffee? So now…with my wonderful flavored creamer I enjoy a cup of coffee every morning and especially love drinking my coffee while watching crafty videos on YouTube…so sit back and take a look at our Coffee themed FOTM blog hop this month. If you have not already snagged your kit please head over to the Flavor of the Month page and scroll down to choose the level of kit you would like! Make sure you head to the website to check out the rafflecopter as well to enter to win a prize!


As always you can find the sketches and product list in the Scrapping for Less Facebook group! Let's jump in and see what I made!

Let's start with collection one! i used the third sketch and followed it almost exactly! I don't use sketches often and sometimes I love them just the way they are! I used a bunch of the Scrapping for Less patterned papers - I just love the blues and browns! Perfect for cards for guys! I glued two of the empherma pieces together to be my focal point and added them to the card with foam squares!

This card features goodies from the second collection and I used the second sketch as well! These are some of my favorite patterned papers in the whole kit! I love the reverse sides of these (you can see all of them in my unboxing video below). The pink, yellow, blue, and brown color combination is too adorable! I stamped the image from the Newton's Nook stamp set onto watercolor paper and colored it with my Staedtler felt tipped pens. Can you believe I don't own any oval dies! Gasp! I will have to buy some! Instead I trimmed the panel into a rectangle and rounded the edges!

This card is from the third collection and the fourth sketch. When I looked at the sketch I immediately thought of a gate fold card - so I tweaked the sketch a bit and made this cute card with a fun opening! I used some stitched dies to cut the polka dotted patterned paper and scored them about a half inch from the edge and adhered the flap to the back of a piece of cardstock. Watch the video below for the full tutorial because it's kind of hard to explain! I adhered a regular top folding 4 1/4 inch card to the inside. I stamped a sentiment and trimmed it into a strip. When I adhered the coffee stickers I only added adhesive to the left side and the sentiment on the right. When this card opens the flaps open left and right and then the green card on the inside opens at the top!
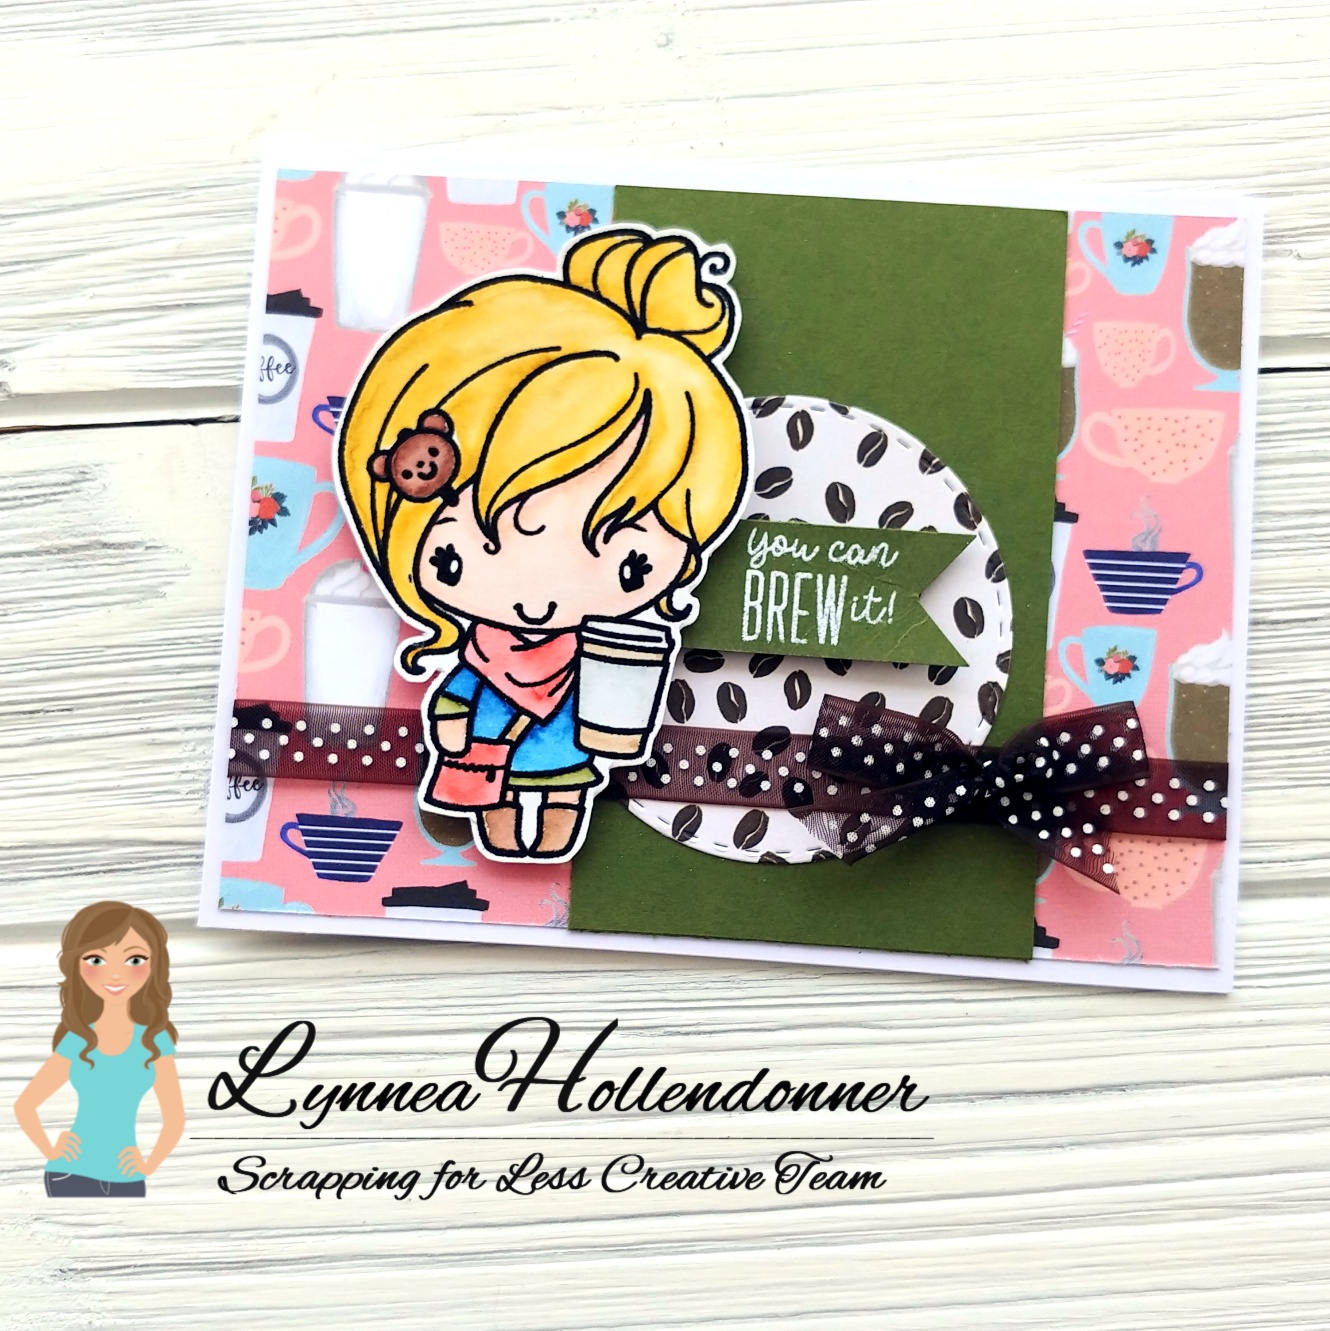
This cute little image from the Brew It Anya stamp set is from the fourth collection and I used the first sketch to build my card. Look how cute she is! I used my Staedtler felt tipped pens to color her, but I used Bristol Smooth cardstock this time and I think you'll see me using that more and more! I love how smooth and bright white the paper is! All of the patterned papers and such are from the fourth collection except the ribbon - I stole that from the first collection!

Here's a bonus card for you! The Banana Split level kit is worth the little extra! You'll get a mini ink pad, an extra stamp set, an embossing folder, and an oversized coffee cup chipboard piece! I wanted to make it so that the chipboard piece could be used over and over again - so I covered it with some Peacock Feathers Distress Oxide Ink, positioned it over a piece of cardstock and ran it through my Big Shot - but I removed the bottom cutting plate and only used the top one. My sandwich was as follows - the Big Shot base, my cardstock with the chipboard piece on top, and a single cutting plate on top of that! This creates a letterpress look with the ink pressed into the cardstock. And you can do this over and over again! I stamped a sentiment from the Your Next Stamp stamp set in the Banana Split level and popped it up with foam tape. Easy peasy! And you could create so many of these!
Check out my videos below! The first is the unboxing video and the second is the process video for each of the five cards you've seen here!

Love this kit and all the awesome cards you’ve made!
ReplyDeleteWOW!! Brilliant idea for the giant coffee cup!! I LOVE IT!!! I also enjoyed all of your other cards too!
ReplyDeleteAll of your projects are fabulous! Love that gatefold one with the sticker and Let's do coffee.
ReplyDeleteYour cards are all so adorable! Great idea using the wood cup to stamp! Inspiring!!
ReplyDeleteAwesome gate fold, and LOVE the idea of using the wood as a stamp!! CLEVER!
ReplyDeleteThese papers are so pretty and you've used them and the other products so creatively. Thanks for the inspiration.
ReplyDeleteI watched your videos last night. As always - absolutely lovely cards. I would have never thought of using the wooden cup in the Banana Split pack as a stamp. Brilliant!!!!
ReplyDelete