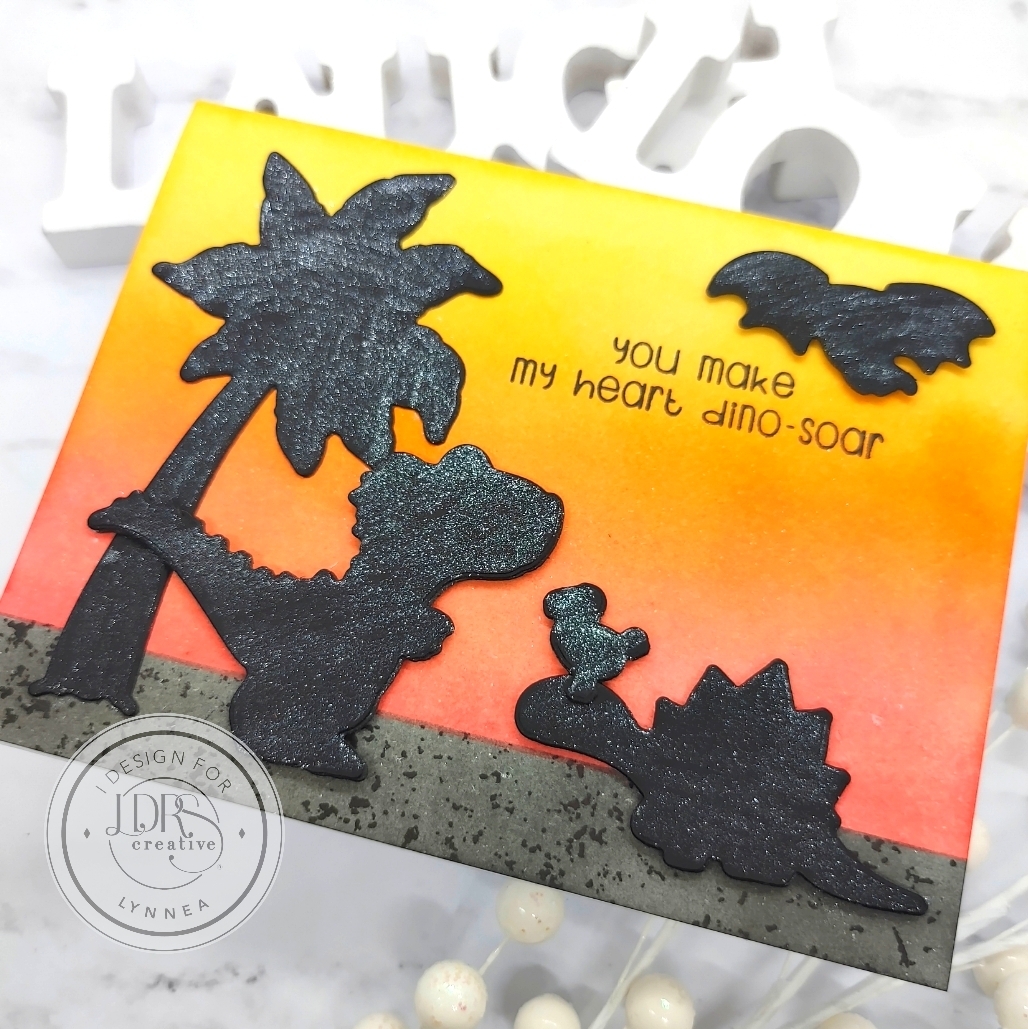
I have a fabulous technique to share with you if you're short on time and can't color a bunch of images for your card - just use your coordinating dies to create a silhouette effect! Watch the full tutorial on the LDRS Creative YouTube Channel!
I used the
Hawaiian Vacation Coordinating Dies and cut the palm tree from black cardstock and cut the T-Rex, Stegosaurus, and Dodo Bird from black cardstock with the
Baby Dino Coordinating Dies. It is that simple to create a silhouette effect! No coloring, no stamping ... just die cutting! I added the images to my card with foam tape and stamped a sentiment from the
Baby Dino Stamp Set near the top right.
I covered my silhouette images with a healthy coating of clear glitter ... because everything looks better with glitter! And that's it! Thanks for joining me!


No comments:
Post a Comment