Saturday, January 30, 2021

LDRS Creative | 5 Cards 1 Kit Dream Big Exclusive Craft Kit

Hello, hello! It's Lynnea and I have 5 cards to share with you that I made with the latest craft kit from LDRS Creative! There's lots to share, so let's jump right in! 


The Dream Big Exclusive Craft Kit is FULL of amazing stamps, dies, papers, and more! My video gives a detailed walk through of everything in the kit - and I used it all in the video, too! I made five cards and I have lots left over to make even more adorable out of this world cards! 


I tried my best to really highlight the amazing contents of the Dream Big Craft Kit, but I did pull in some of my LDRS Creative staple items. You'll see me using the A2 Stitched Layered Card Topper Dies throughout my projects. I love them and they make adding simple details so easy! Especially when paired with the GORGEOUSLY STUNNING patterned papers in the kit. Seriously ... I can't say enough good things about the papers in this kit! I used a gorgeous scene patterned paper along with some colored cardstock from the kit and added my adorable images on top. You can't get any better than that! 


I used another patterned paper for my second card - I just couldn't resist this moon landing scene! I used the outer die from the Slim Line Basket Weave Pocket Die Set and cut down my patterned paper and added it onto a slim line pocket card base. Some cute images and a matching sentiment are all I needed to complete this card! 


You guys ... !!! If there is one selling point to this kit it's the stencil! The kit comes with a set of 2 layering stencils that will create this GORGEOUS scene! It's just beautiful. I kept the card simple and allowed the stencil to be the star of the show. I used a handful of LDRS Creative Hybrid Inks to color my scene and my jaw hit the floor when I removed the stencil! I didn't want to cover up too much of the scene, so I used the previously released Love Stack Stamp Set and Sentiment Stack Coordinating Die as well as some bubble embellishments to finish the card. 


I couldn't just NOT use this pretty pink and peach galaxy patterned paper! It's one of my favorites!! I decided to create a super simple scene using the patterned paper and some die-cuts. I used the Lil' Pink Houses Border Die and the Starry Sky Border Add-On Die and some LDRS Creative Hybrid Ink to add some quick color to the die-cut pieces. The Starry Sky Border Add-On Die is a definite MUST! It measures just over 6 inches, so you can use it on both horizontal and vertical style cards! 


I decided to go out with a bang and create a fun shaker for my last card! I used the A2 Stitched Layered Card Toppers Die Set to create a frame from cardstock in the kit. I cut down a piece of patterned paper and adhered my little monkey astronauts and a bunch of sequins. Boom! An easy shaker scene! 


The Dream Big Exclusive Craft Kit is available for pre-order NOW in the LDRS Creative online store! This kit is limited edition and exclusive to the LDRS Creative shop, so you won't be able to find it anywhere else and once it's gone, it's gone! Snag yours now! I'll be back soon with more Dream Big Craft Kit inspiration! 

Friday, January 29, 2021

LDRS Creative January Feature Day 2 | Easy Valentine's Day Scene

I hope you're here for more wintery LDRS Creative inspiration! You are?! I made an easy Valentine's Day Scene with a cover die, some patterned paper, and some cute images! 


This card is so simple and so cute! I die cut a piece of patterned paper from the MacKenzie 6x6 Paper Pack with the Sunburst Rectangle Cover Die and added adorable images from the City Sidewalks and 34th Street Stamp Sets on top. I wanted a cute Valentine's Day sentiment, so I stamped the Love Stack Sentiment Stamp with Kiss Me Red Hybrid Ink and cut it with the coordinating Sentiment Stack Die Set and added it below my scene. 


This card is SO easy! You could make a bunch of them and have a handful of cutie patootie Valentines on hand! 

Thursday, January 28, 2021

LDRS Creative January Feature Day 1 | Winter Slim Line Scene

It's time to show off some wintery projects using LDRS Creative goodies! I made a fun and sparkly slim line card to kick off the January features! 


This card is full of sparkle! And it was so easy to make! I used some of my favorite wintery LDRS Creative products. I knew that I wanted to incorporate the Falling Snow Die - it's just stunning! I layered it over some shimmery black cardstock and created hills with the Over the Hills Die. This die is incredibly versatile - rolling hills for the Spring and Summer and and snow banks for Winter! 


Can we just talk about the cute little critters?! They're from the Snow Much Fun Stamp Set and they are ADORABLE!! Oh my goodness I can't get over the cuteness! I colored them with pinks and reds for Valentine's Day and added a black border with the Slim Line Scallop Die Set


I will be back tomorrow with another wintery LDRS Creative Features card and video! I'll see you then! 

Monday, January 25, 2021

Pink & Main | Inked Embossing Folder Valentine

Rawr! I have an inked embossing folder technique using Pink & Main products to share with you today! This is an oldie, but a goodie technique that I love for quick backgrounds!


I like to start my cards by creating a fun background, so let's dive in! I grabbed the Wide Stripes Embossing Folder and opened it up. You'll see there are two sides - one has skinny raised stripes, one has large raised stripes. The raised portions of the embossing folder with press into the cardstock creating an impression and the depressed areas of the embossing folder will actually become the raised portions. I chose to work with the larger raised stripes. I used three colors of water reactive inks and smooshed my ink pads directly onto the raised portions of the embossing folder and spritzed it with water. I carefully placed a piece of thick watercolor cardstock into the embossing folder and ran it through my embossing machine following the instructions for embossing. 


This technique presses the ink into the cardstock and creates a fun colored and textured background! You could definitely switch this around and ink up the thinner stripes of the Wide Stripes Embossing Folder and you would have thin colored stripes pressed into the cardstock with thick white raised stripes. Either way gives you a cool background! I wanted to bring a little more fun to my background so I used black ink to stamp the hearts border from the Rawr Stamp Set into each of the inked depressed stripes. 


Now it's time for the cute images! I stamped a couple of dinos and the speech bubble from the Rawr Stamp Set and colored them with Copic Markers then cut them out with the coordinating Rawr Die Set. I LOVE that the Rawr Die Set also cuts out the tiny sentiment! 


I added the images and sentiment with foam tape and covered the balloons, speech bubble, and heart with glitter and Glossy Accents for shimmer and shine. I hope you'll try this fun technique! 

Sunday, January 24, 2021

i-crafter | Koi Pillow Box with Colorful Sprays

I'm sharing an easy way to quickly add color to the Koi Pillow Box Die from i-crafter. I like to add little candies or gifts inside of the pillow box to give to a friend! 


There are so many ways to bring color and pattern to the Koi Pillow Box - patterned papers, colored cardstock, etc. I went with Distress Oxide Sprays! I cut all of the pieces from the Koi Pillow Box Die Set from heavy white cardstock and sprayed them with a bunch of colors! I used blue and purple on the body, green and yellow on the fins, and then pink on the gills for a splash of color. I love how the sprays give added texture! 


The Koi Pillow Box will perfectly fit small candy bars, a gift card, or a pack of sequins! My son loves sequins and I thought this little fishy would be a great way to give him a little gift! There are little holes in the top of the Koi Pillow Box so that you can thread a piece of ribbon or twine through, but I didn't want that to hinder him, so I decided to leave it off. This little guy was so easy to put together! It would be great for teacher gifts! Thanks for stopping by - see you soon! 

Saturday, January 23, 2021

InkOn3 | Atelier Ink Chevron Valentine's Day Card

Sometimes I focus so much on fun techniques that I forget the amazingness of simple solid stamping! I love the smoothness of the InkOn3 Atelier Inks! I used the two new colors to stamp a pretty chevron background. 


Let's start with that pretty, colorful background! The InkOn3 Atelier Inks are great for all kinds of stamping - detail, sentiments, etc - but I really love to show them off with solid stamping! They are gorgeous and smooth from the first impression! I used the Pinkfresh Studio Nested Chevron Background Stamp to build my background. I alternated the chevrons between the new Sweet Petunia Pink and Trinity Teal Atelier Inks. I just LOVE this color combo! 


I used Blackout Hybrid Detail Ink to stamp a cute little gnome image as well as a sentiment from the Whimsy Stamps Gnome One Like You Stamp Set and colored him with Copic Markers. I covered the image with some Liquid Pixie Dust for all kinds of shimmer! I keep a little bit in a Small Fine Tip Water Brush Pen so that I can easily paint shimmer onto my colored images. 


I trimmed down my background panel to be slightly smaller than my card base and popped it up with foam and added my cute colored image in the center of the card. That's it! Cute and simple! I love that multicolored stamped background! 

Friday, January 22, 2021

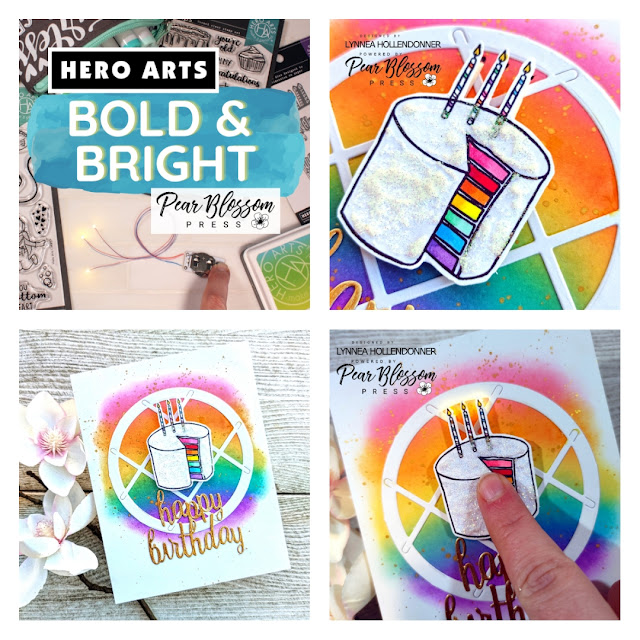
Pear Blossom Press and Hero Arts Collaboration Hop


Welcome to the Bold & Bright Hop with Hero Arts and Pear Blossom Press! You’re going to see some of the coolest light-up cards, all featuring your favorite stamps and dies from Hero Arts. Get ready for lots of inspiration, and be sure to comment as you hop along, for your chance to win a $50 store credit!


I really love the card I made for this hop - is it okay to say that? Haha! It's bright and vibrant and glittery! And it lights up! Watch my video above for a full tutorial! 


I started with the cake in my process video, so let's start there! I stamped the cake and candles from the Hero Arts Time for Cake Stamp Set and colored the rainbow center with Copic Markers. I didn't color the outside of the cake at all - I have something special in mind! I scooped out a small bit of Iridescent Glitz Glitter Gel and spread it around the cake with a palette knife. Now I have a chunky, glittery, iced cake! It took almost no time to dry, too!


I wanted to create a special background, so I used the Hero Arts Porthole Fancy Die, but I cut off the outer circle which made it look like a porthole. Now it just looks like a circular grid backdrop. I used i-Brush Blending Brushes to blend on a rainbow of Distress Oxide Inks and added some gold watercolor spatters on top. I adhered the Porthole Fancy Die-Cut piece on top. 


Before I go any further with the front of the card - let's light it up! I pierced three small holes in my background where the candles from my cake would lay. I marked the placement of the lights on my card base as well as where I need to place my button. It's is SO easy to assemble the EZ Lights! The whole process took a little more than 3 minutes! You can't beat that! A real game changer is the double thick foam tape carried by Pear Blossom Press! It makes assembling any kind of interactive card a breeze. I highly recommend that you grab a roll! 


Now let's finish up the front of the card. I wanted a die cut sentiment to go on my card so I cut apart the Hero Arts Happy Birthday Cake Fancy Die! I die cut it from gold cardstock and trimmed the little tabs at the beginning and end of the sentiments to make a stand alone die cut sentiment. 


Every good hop has prizes, right? So Hero Arts, and Pear Blossom Press are each giving away a $50 store credit! Comment on this post by January 29, 2021 to be entered to win. Winners will be posted on the Pear Blossom Press Blog on February 6, 2021.


Wednesday, January 20, 2021

Erin Lee Creative | January 2021 Release Blog Hop

Well, hello hello! Look what time it is! Erin Lee Creative is releasing a collection of new stamps, dies, a stencil, and other embellishment goodies today! We're kicking off this release with a blog hop, so be sure to comment on blog entries along the hop so you can be entered to win a $50 voucher to use in the Erin Lee Creative shop! There will be two winners chosen at random from the comments across all the blogs, so every comment is another entry! 


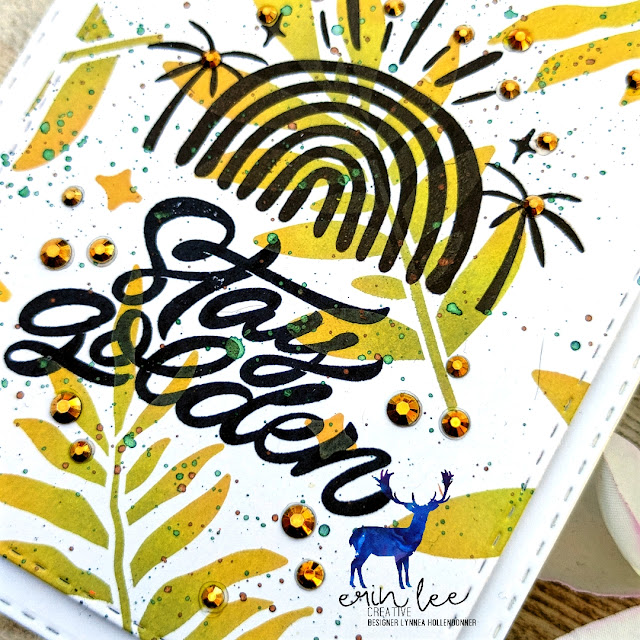
I placed the Sparkling Palms Stencil onto a piece of white cardstock and used two shades of green as well as a bit of yellow Distress Oxide Ink to create my background. I added some bronze and dark teal shimmer watercolor spatters on top for more texture. 


I stamped the rainbow and palm tree images from the Stay Golden Stamp Set and stamped the sentiment below the image. Watch my video above ... this was NOT how I envisioned this card turning out! But sometimes you need to roll with it! I die cut my panel with a stitched rectangle and added it onto a stitched white layer. To keep with the golden theme I added lots of gold gems all over my card. 


Now it's time for the hop! Remember that each comment is an entry to win a $50 shopping spree at Erin Lee Creative! Good luck! 

Simon Hurley create. | Simple Happy Mail Card

What's my favorite product line from Simon Hurley create.? I bet you're dying to know! It's his peel-apart background stamps! I love how you can use them together for a large background ( like on this card! ) or peel off individual elements and use them on their own! 


I can't think of a simpler background than this, but it's my favorite card that I have made in a while! The simplicity sings! I stamped the Happy Mail Peel-Apart Stamp Set onto a piece of Stark White Cardstock with black ink. That's it. Seriously! Background complete. Check! 


I mixed together two stamp sets for my images and sentiments. I stamped the box from the Cool Cats Stamp Set and thought the little kitten in the Dudettes Stamp Set would fit in the box perfectly! I have three cats at home and they are ALWAYS stealing boxes for themselves! 


I popped everything up on my background with foam tape and that finishes the card! You can make a BUNCH of these cute cards in a short amount of time and send them out to all of your kitty loving friends! 

Miss Ink Stamps | Alice Infinity Shaker Card

Unfortunately sometimes life calls for an encouragement card. Not everyone wants a happy rainbow when they're feeling down. The Miss Ink Stamps In the Dark Stamp Set is perfect when you just need to tell a friend that you're there for them. 


An infinity shaker card is so easy to make and adds a "how did they do that" bit of flair to a card! Check out the video above for tips on creating a multi colored inked background with the Alice Background Stamp as well as how to make a shaker card that goes edge to edge! I used some Champagne Stardust Sequins that really catch the light! 


This card is simple and elegant in all the right ways! I hope you snagged some tips in my video! I'll see you soon! 

LDRS Creative | Easter Sunflower Card

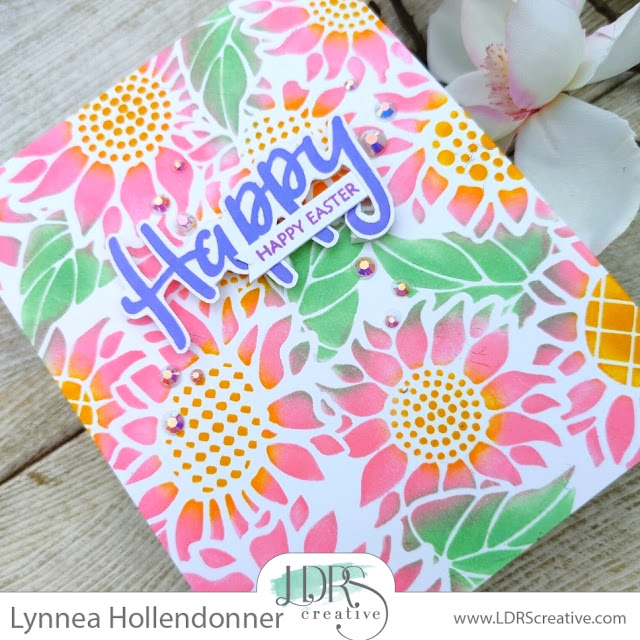
Hello and Happy Easter! Haha! It's never to early to get started on Spring cards ... especially when it's so cold outside that your little tosies are cold! I altered the Sunflower Stencil from LDRS Creative and made it into a bright and happy Easter background! 


The great thing about floral stencils is that you can change up the colors to suit the season. The Sunflower Stencil is perfect for making gorgeous fall sunflowers, or bright red summer flowers, or even pink Easter flowers! You could mask off the stencil for perfect flowers, but I didn't take the time because .... I'm a lazy crafter! I used fingertip blending brushes so that I could do my best to keep the ink where it was supposed to be, but I still had some overlap and that's okay! I used Pistachios-A-Plenty Hybrid Ink for the leaves, Soft Kisses Hybrid Ink for the flower petals, and Dan-D-Lion Hybrid Ink for the flower centers. 


I didn't want to cover up too much of the background, so I chose to use the sentiments in the Hydrangeas Stamp Set. The large "happy" is bold enough to be seen, but doesn't take over the card. I stamped "happy" with Mrs. Periwinkle Hybrid Ink and bubble cut around the sentiment. I stamped "Happy Easter" with La La Lavender Hybrid Ink and trimmed it into a sentiment strip and added both sentiments to the card with foam tape. 


I finished the card by embellishing with some pearly gems. I hope you're staying warm and thinking spring! See you soon! 

Tuesday, January 19, 2021

LDRS Creative | Easy Masking and Ink Blending

There are a few designs that I keep tucked away in the back of my mind when I'm crafting. I like to pull them out when I want a simple card with some flair! I used the adorable LDRS Creative Boardwalk Mice Stamp Set for this cutie card! 


I have a secret. I pulled out the Boardwalk Mice Stamp Set to play with because I have *never* inked it up! WHAT! Tell me I'm not the only one who hoards cute things! Yikes! I had to remedy the situation, so I used Raven Hybrid Ink to stamp two of the images from the Boardwalk Mice Stamp Set - the little carnival scene and the hot air balloon with the ADORABLE mice. I colored them with alcohol markers keeping the color combination light and spring-y! I used the coordinating Boardwalk Mice Die Set to cut out the images. I love how even the inside pieces of the ferris wheel are cut out! 


I masked off about the bottom 2/3 of my card front with a wide masking tape so that I could add some ink blending behind my "scene". I colored my images with pastel colored markers, so I thought I would do the same with my background. I reached for my Pistachios-A-Plenty Hybrid Ink Pad - a light minty ink that is just gorgeous. When I started blending the ink onto my background I realized that I hadn't cleaned off my ink blending brush from a previous project where I used Key Lime Pie Hybrid Ink. Doh! But you know what?! I LOVE how it turned out! I think that pop of a more vivid ink brings the card to life! I kept the ink concentrated towards my masking tape and blended out to white at the top of the card. I added some flicks of black paint for texture. 


I stamped a sentiment from the Boardwalk Mice Stamp Set with Raven Hybrid Ink in the center of my card right below the ink blending. I added the images on top with a bit of foam tape and that's it! I'll see you soon! 

Monday, January 18, 2021

Pink & Main | Little Cherubs Shaped Card

I love to mix colors and patterns! Here's a peek at the Pink & Main January release where I made an easy shaped card with lots of color! 


This card was so fun and easy to make and uses a bunch of new Pink & Main products! Let's start with the shaped card. I used the second largest die in the new Mod Stitched Rectangle Die Set to cut two pieces of heavy weight white cardstock. I scored one of the die cut pieces about 3/4" from the top to create a fold for my card. I used strong double sided adhesive to attach the second piece of cardstock to the scored piece creating a shaped top fold card. I was going to leave the background white for a light and airy card, but I decided to go full throttle into color! I placed the Roundabout Stencil over the cardstock and used an Ergonomic Blender Brush to add a peachy orange ink all over the front of the card. I LOVE the Ergonomic Blender Brush for adding ink to backgrounds! It's effortless! 


The new All Occasion Florals 6x6 Paper Pack has got to be my favorite of all time! I know I say that a lot, but seriously the colors and patterns have me all starry eyed! You'll want to buy extra of this one for sure! I used the Mod Stitched Rectangles Die Set to cut two patterns from the All Occasion Florals Paper Pack and adhered them on top of my shaped card. I stamped an image from the Little Cherubs Stamp Set, colored it with Copics, and cut it out with the coordinating Little Cherubs Die Set. I completed the card with a black stamped sentiment towards the bottom of the patterned paper. 


The January release from Pink & Main hits the shop in 2 days! I hope I'll see all of you in the Pink & Main shop on Wednesday, January 20th!